How to Make Candles with Ice
Learn how to make candles by pouring wax over ice in small milk cartons. This fun craft produces beautiful, textured candles. I grew up making
Learn how to make candles by pouring wax over ice in small milk cartons. This fun craft produces beautiful, textured candles. I grew up making

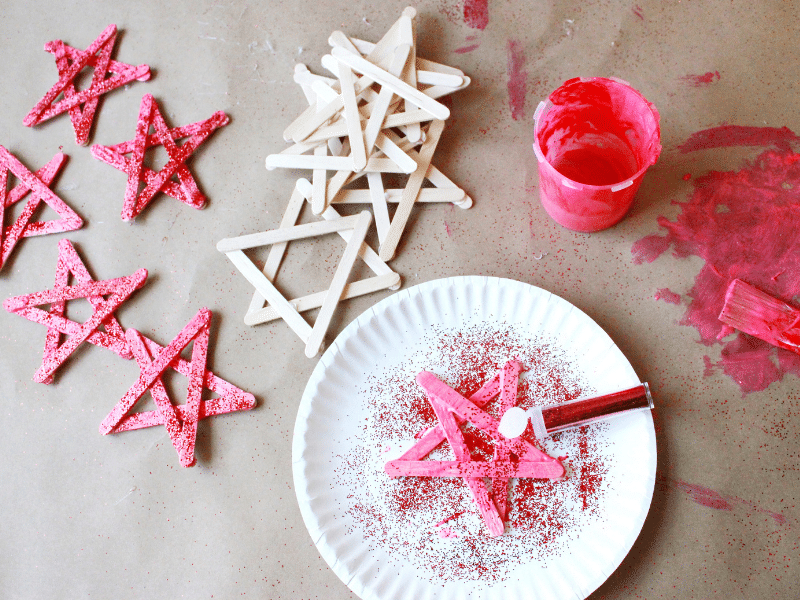
Keep little hands busy and excited for the celebration with these fun and festive New Years crafts for kids! Celebrate the New Year with this
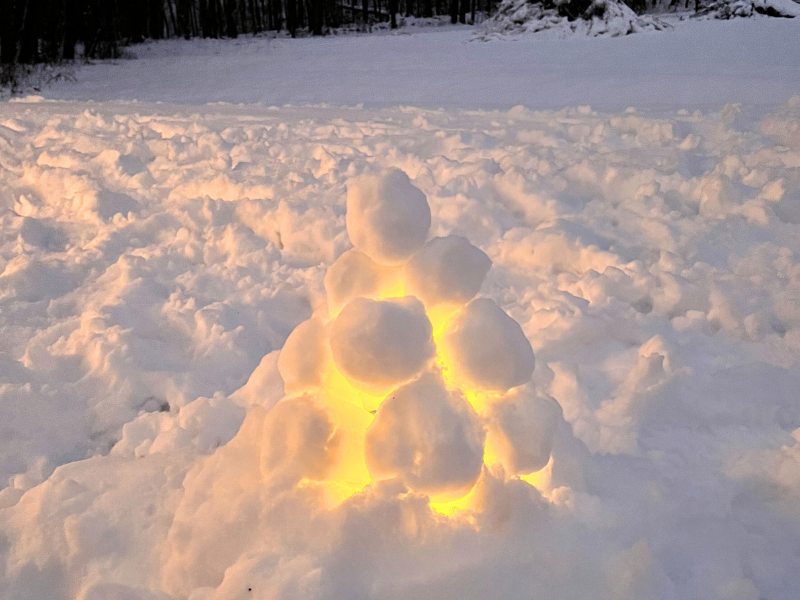
Snowball lanterns dot the Swedish landscape in winter. Learn how to make these beautiful snow lanterns with just snow and a tea light. Photo updates
Here are 11 easy Christmas craft ideas for kids to try this holiday season. Create homemade ornaments, gift tags, garlands, wrapping paper and more! Updated
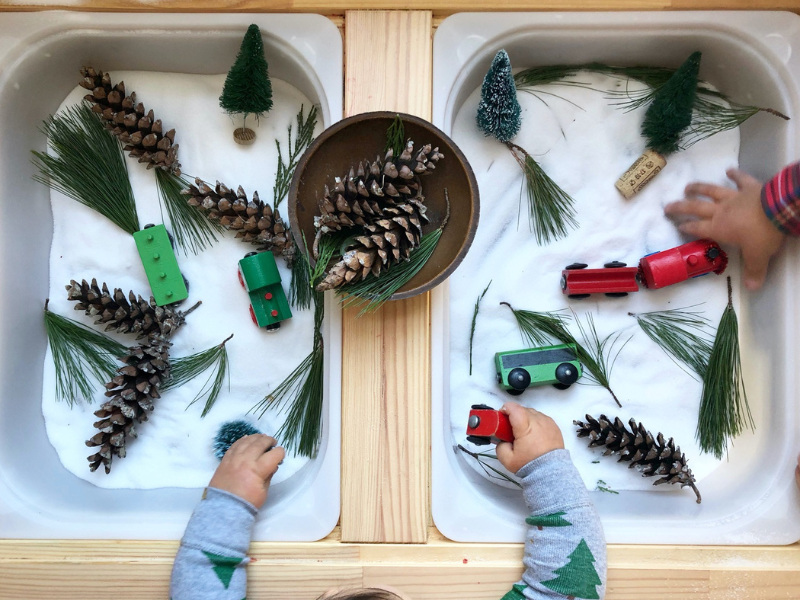
Here are some of our favorite Christmas sensory bins for kids. Inspire fun and festive creative play all month long! Updated November 2024 There are

This stocking stuffer guide includes the best mix of art supplies, small games, toys & useful items for kids. Updated November 2024 Every year it’s

Learn how to make DIY wrapping paper for kids with a rolling pin and foam stickers! A fun holiday craft project. Updated November 2024 Have

Learn how to make your own DIY stamps with rubber printing plates. Then print festive, homemade holiday cards for kids. This will be our third

Here are 5 of our favorite Christmas baking ideas to try this holiday season with your family! You’ll have fun baking them AND eating them!

Find new children’s books for Christmas or revisit old favorites in our special holiday book list for kids! Updated November 2024 If you’re looking for

Learn how to make salt dough with this easy recipe. Salt dough is great for all kinds of crafts, including ornaments and pendants. Easy to

Here are 10 salt dough decoration ideas that kids can make this Christmas season to connect creatively as a family. Try one today! Updated October