Create beautiful marbled paper art collages inspired by Australian artist Kate Shaw in this post by Danielle Falk of Little Ginger Studio.
Updated February 2025
I’ve admired the work of Australian artist Kate Shaw for a long time. Ever since I first laid eyes on her enormous poured acrylic paint collage landscapes, I have been trying to find a way to create similar works with my students. The colors, flowing forms, and impressive shapes of her work are just mesmerizing.
But how to achieve that swirling look with kids? Marbled paper to the rescue!
While scrolling through The Artful Parent, I found the perfect solution: use marbled paper instead! After reading this blog post, I decided to make marbled paper using both the shaving cream method and the oil method.
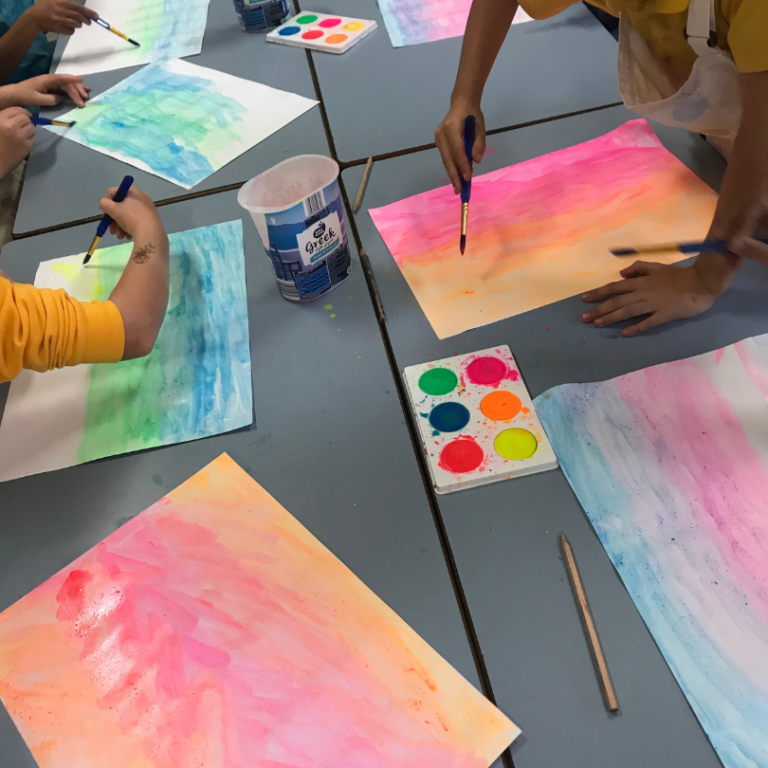
We used liquid watercolors which meant we could create beautiful swirls using pink, purple and aqua. We also created some extra painted papers using the liquid watercolors to use as a contrast. Tip: Restrict the colors for each paper to no more than two primary colors at a time to avoid creating murky brown!

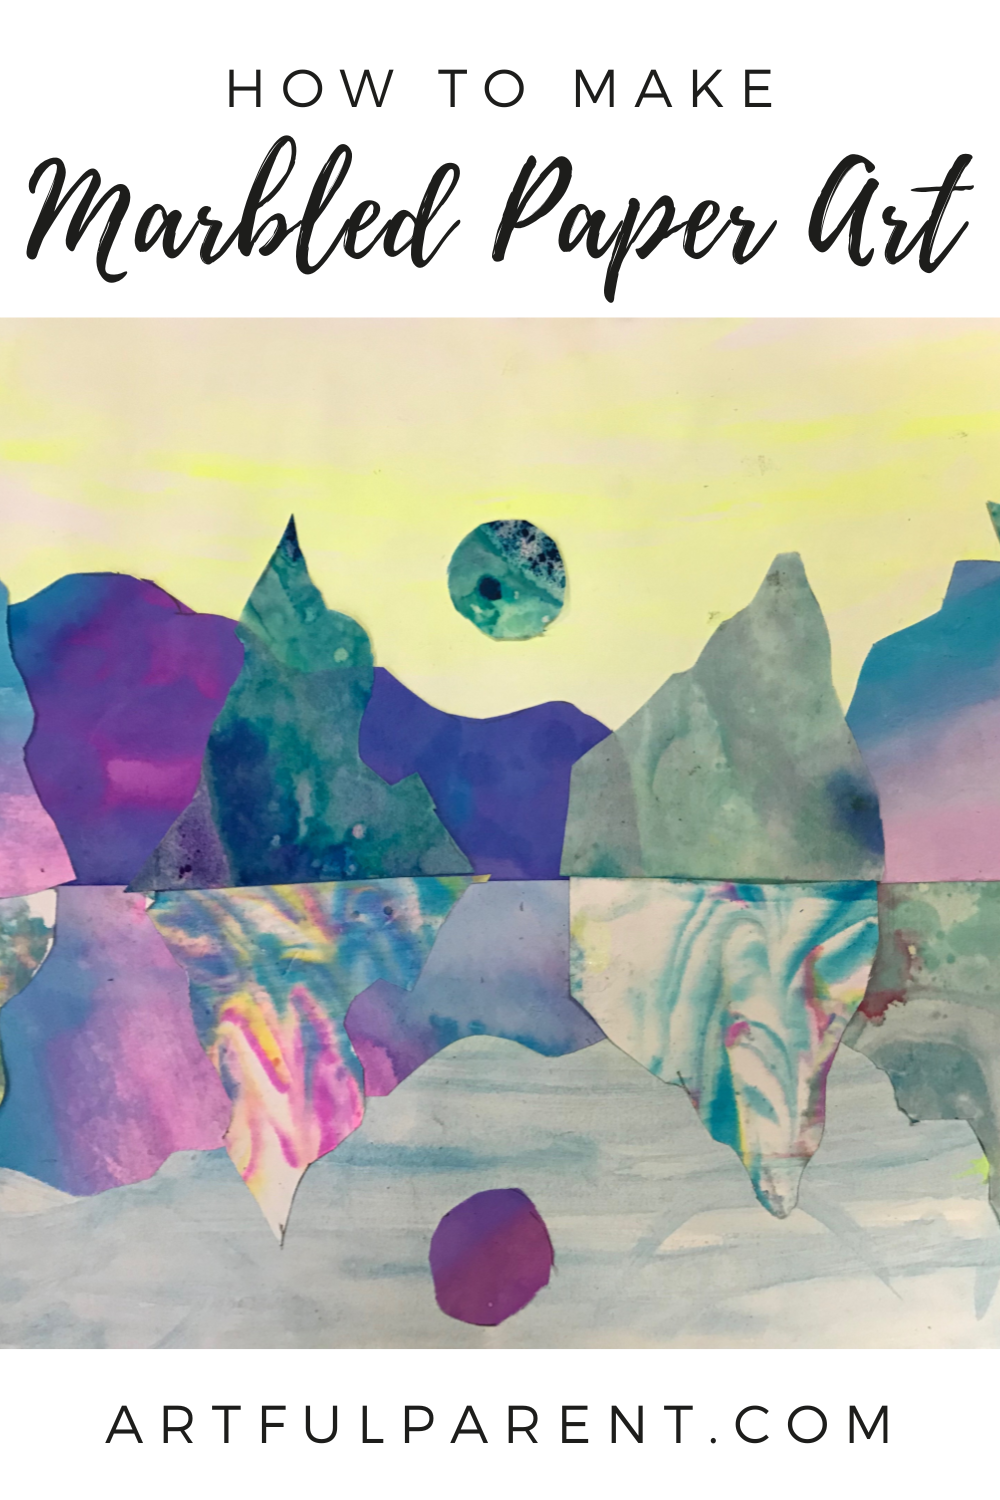
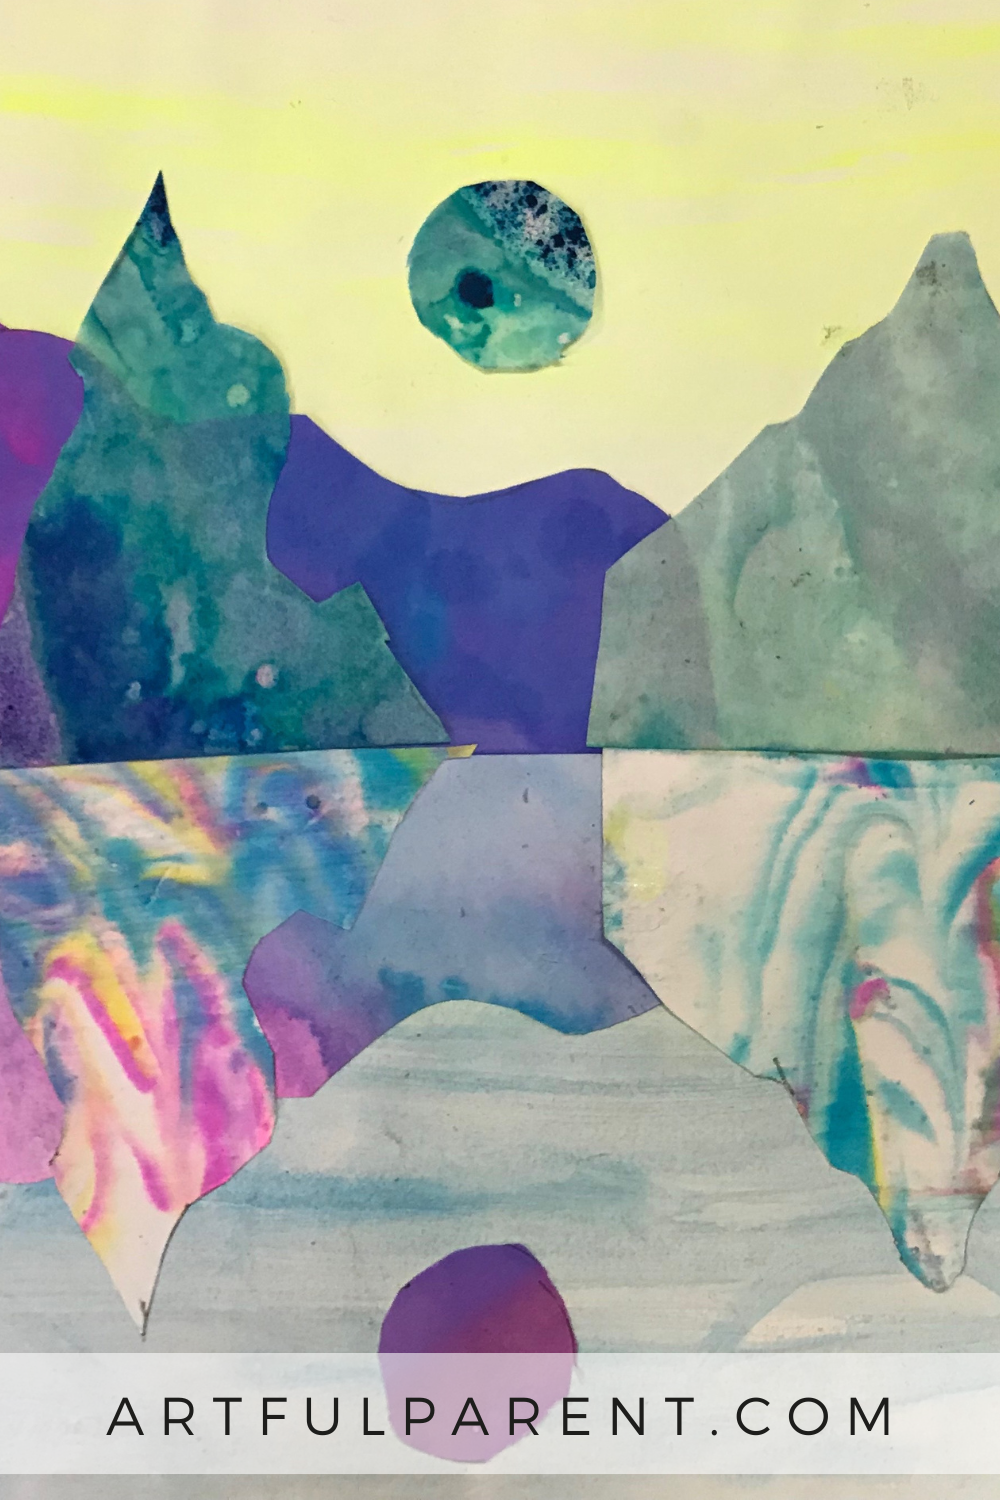
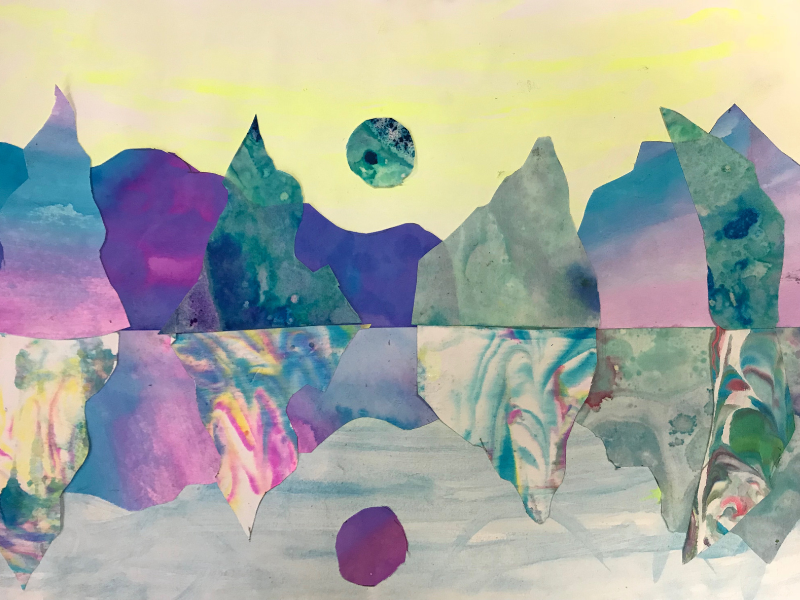
These marbled paper collages are a beautiful representation of the reflection of a landscape on water.
Marbled Paper Art Collages

MATERIALS
- Shaving cream marbled papers
- Oil & food dye marbled papers
- Paper painted with liquid watercolors
- Scissors
- Sturdy paper for the background
- Large paintbrush
- Glue stick
- Pencil
- Ruler
INSTRUCTIONS
- Paint the background
Begin by painting the background on the sturdy paper. Create a horizontal blend of two colors, for example, blending from pink to yellow, mimicking a sunset/sunrise sky. It doesn’t have to be realistic – this blend will become the sky and water.
- Cut and arrange the shapes
Carefully draw mountain shapes onto the back of some bright or dark colored marbled or painted paper and cut them out.
Find some slightly lighter paper and use your shapes to trace a MIRROR IMAGE of the first shapes. Then cut these out. These second shapes will be the reflections in the water. Arrange them along a horizon line on your background.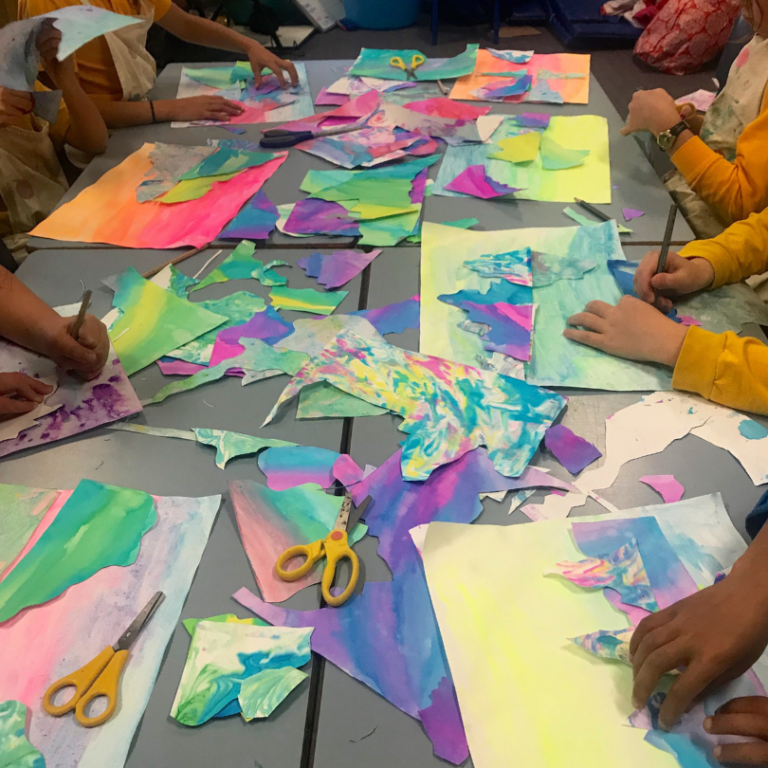
Continue cutting and adding landforms and their corresponding reflections until you have a pleasing composition. Don’t forget to add a perfectly round moon or two to make it look really Sci-fi!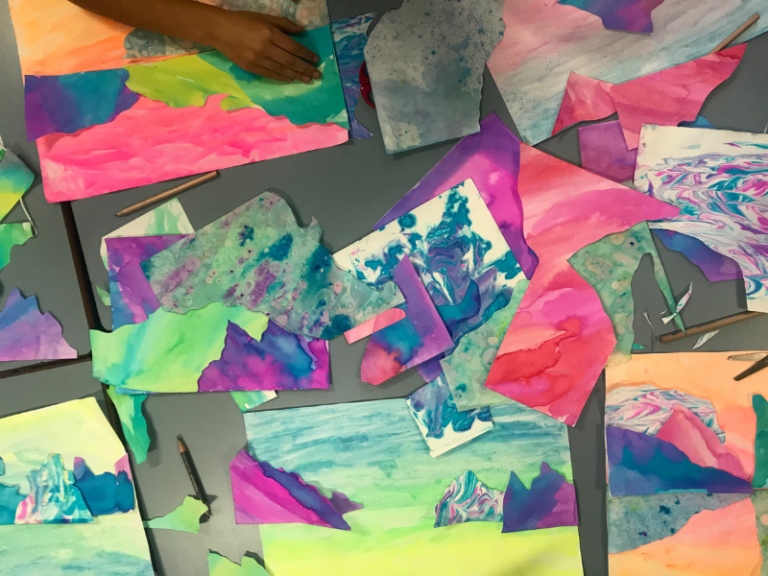
Tip: Choose papers that are opposite in color to your back ground so that they POP. For example, if your background is mostly blue and other cool colors, choose oranges and pinks for your landforms. Similarly, try to separate like colors when arranging your collage pieces. It may take a while to find an arrangement that looks attractive – this is the hard part! - Glue your collage into place
It’s best to carefully draw a horizontal line across the centre of your background lightly in pencil. This is the only way you can ensure a really precise composition.
Carefully organize your composition along the horizon line.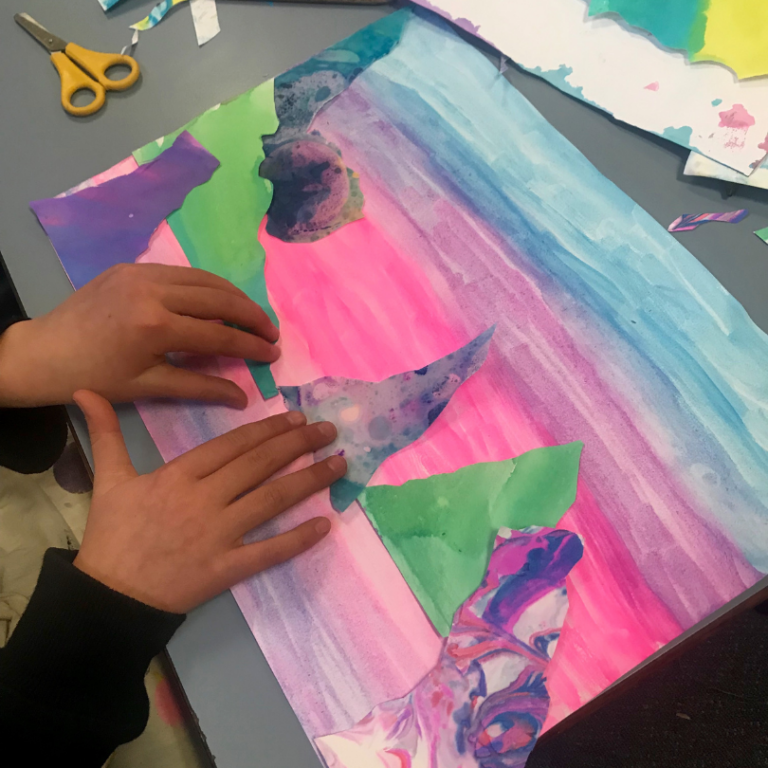
When you’re ready, glue your pieces one by one, trying to glue the bottom pieces first and stick to your original arrangement as much as possible. - Step back and admire
We love how these gorgeous landscapes came out!
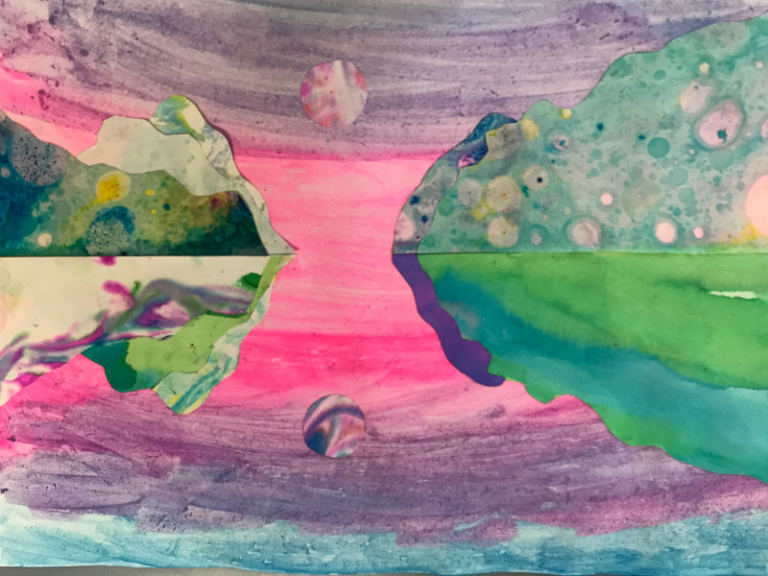
Wow! You should be looking at a totally frame-worthy piece of colorful kid-made art.
These landscapes look particularly good en masse and it’s fun to make lots of different versions.

More Collage Art for Kids
- How to Make Picasso Collages for Kids
- How to Make Paper Collage for Kids
- How to Create Monochrome Paintings
- How to Make Mandala Art Designs on Records
- How to Create Collage Art for Kids
- How to Make Painted Paper Collages for Kids
Pin It For Later