Paper marbling with oil and food coloring is a simple and fun technique that requires just a few common household materials. And the results are unique and stunning!
Updated February 2025
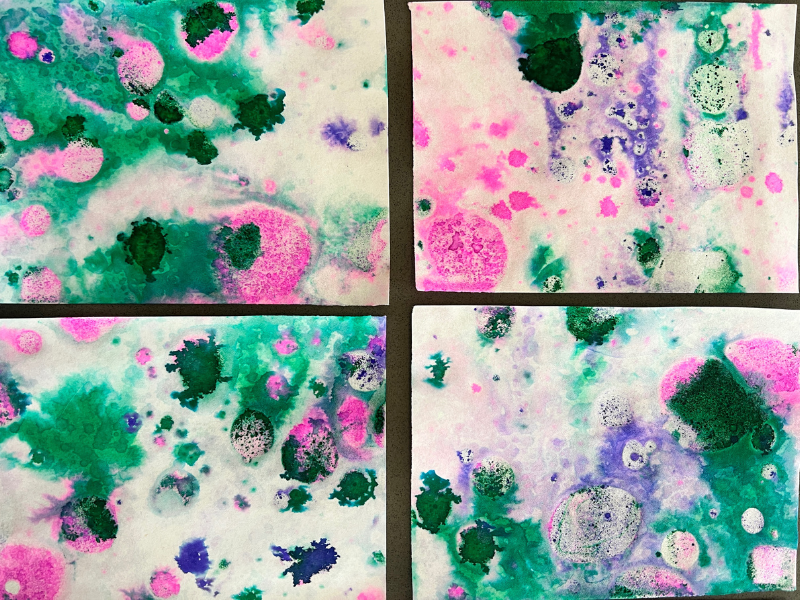
Paper marbling with oil and food coloring is beautiful! And so easy!
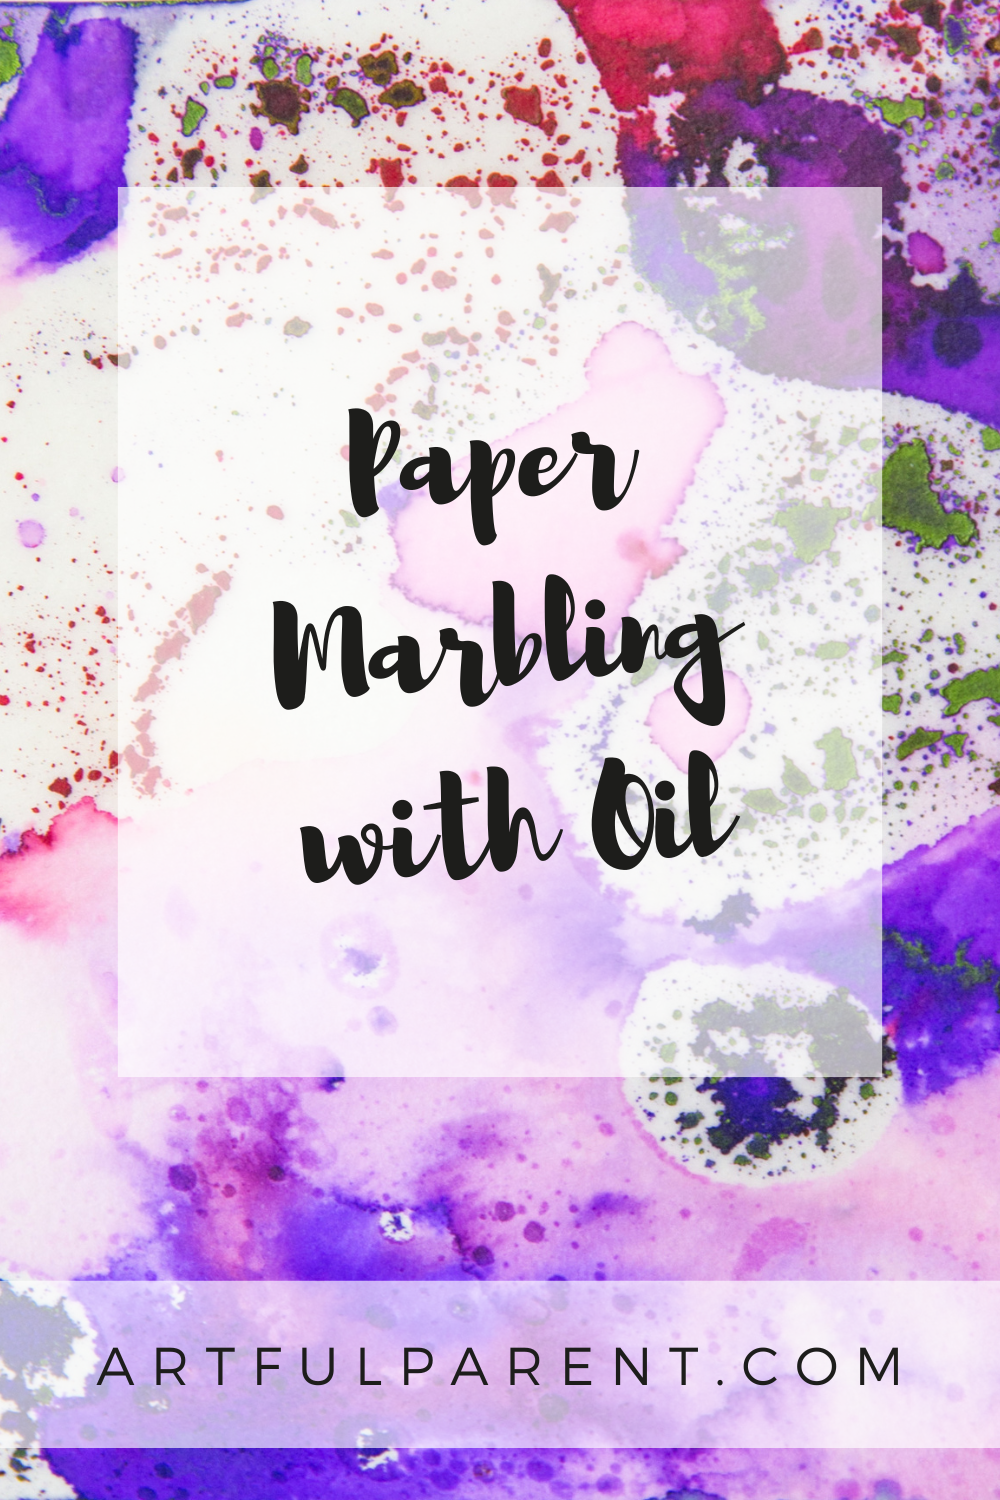
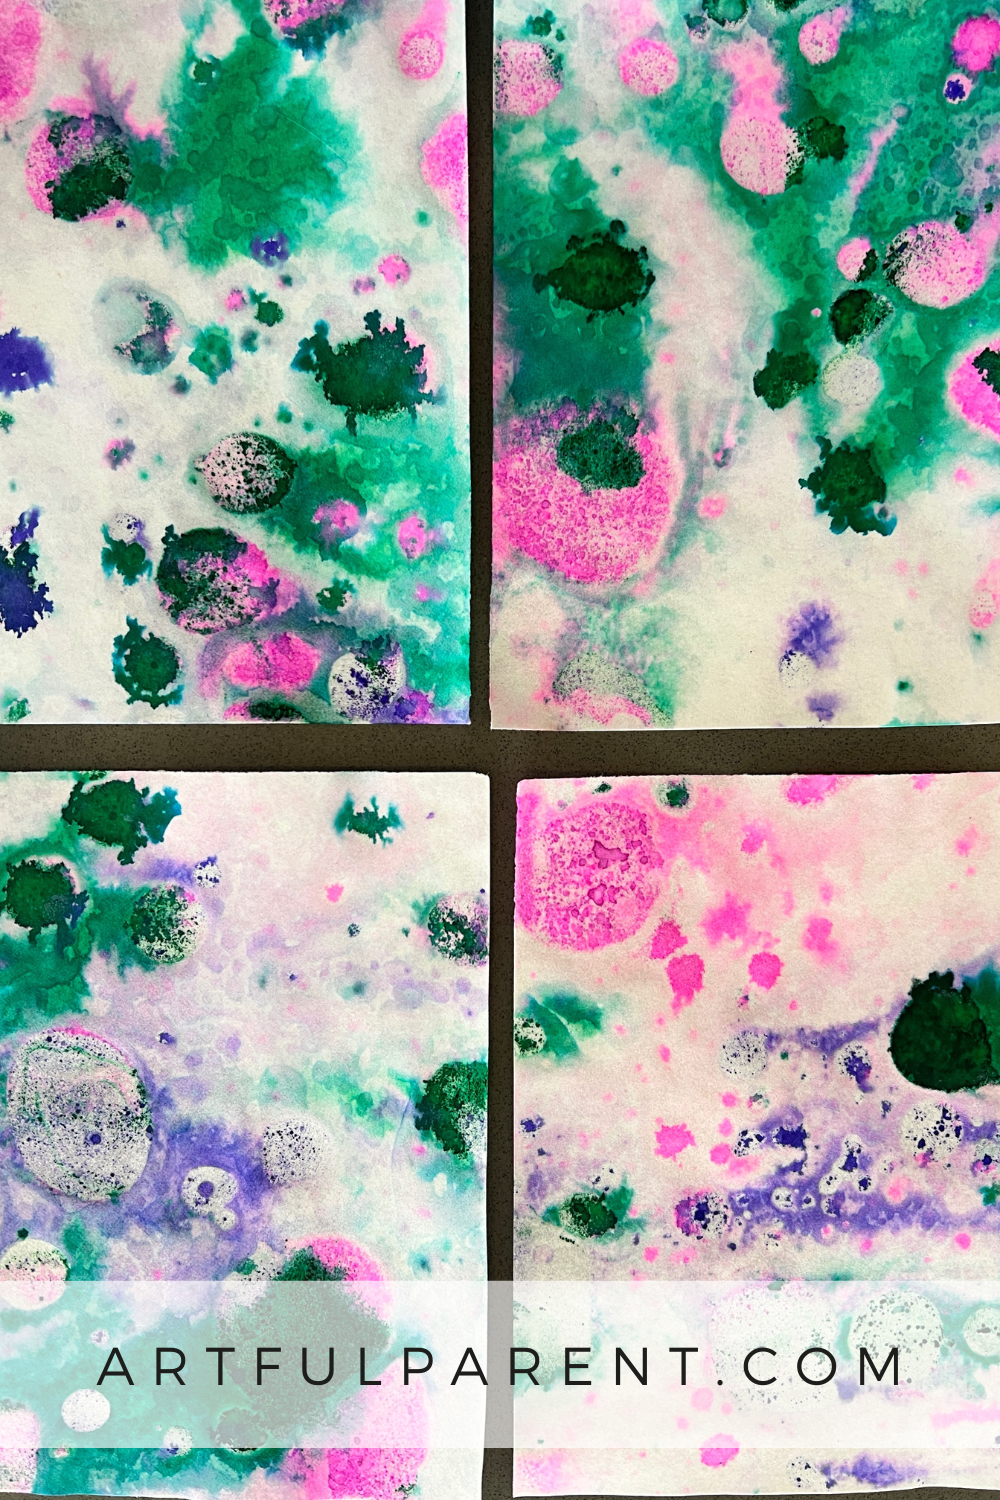
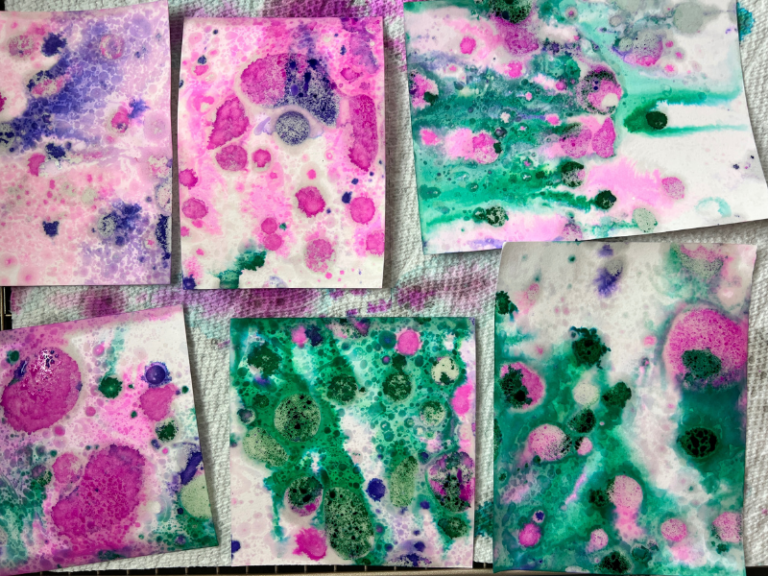
Since oil and water repel rather than mix, the oil marbling technique creates bubbles of color and white spots. Where there are oil bubbles, the water-based food coloring won’t stick to the paper.
It’s messy, but worth it. And it’s one of the easiest ways to marble paper with kids.
We still LOVE marbling paper with shaving cream, but the effect is completely different with oil.
Here’s a video showing Marbling with Oil in action! And we’ve included a detailed tutorial with instructions below.
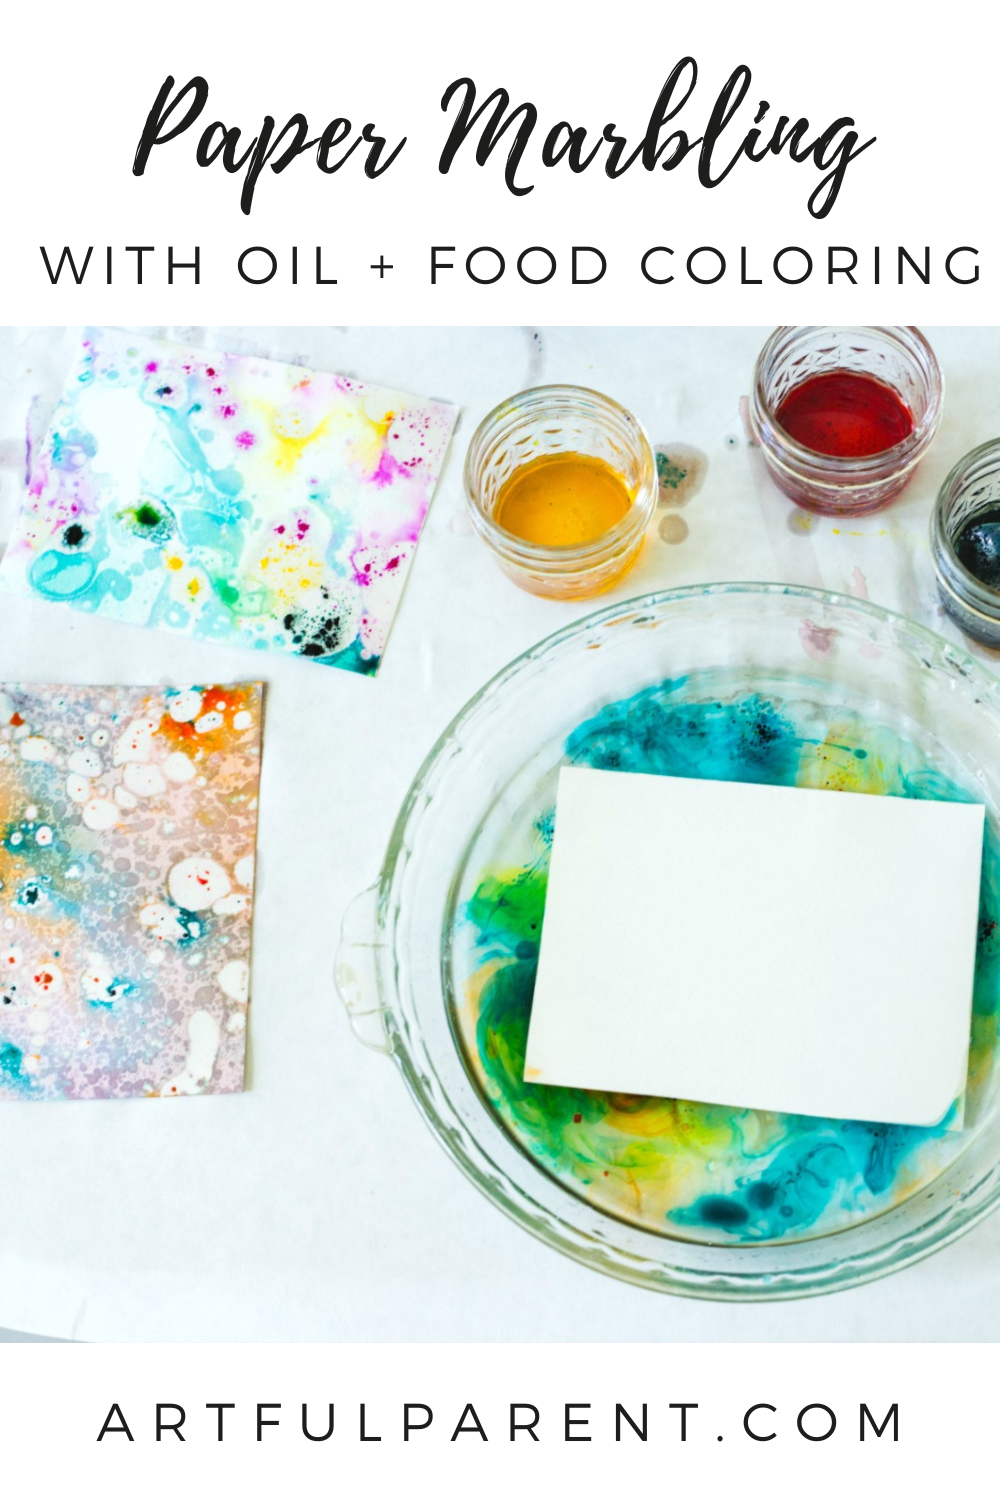
Paper Marbling with Oil

MATERIALS
- Vegetable oil*
- Liquid food coloring or liquid watercolors
- Watercolor paper or cardstock, cut into smaller pieces
- Droppers (optional)
- Dishes and utensils (pie pan or baking dish, small cups or bowls, forks, spoons)
*Baby oil or mineral oil may work just as well, but we used vegetable oil.
INSTRUCTIONS
- Mix oil and color
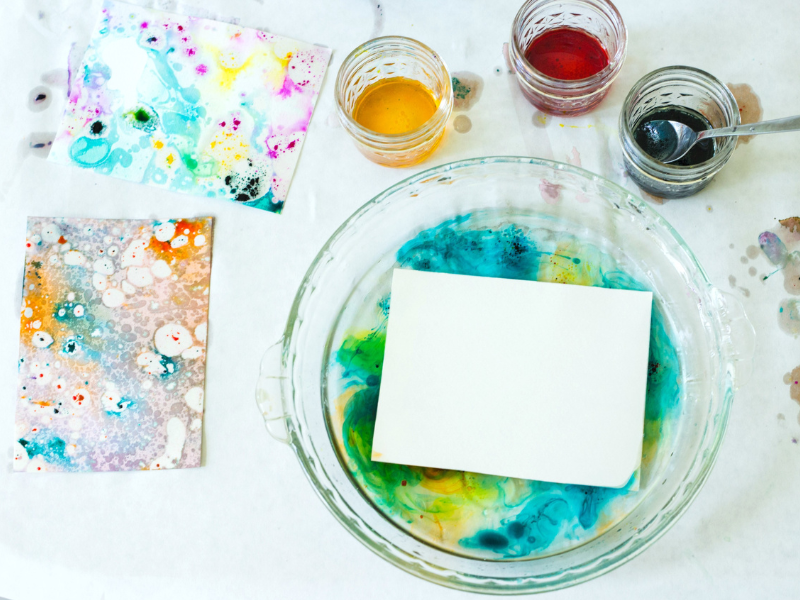
Pour a small amount of vegetable oil into a small bowl and add food coloring. Stir vigorously with a fork so the big drops of color are dispersed throughout the oil as smaller droplets.
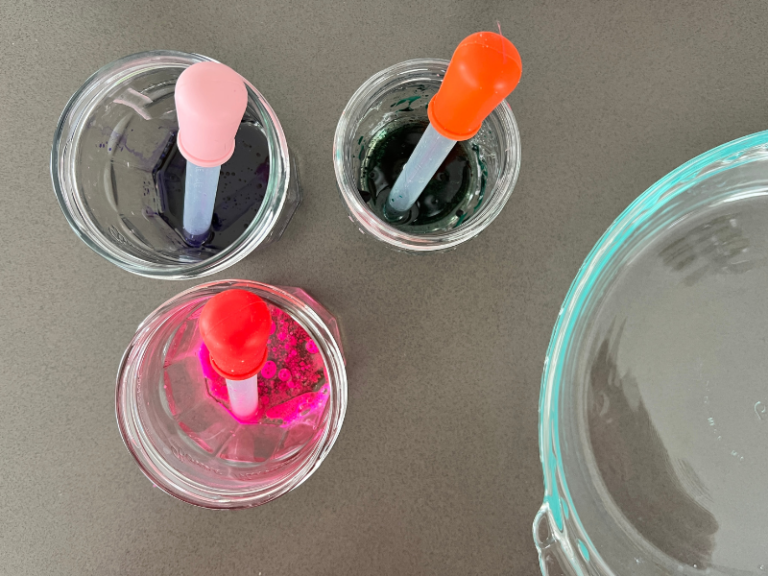
Repeat with as many colors as you want to use. - Add oil + food coloring mixture to water
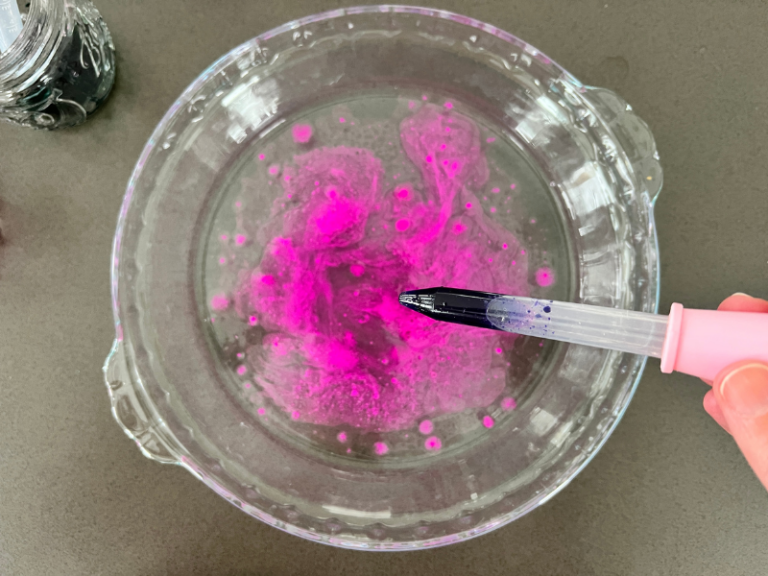
Pour about an inch of water into a shallow pie pan or baking dish. Use a dropper or spoon to transfer the oil + color mixture to the dish of water. Use one color or many.
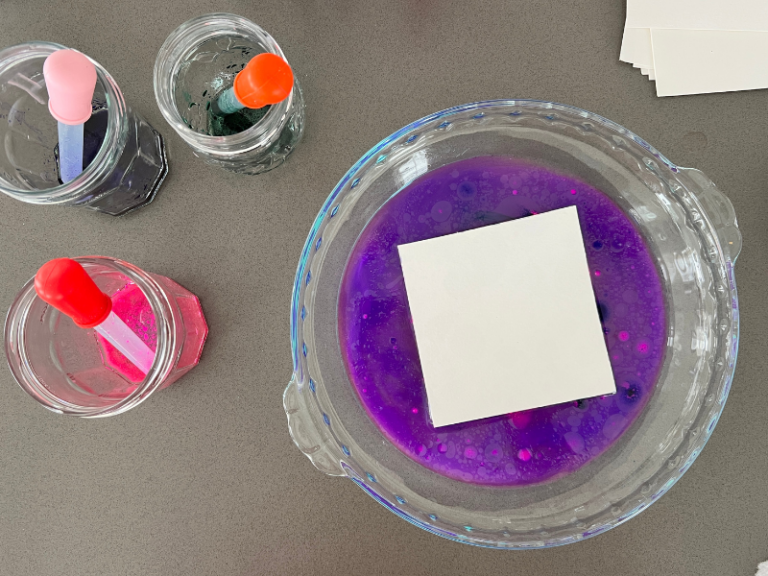
- Marble your paper
Lay your paper on top of the water, and then lift to reveal your marbled paper.
Add more colors and repeat!
After a couple of rounds, the water may be too muddy or saturated to get a pleasing effect. At that point, you can dump the water and start fresh with a new layer of clean water. - Let your marbled paper dry
Lay the newly marbled paper flat to dry.
Note: The paper is very oily at first, but as the artwork dries, the oil is absorbed into the paper, and it no longer feels oily to the touch.
We love to use this paper for notecards, DIY notebooks, buntings, and other crafts.
More Marbling Techniques to Try
- 6 Easy Paper Marbling Techniques
- Marbled Paper and Tips for Success
- How to Make Marble Paper Art Landscape Collages for Kids
- Paper Marbling with Acrylic Paint and Liquid Starch
- Shaving Cream Marbling with Kids
- The Best Art Ideas for Kids in 2023
Want even more science experiment ideas?
Check out our Science Creativity Pack!
You’ll love the magical combination of science & art, helping kids make all kinds of fantastic discoveries!

Pin It for Later