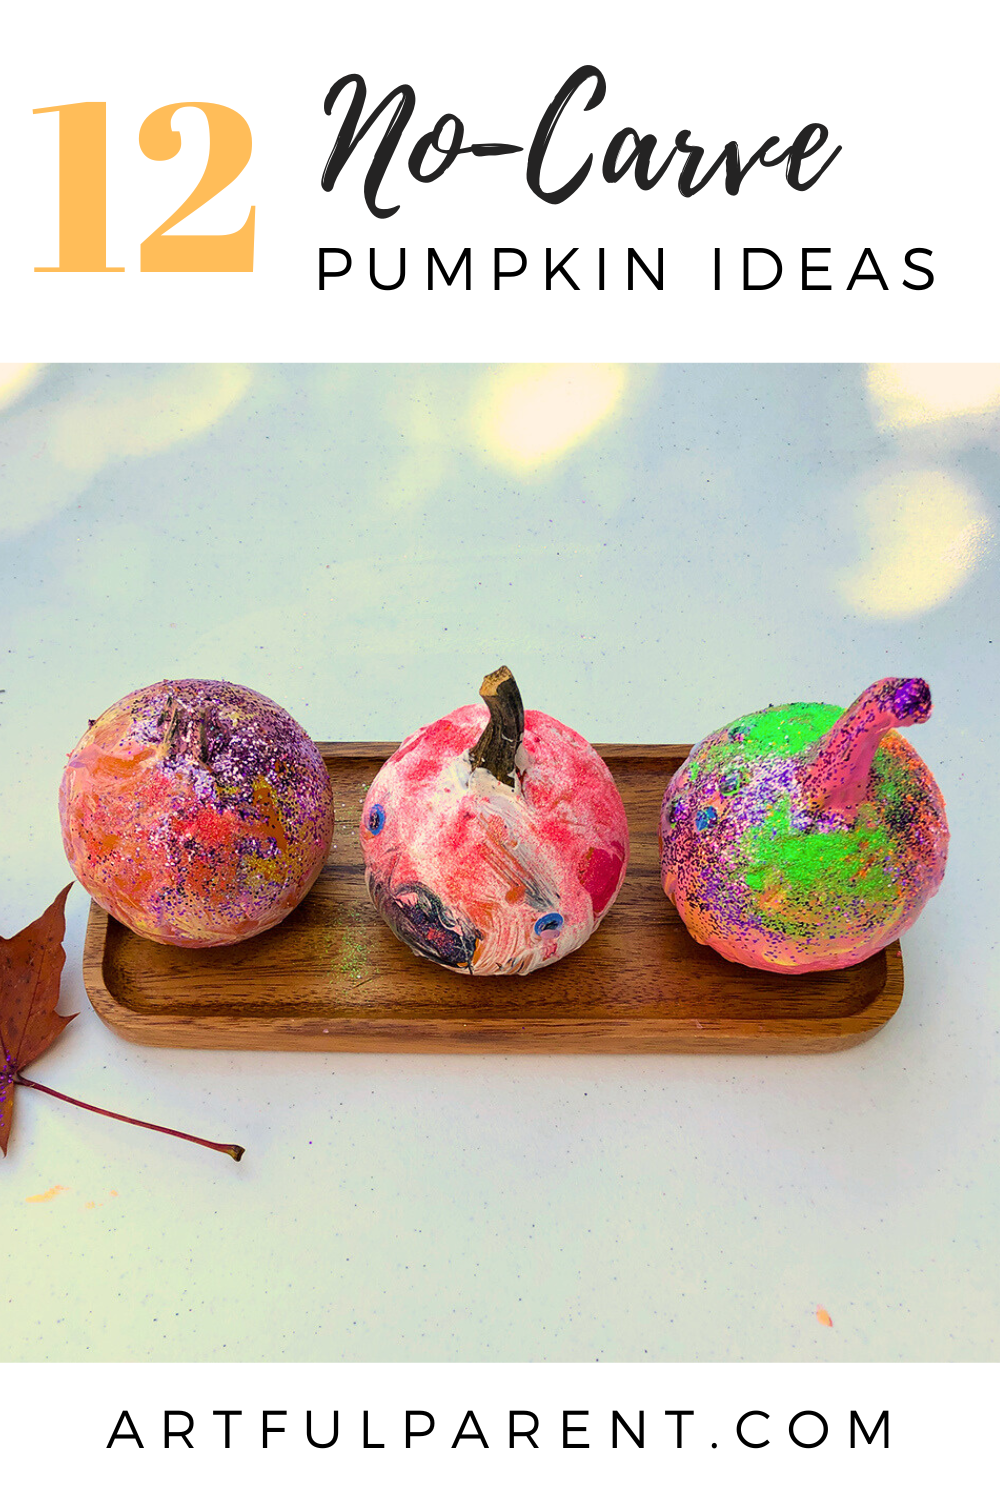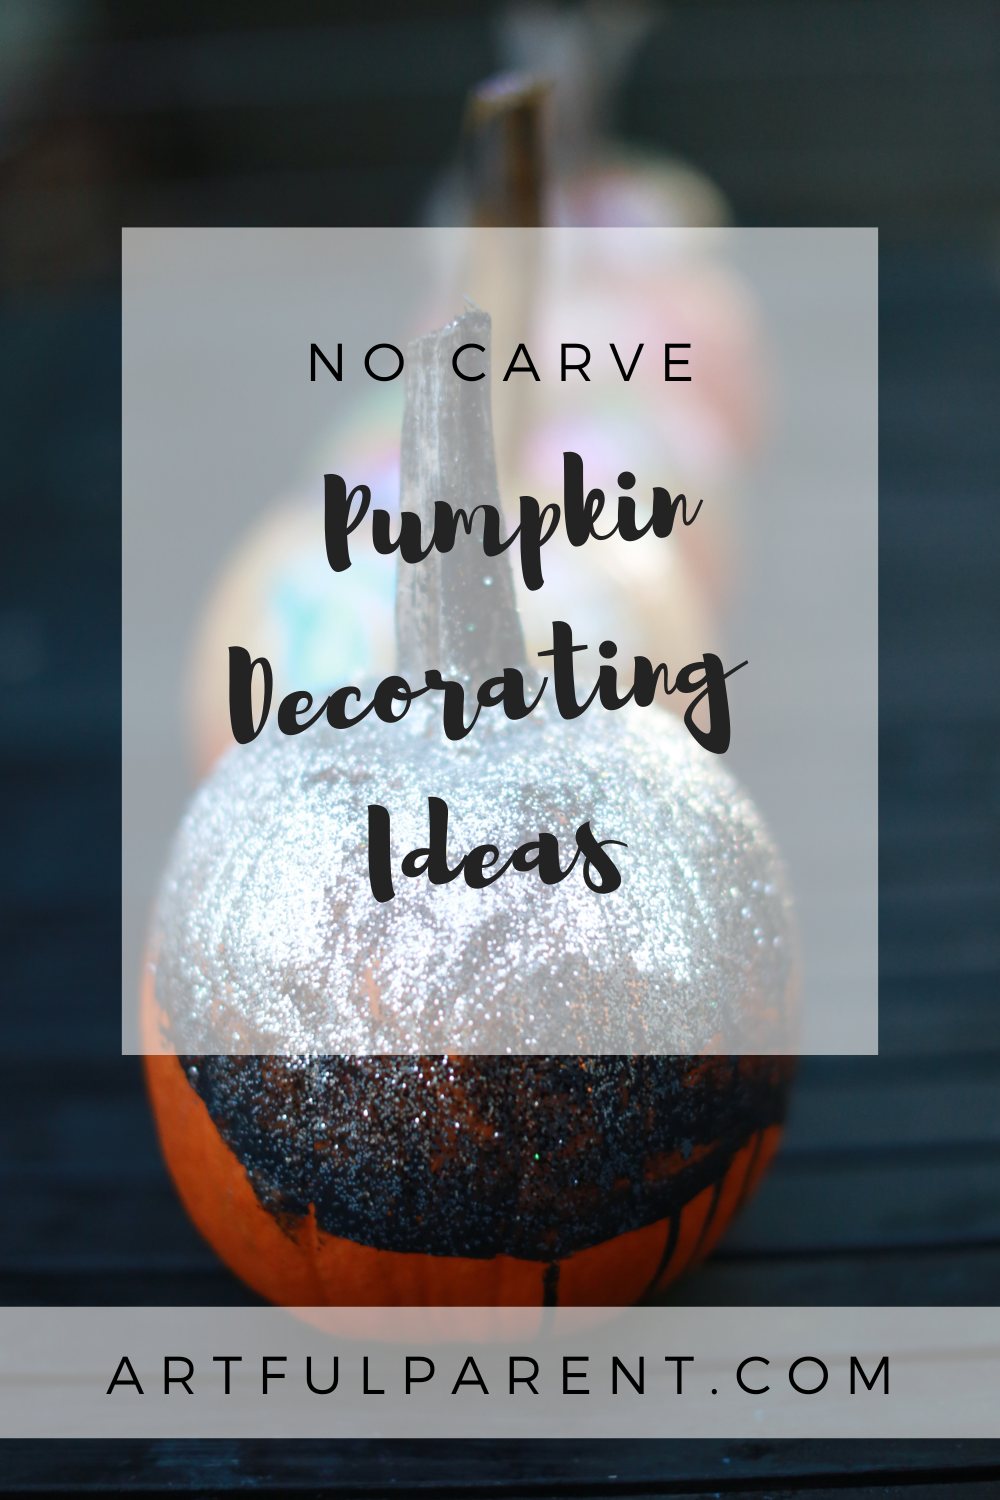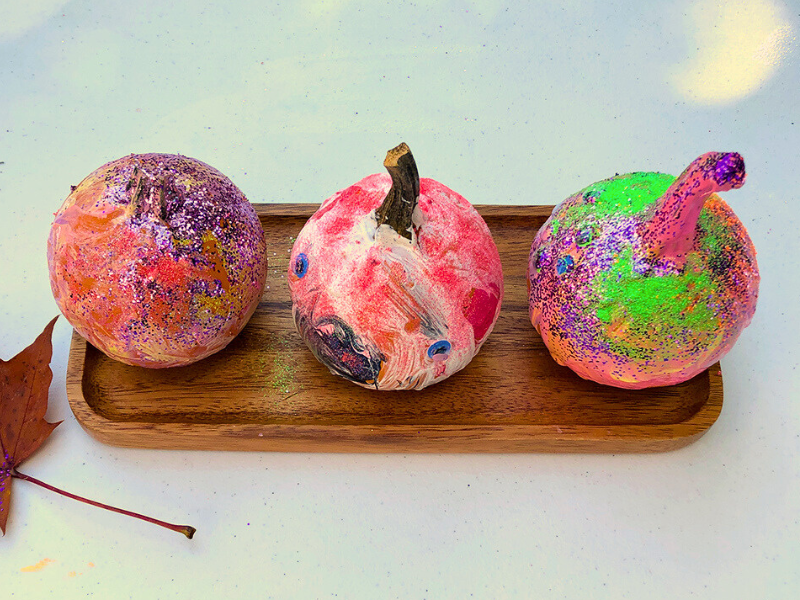
These no-carve pumpkin decorating ideas for kids are fun for all ages! They’ll make your pumpkins look great and last a long time.
Updated September 2024
Carving pumpkins is a Halloween tradition, but it’s not very little-kid friendly. Plus, you need to wait until practically Halloween Eve if you want your Jack-o’-lantern to look good for the big night.
These process art pumpkin decorating ideas are different.
They are great for little kids (and big!), look great, and are long lasting since they are no-carve. So it’s a big win all around.
You can start decorating your pumpkins as early as they become available in the pumpkin patches, stores, and farms, get into the Halloween spirit, and have great Halloween decorations all month long.
Plus, these process art pumpkin decorating ideas for kids make for great seasonal art invitations as well as party activities and family art sessions.
No Carve Pumpkin Decorating Ideas
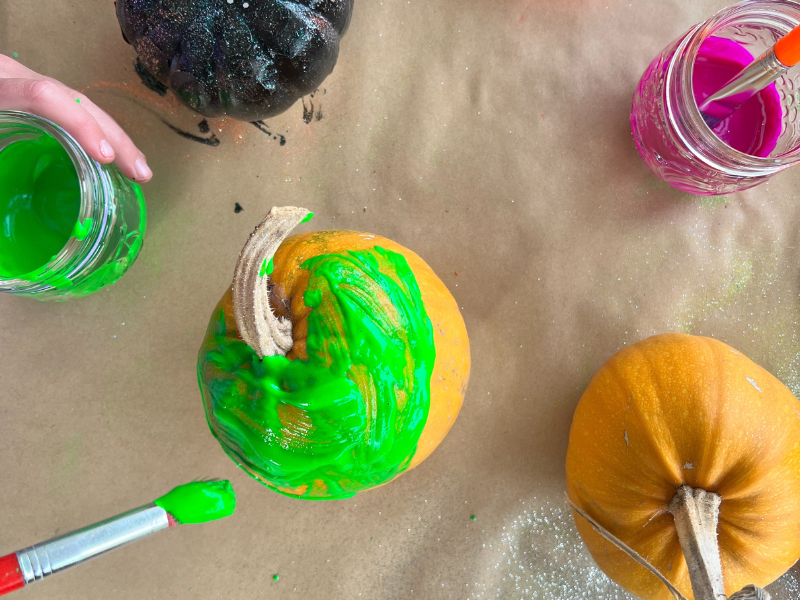
 1. Pumpkin painting
The perfect Halloween art activity for toddlers! Paint your pumpkin with a brush or with your fingers. We especially like BioColor paint for painting on pumpkins as it adheres well and dries shiny, but tempera paint will work too.
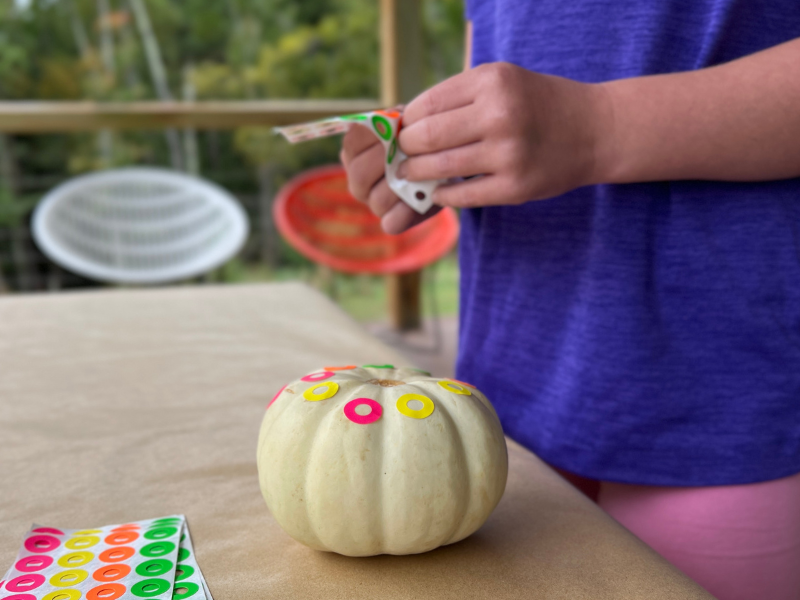
2. Try sticker resist pumpkins
Use stationery store stickers such as hole reinforcement stickers, circle stickers, or mailing labels (try cutting some into triangles!) to decorate your pumpkins. You can use leave the stickers as is or take it one step further by doing sticker resist art on your pumpkin. Simply paint over the stickers and pumpkin, then remove the stickers to reveal your design.
Note: Use tempera paint rather than the BioColors we mentioned earlier for this one. The stickers will be easier to remove.
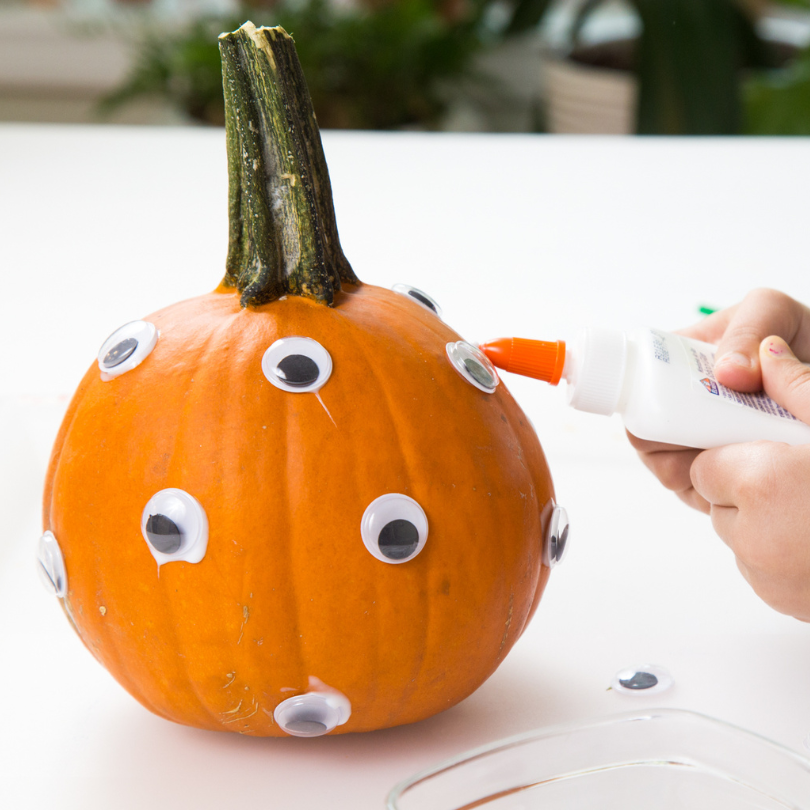
3. Make a googly eye pumpkin!
This idea is so simple and yet makes for such a fun (and funny!) pumpkin! Use white glue to stick googly eyes all over your pumpkin! Arrange the eyes in a design or anywhere you’d like.
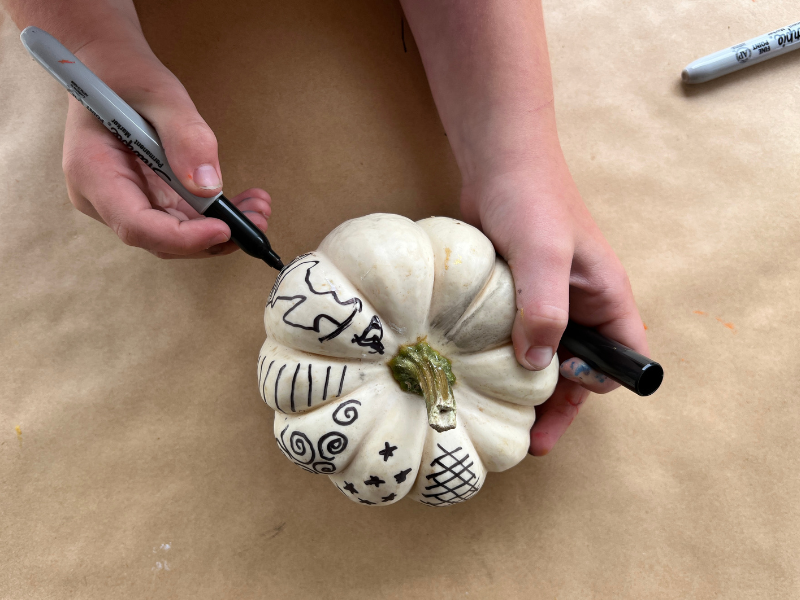
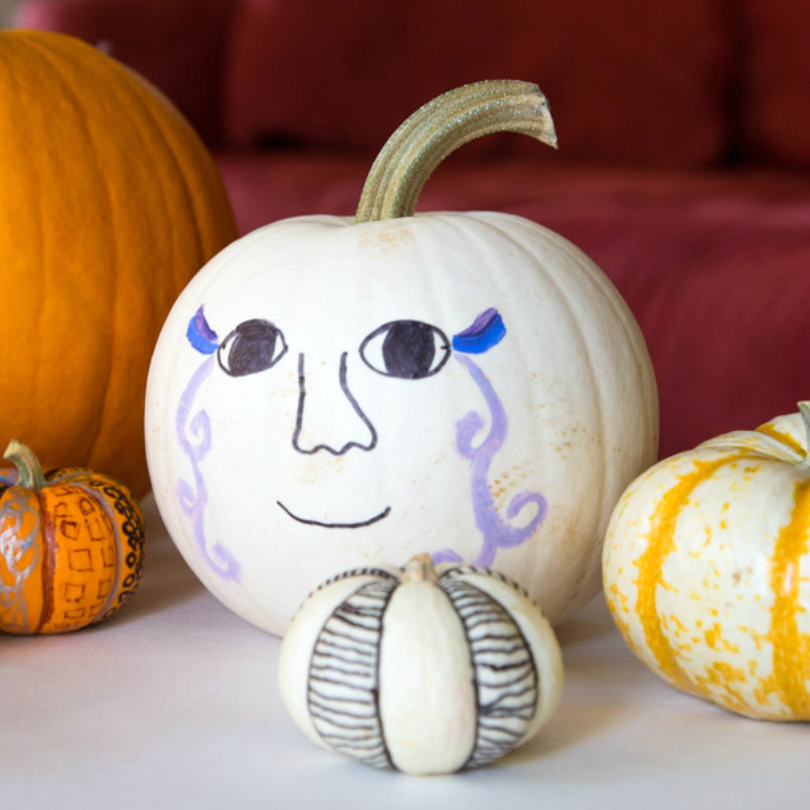
4. Scribble drawing pumpkins
Scribble, doodle, and draw all over your pumpkin with Sharpie markers. You can make abstract designs or use the sharpie to draw a jack-o’-lantern face!
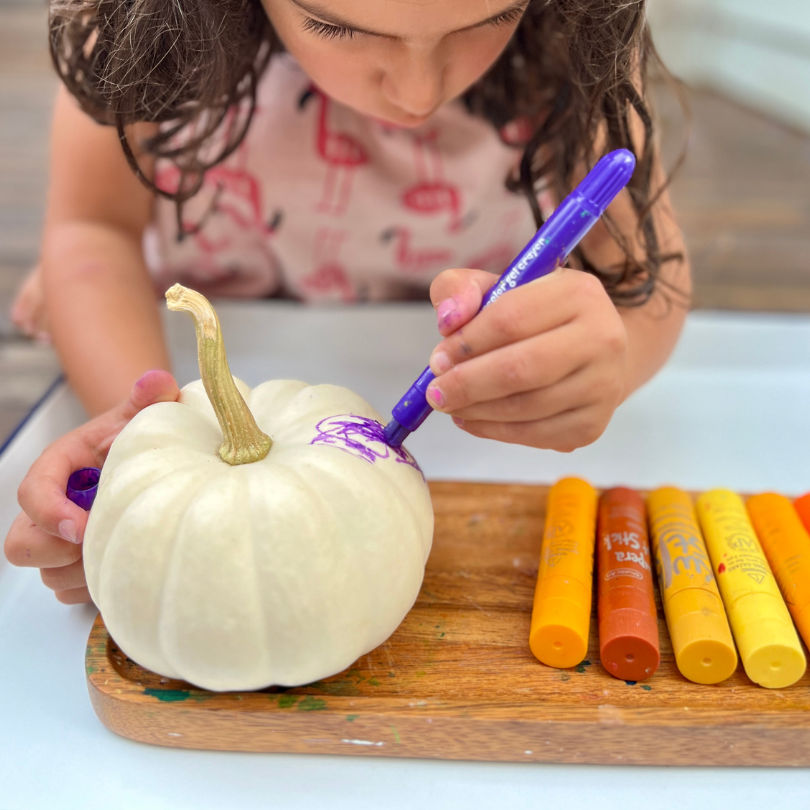
5. Color your pumpkin
Use crayons, oil pastels, or tempera paint sticks to color your pumpkin. You can fill each section of your pumpkin a different color, or color the whole thing your favorite color!
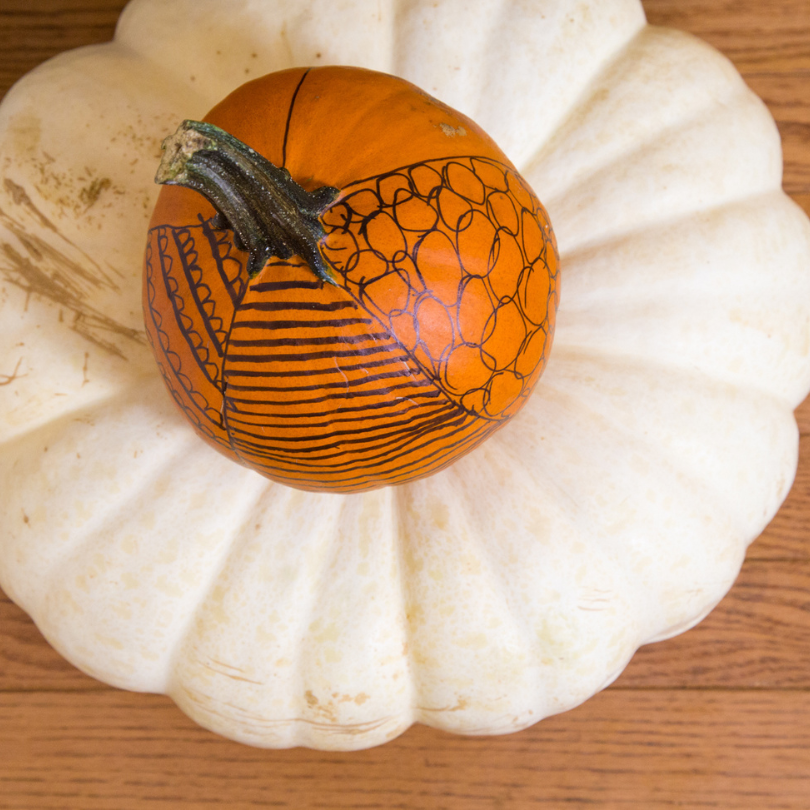
6. Pumpkin decorating Zentangle style
Use Sharpie markers to doodle different tangle designs in each vertical pumpkin section. Chalk markers work, too, but are not permanent. You can also do this with Autumn leaves!
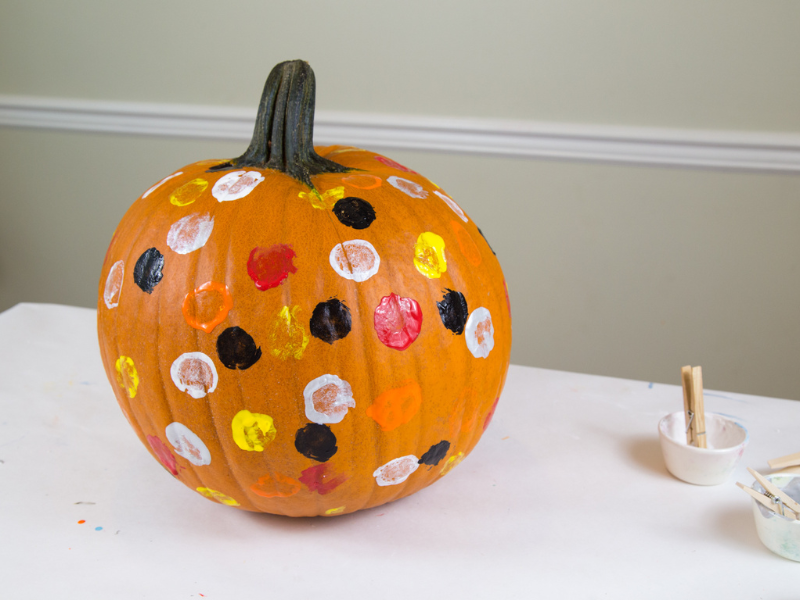
7. Polka dot pumpkin decorating
Use a pompom held in a clothespin to print dots all over your pumpkin with paint. Or try Q-tip pointillism for smaller polka dots.
8. Decorate a pumpkin with face paint
Draw facial features on the pumpkin first with Sharpies (optional) then decorate with face paint. We like this Snazaroo face paint kit. Bonus: you can wash it off and start again as often as you like!
9. Splatter paint pumpkins
Use a splatter painting technique to give your pumpkin a Jackson Pollock effect. Hint: Do this one outside!
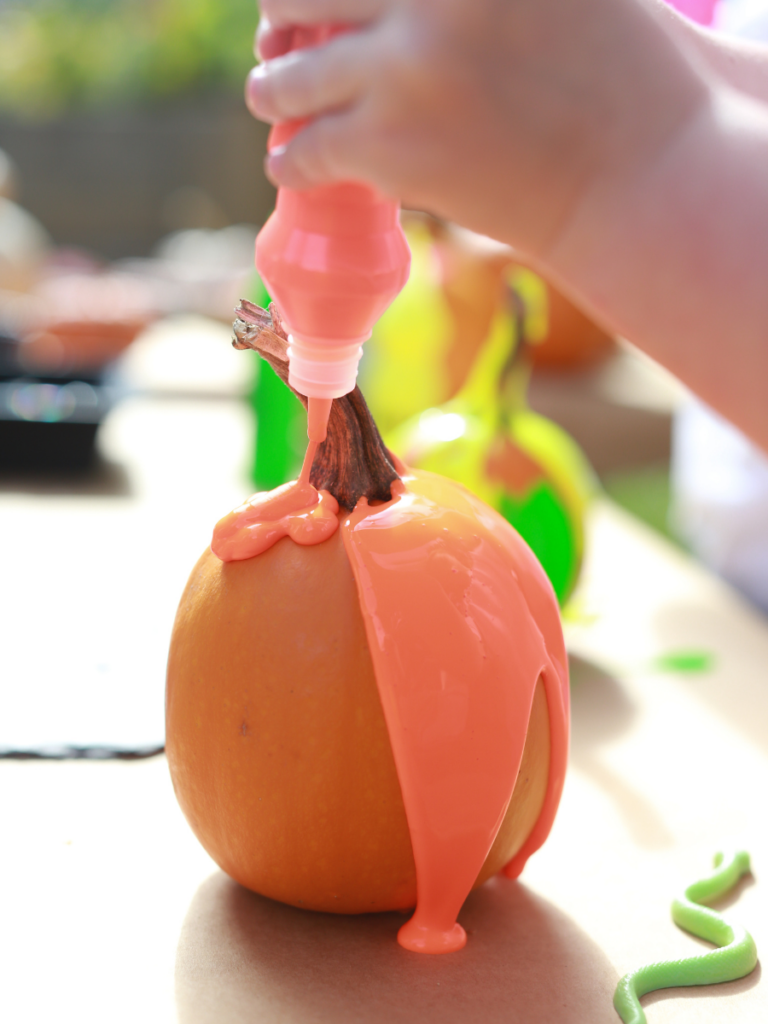
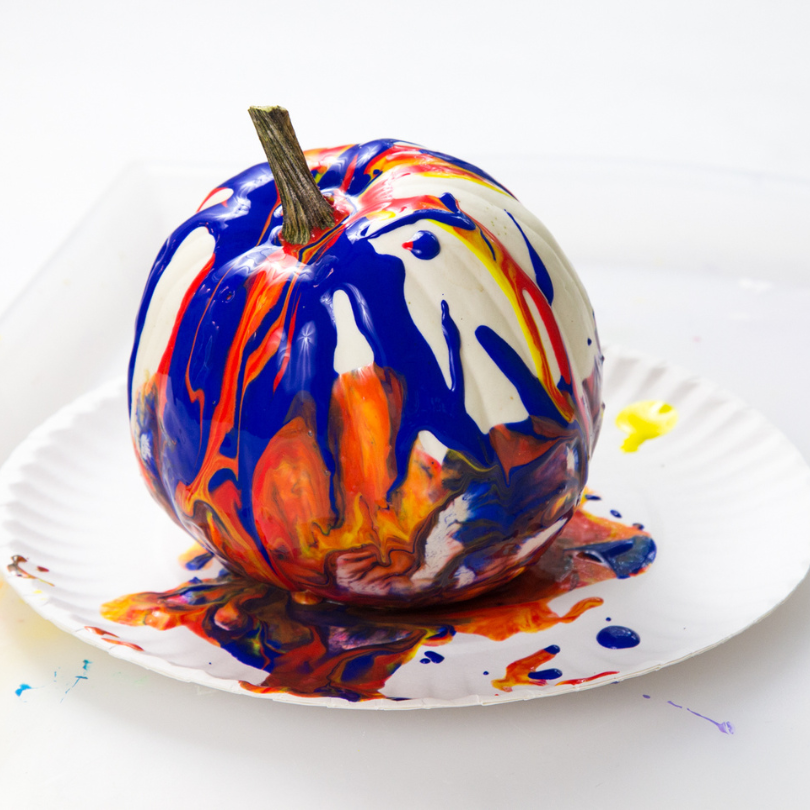
10. Decorate a pumpkin with squeeze paint
Squeeze or drip paint over the top of the pumpkin and watch it drip down the sides of the pumpkin to create a neat effect. We like the MALA paint from IKEA for this, or you can put your preferred paint into squeeze bottles.
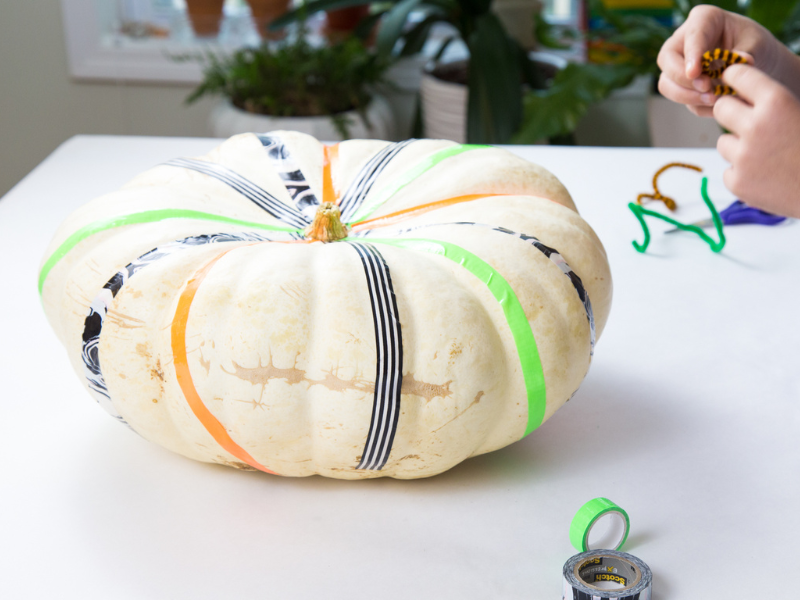
11. Washi tape pumpkin decorating
Wrap washi tape around your pumpkin in any design you like. Or use pieces of the washi tape like stickers. Here’s a festive set of Halloween washi tape! And glow-in-the-dark tape would be fun for this, too.
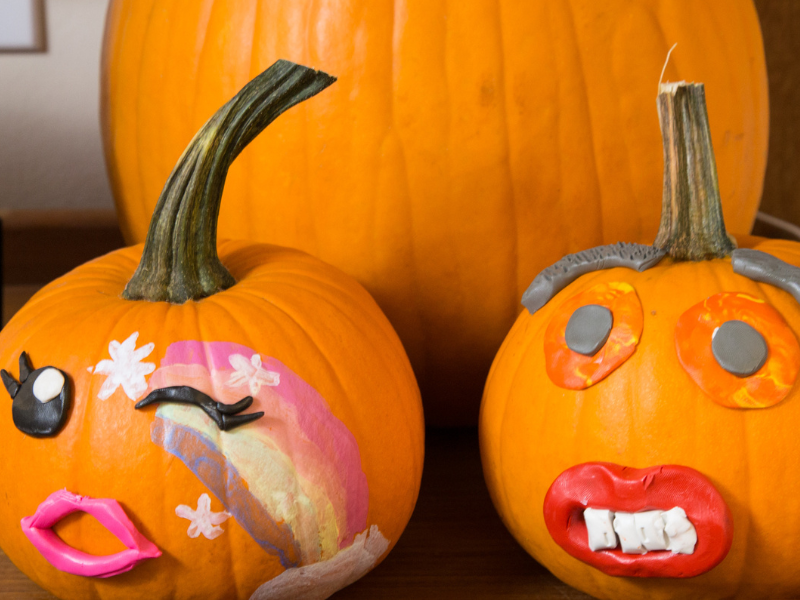
12. Add clay faces to your pumpkin
Use modeling clay or playdough to add three dimensional faces (or other designs) to your pumpkin.
How about you? Which of these kids pumpkin decorating ideas would you like to try?
More Pumpkin Fun for Kids
- 5 Pumpkin Painting Ideas for Kids
- The Best Pumpkin Decorating Ideas for Kids
- A Pounding Pumpkin Activity for Kids
- How to Decorate a Pumpkin Fairy House for Kids
- How to Get a Lite Brite Pumpkin Effect for Your Jack-O’-Lantern
- 31 Days of Halloween Activities for Kids (with Free Printable!)
Pin It for Later