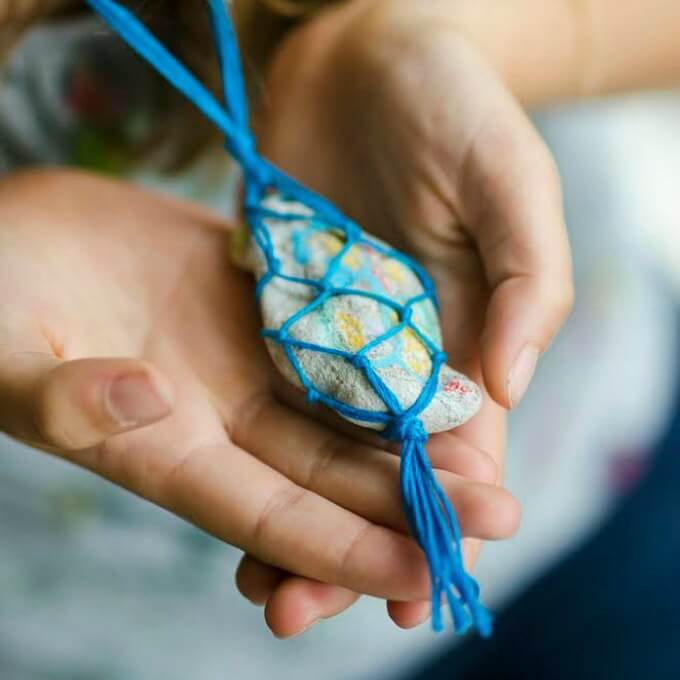
These macrame rock necklaces were an idea that came about after we painted rocks but, would work with so many rock treatments, along with nature finds, such as seaglass or a piece of drift wood. They were so beautiful and it gave me an idea that led to these necklaces. I hope you have as much fun as we did making and then wearing your creations!

I love projects that both kids and adults can make, and I wanted to simplify the process to as few, easy, steps as possible.
Let’s get started:

Macrame Rock Necklaces
MATERIALS
- 1 painted rock
- 8 equal lengths of yarn, ribbon, cord or string the length of a necklace
- Scissors
- Beads, optional
INSTRUCTIONS
The photos might be enough of a guide to make these macrame rock necklaces, but, I’ll give step-by-step instructions, too.

Start by tying the 8 pieces of string together in a tight knot. Leave a little extra length at the end if you would like the tassel effect that we created here.
Tape the tail to a flat surface. This is optional but, I’ve found that once I have the knot that it is easiest to work if I have the strings grounded. I find it useful, later, when the tying begins in order to create even work. However, is isn’t OK, if it works better for you to leave these loose. It’s really a personal preference.

Pair the string in sets and tie each set. The distance of this knots is determined by the size of your rock. For example, if the rock is a 2 inch rock, then, if could be an idea to keep all of your knots at a ¼ – ½ distance. You will need the knots close enough so that the rocks are held well but, if you use thicker materials for tying then, you’ll want the spacing to be wider. It will feel natural as you work, as long as you keep in mind the idea that you’re “creating a basket” that will encase your rock.
Now, pair each string with the piece to the side and tie the next level of knots.

Continue tying until the pattern reaches the length of the rock.
Tie off the top of the rock.

Tie top string to desired length for necklace.

Optional: If you’d like to embellish these rock necklaces, adding beads to the process is really pretty!
More Fun Summer Crafts for Kids
- DIY Bike License Plates
- Easy Pocket Necklaces
- Recycled Kaleidoscope Frisbees
- Pompom Fingerknit Belts
Pin It for Later