Raised salt painting is an all-time favorite kids’ art activity that is loved by all ages from toddlers on up. Glue, salt, and watercolors are all you need for this simple art activity, also known as salty watercolors.
Updated January 2025
Raised salt painting is awesome.
This simple process art activity is one of our top art activities for kids of all ages. If you haven’t tried raised salt painting yet, now’s your chance!
And best of all, it only requires a few, simple materials! You probably have them all at home right now. All you need is white glue, table salt, and watercolors!
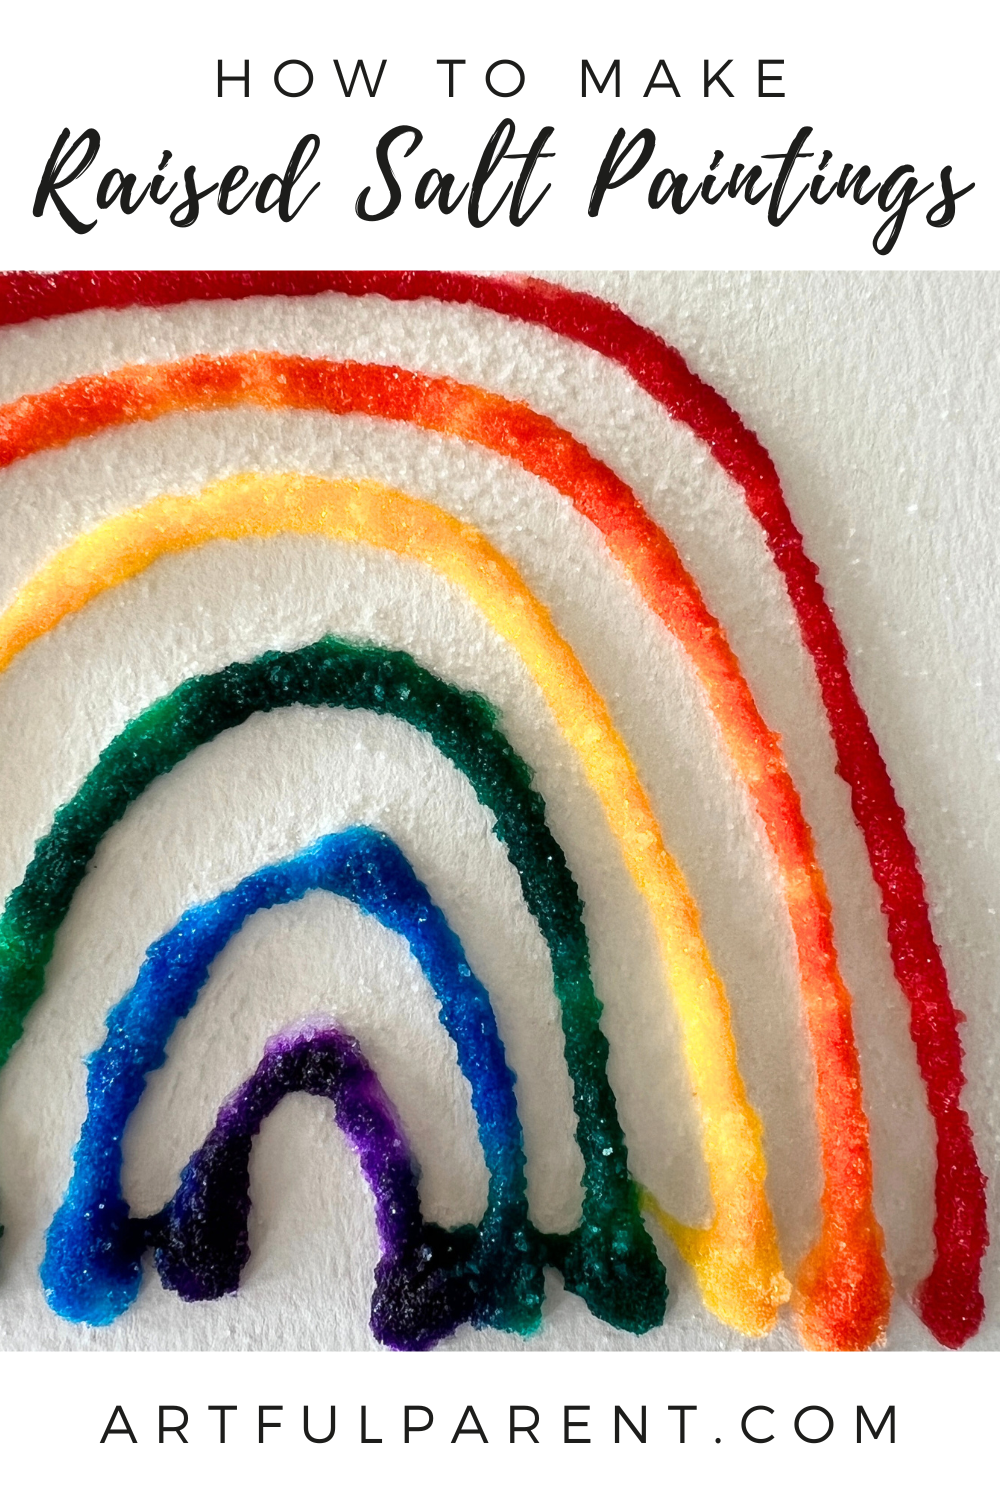
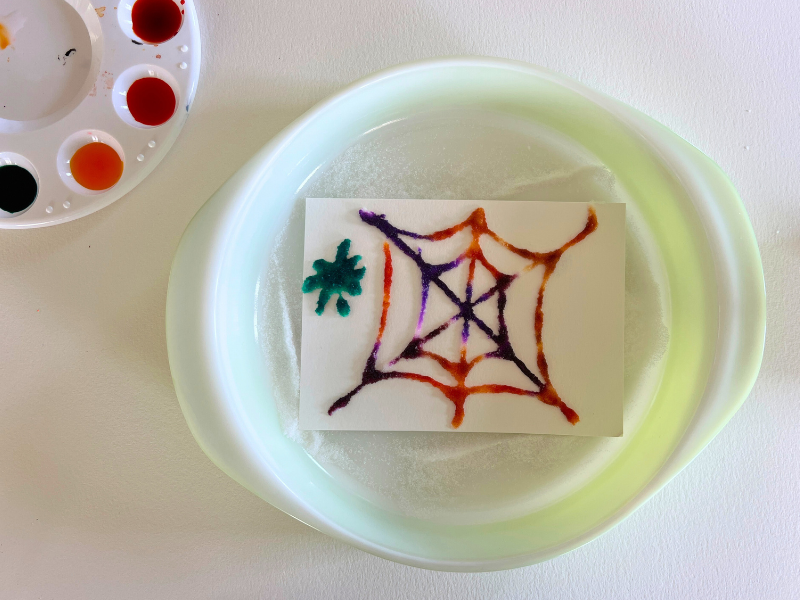
The best part about making raised salt paintings is that you can adjust it to whatever theme, holiday, or season you like! We love to make salty spiderwebs at Halloween and sparkly snowflakes in winter!
First here’s a video of the salt painting in action, then, below is the step-by-step tutorial for this fun art activity.
Raised Salt Paintings

MATERIALS
- Cardstock* or sturdy paper
- Bottle of white glue
- Table salt
- Shallow dish or tray to work on
- Liquid watercolors**
- Paint brushes
*Any sturdy art surface will do. We’ve done this with cardstock, poster board, cardboard, watercolor paper, paper plates, and foam core.
**Liquid watercolors are great for this activity. If you don’t have any, you can make your own by watering down food coloring or even using tempera cakes with a lot of water.
Time needed: 30 minutes
INSTRUCTIONS
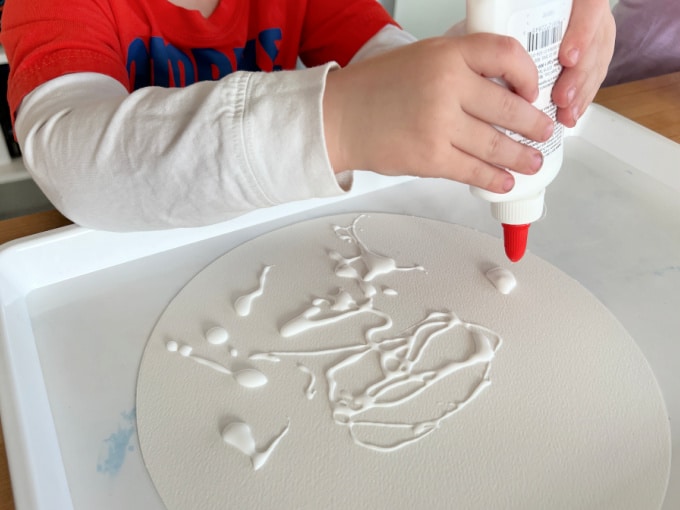
- Squeeze glue designs onto your card stock
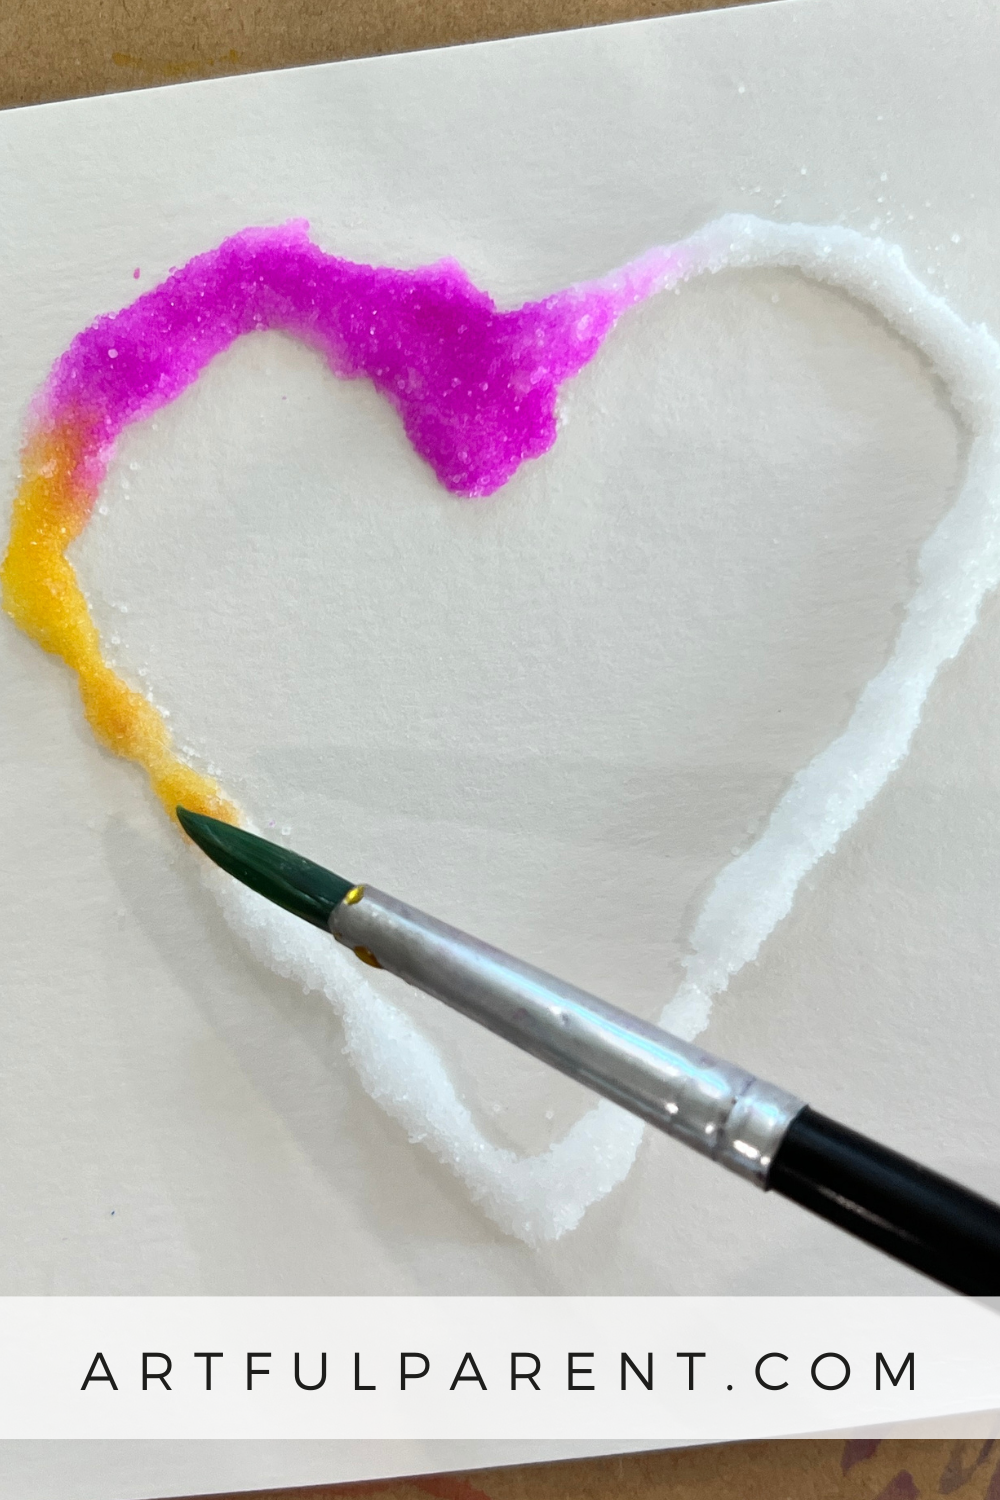
Use your glue to draw a design or picture onto your cardstock.
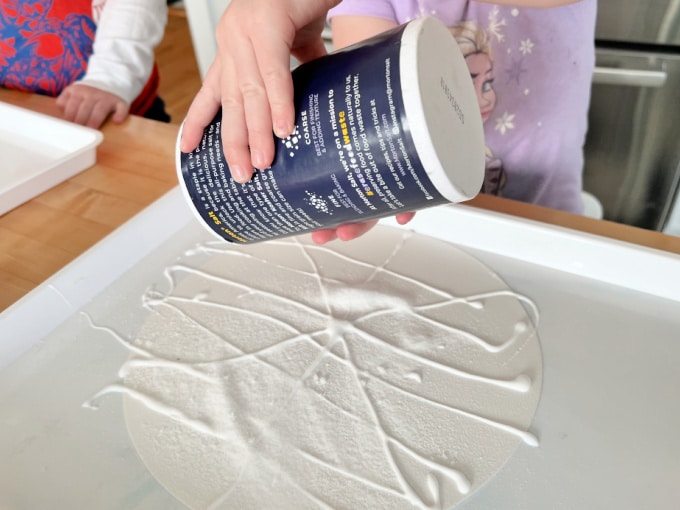
- Sprinkle with salt
Carefully sprinkle salt onto cardstock until the glue is thoroughly covered. Tip to let excess salt fall away. A baking dish or tray helps to contain the salt.
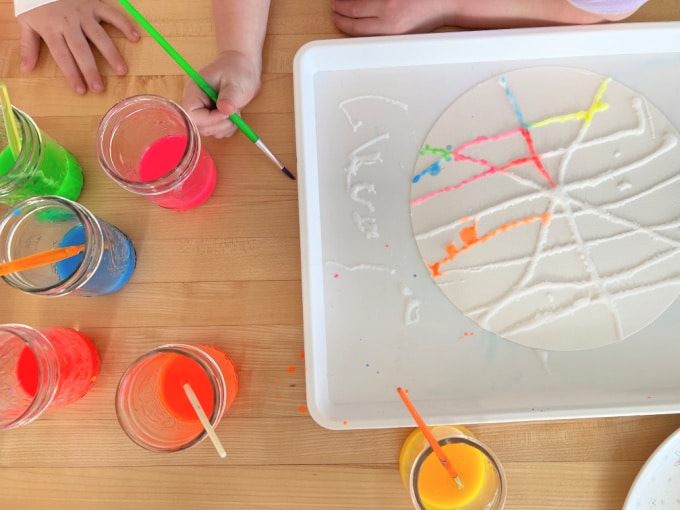
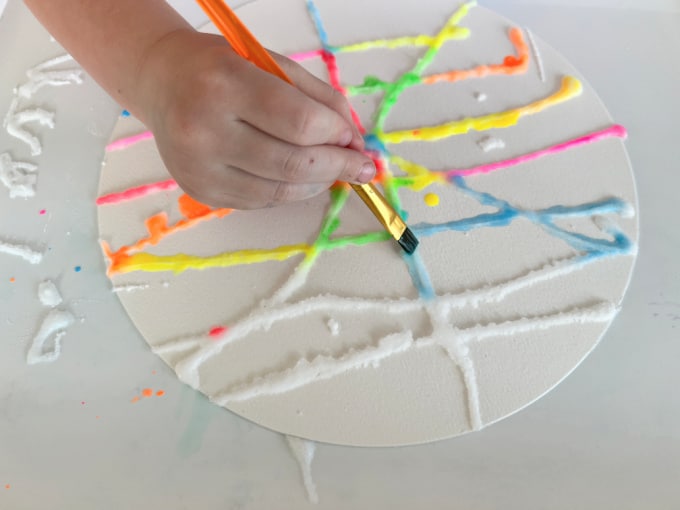
- Add color!
Dip your paint brush into liquid watercolor paint then gently touch to the salt-covered glue lines. Watch the paint magically travel in both directions!
- Let dry thoroughly
The drying process may take a day or two.
Once dry, display your new artwork!
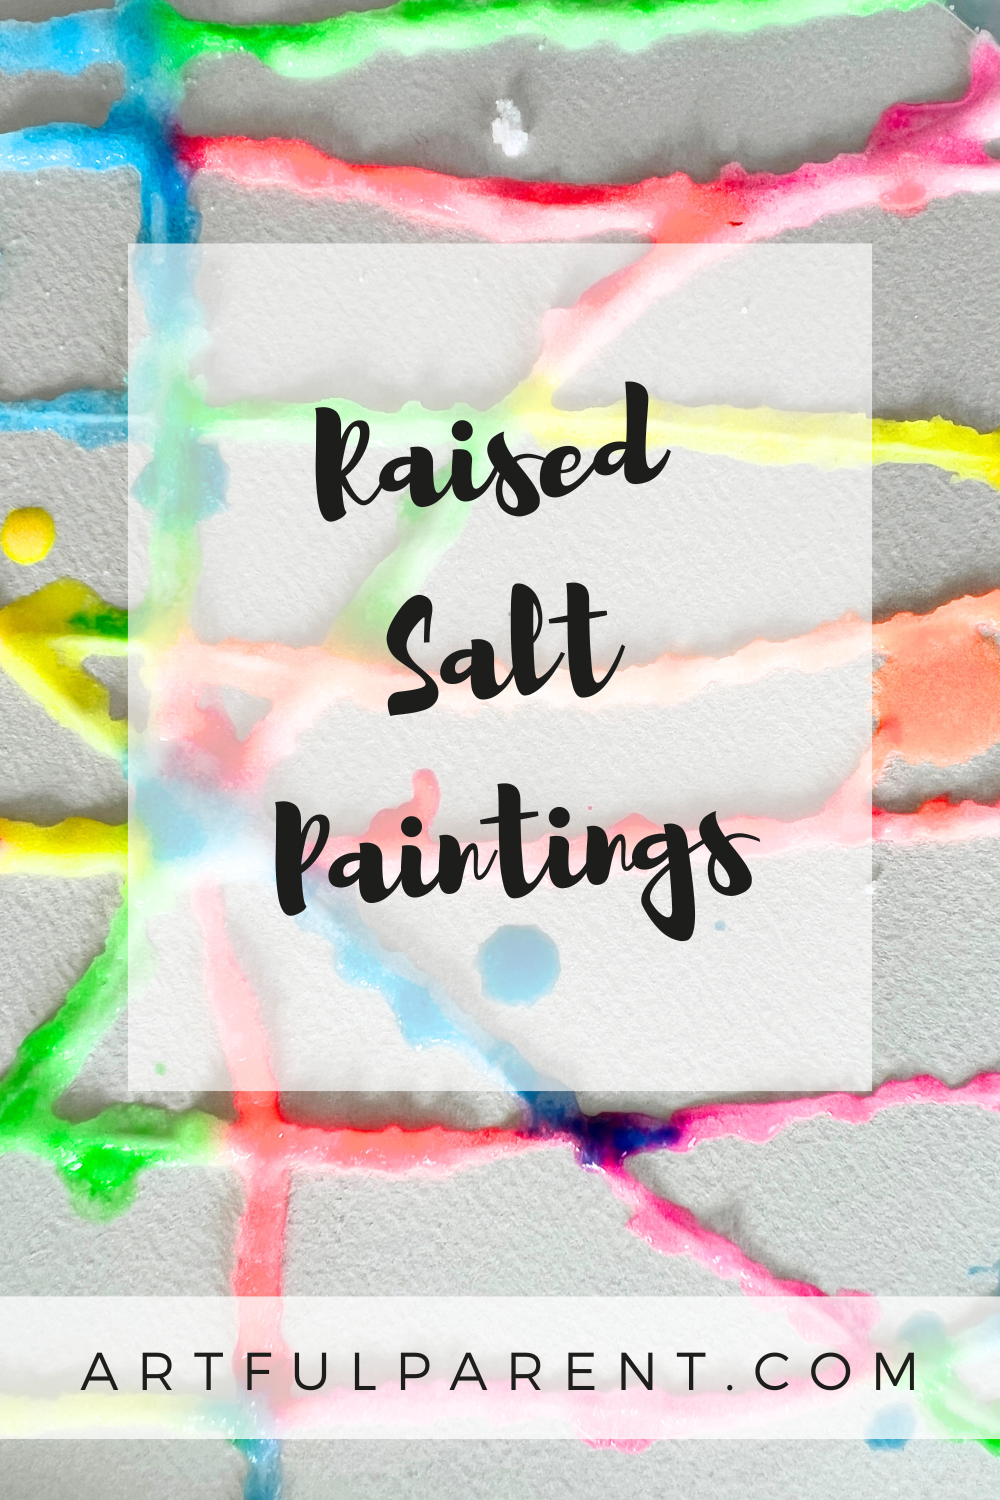
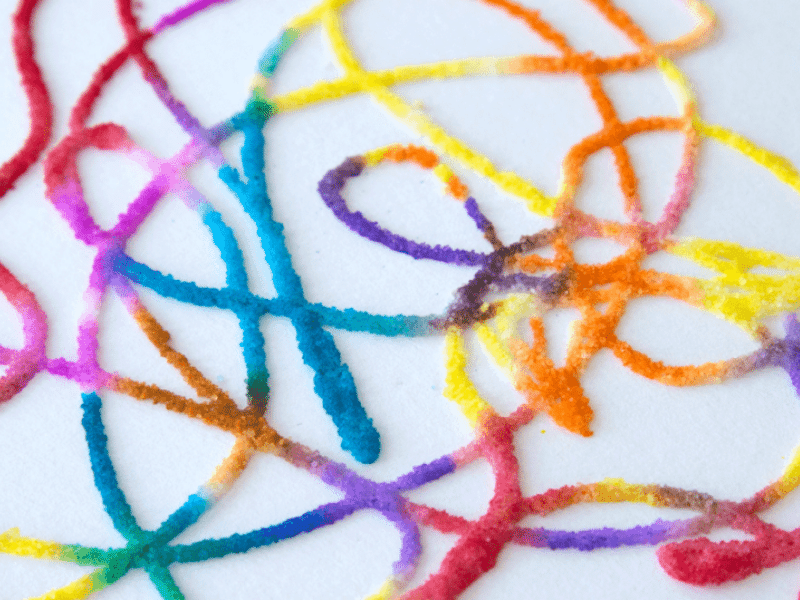
You can use this glue + salt + watercolor technique to make words, nature scenes, squiggles, faces, and more! And of course, we love to make designs for whatever holiday or season we’re celebrating!
How about you? Have you tried raised salt painting with your kids yet?
People Also Ask
- What do I need for raised salt painting? All you need for this fun process art activity is white glue, salt, thick paper, paint, and paintbrushes!
- What kind of paint do you use for raised salt painting? We like liquid watercolors but you could also use watered down food coloring, or watered down tempera paint.
More Painting Ideas for Kids
- 7 Watercolor Techniques for Kids
- How to Do Splatter Painting
- Watercolor Resist Art with Young Children
- Blow Painting with Straws
- 3 Space Watercolor Art Projects for Kids
- How to Do Pointillism Art
Want even more creative ideas?
Check out our Artful Parent Starter Pack!
Engage your kids through art and creativity with this printable booklet where you’ll find all of our best tips, tricks, and ideas for getting started on your artful parenting journey!
Pin It for Later