Make a fun ice cream craft perfect for summertime or a birthday party! This easy project is a great introduction to printmaking for kids. Original post by Samara Caughey, photo updates by the editorial team.
Updated June 2024
We have been printing ice cream cones with kids at the studio for years. It’s the perfect summertime craft, and even better for summertime birthday parties!
It can be collaborative, where each child makes an ice cream scoop and chooses their own color to add to each printed cone. Or it can be an individual project, where each child makes their own ice cream sundae!
We tried a slightly simpler version* and love the way the prints came out!
How to Make an Ice Cream Craft

MATERIALS
- White drawing paper
- Foam pieces (you can also cut up styrofoam trays, or even use cardboard)
- Pencil (a sharp one)
- 4 pieces of plexi-glass for inking plates. (You can use plastic placemats or put ink right onto an oil cloth tablecloth.)
- Printing ink
- Brayer
*We really wanted to try this activity, but didn’t have all the materials, so instead of foam, we used cardboard templates. We used tempera paint instead of printing ink, and therefore didn’t need the inking plates or brayer. Feel free to try either method!
INSTRUCTIONS
- Prepare materials
Tape down the inking plates onto a table covered with paper or an oil cloth so the pieces of plexi-glass (or placemats) don’t move when rolling out the ink.
Cut the foam into circular shapes and also cut one piece of foam shaped like the cone. - Create printing plate
I start by talking a bit about patterns and what kind of things might be in an ice cream scoop, like sprinkles, chips, gummy worms, etc.
Then have the kids draw into the foam, making sure that you can feel the impressions of the pencil. You can also draw the cone pattern onto the cone shaped foam.
You can also use cardboard like we did, but you can’t make patterns or impressions in it.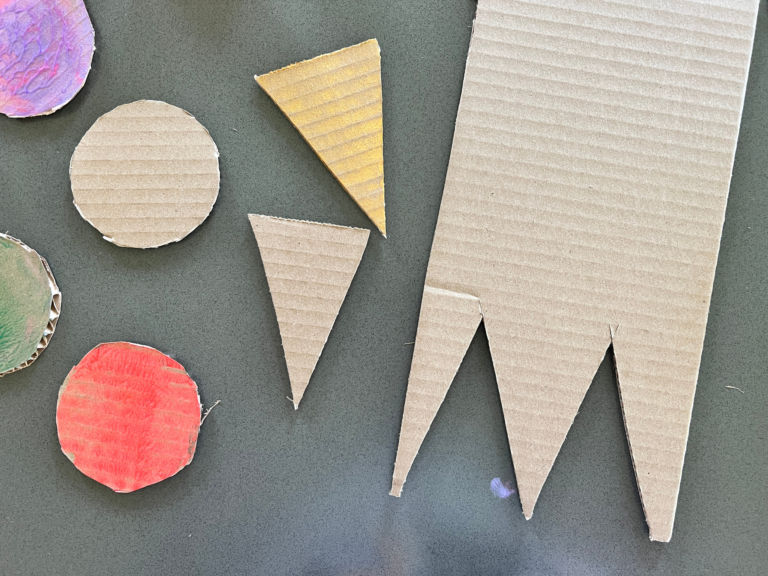
- Add ink or paint
Next, decide on your ice cream flavors. You can have as many as you would like! When mixing the ice cream colors, you can add white to make the colors a bit more pastel.
Once all the colors are mixed on the plates, it’s time for the kids to roll or spread out the ink.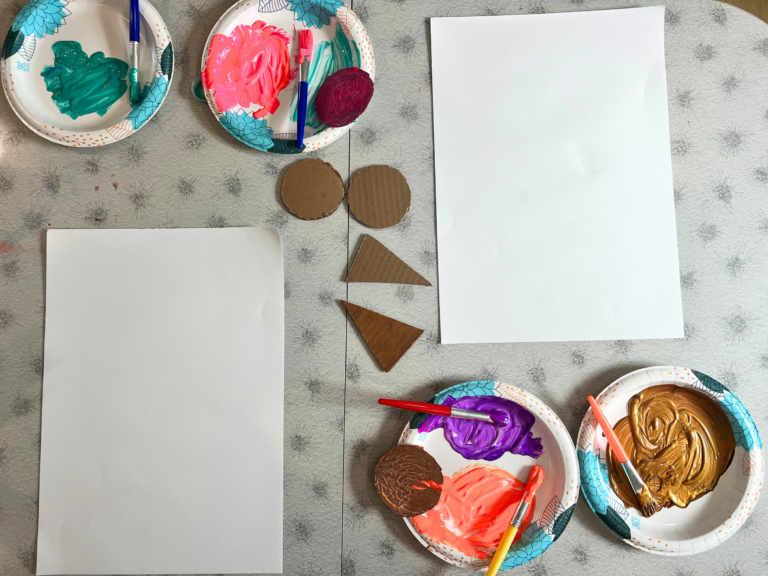
- Make your prints!
To make a print:
Using a brayer or brush, roll the ink on the inking plate and then press the foam ice cream or cone into the ink or paint.
Take the inked ice cream piece and place it face down like a stamp on the paper.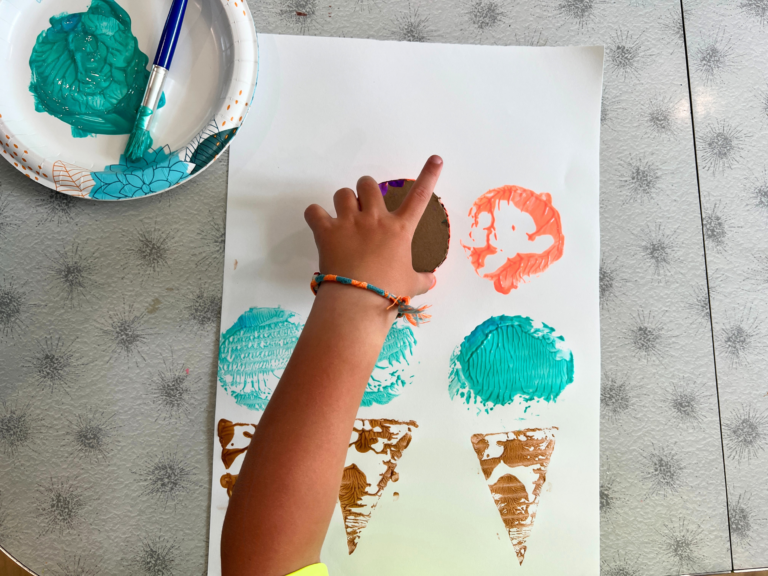
Carefully press the foam onto the paper (you can use a clean brayer or just smooth all over with your hands.)
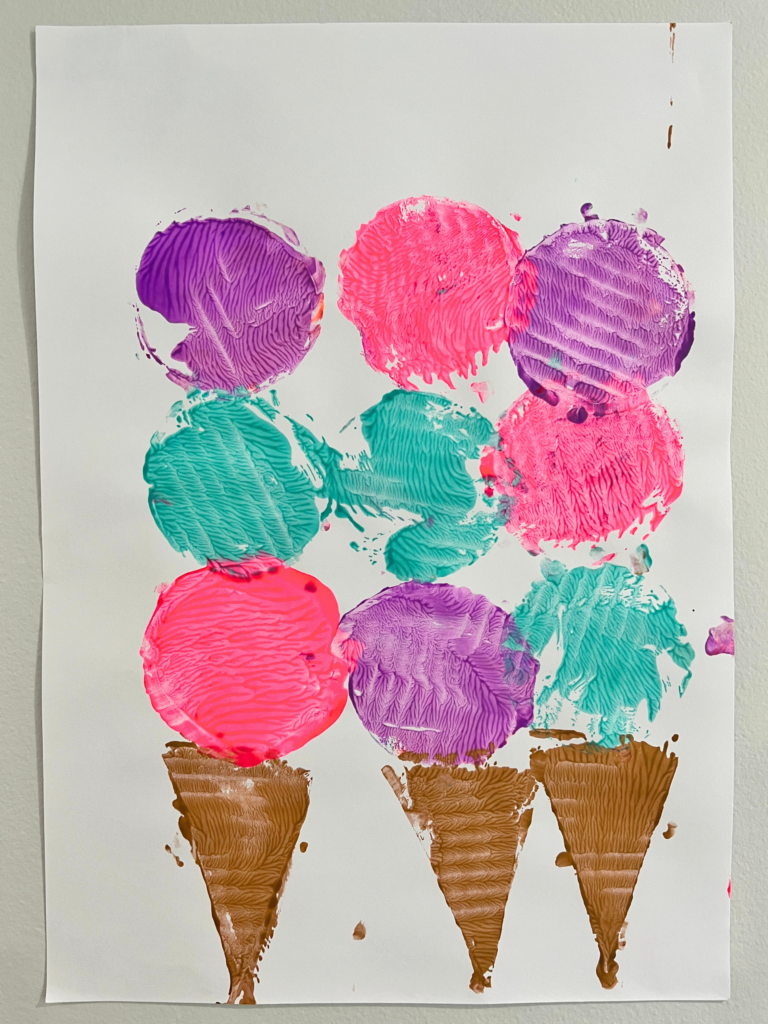
Lift off the ice cream piece to reveal your print!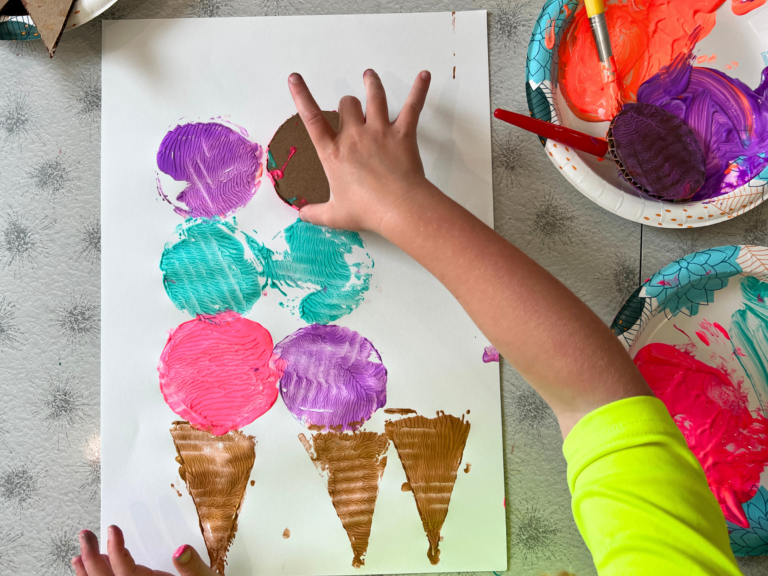
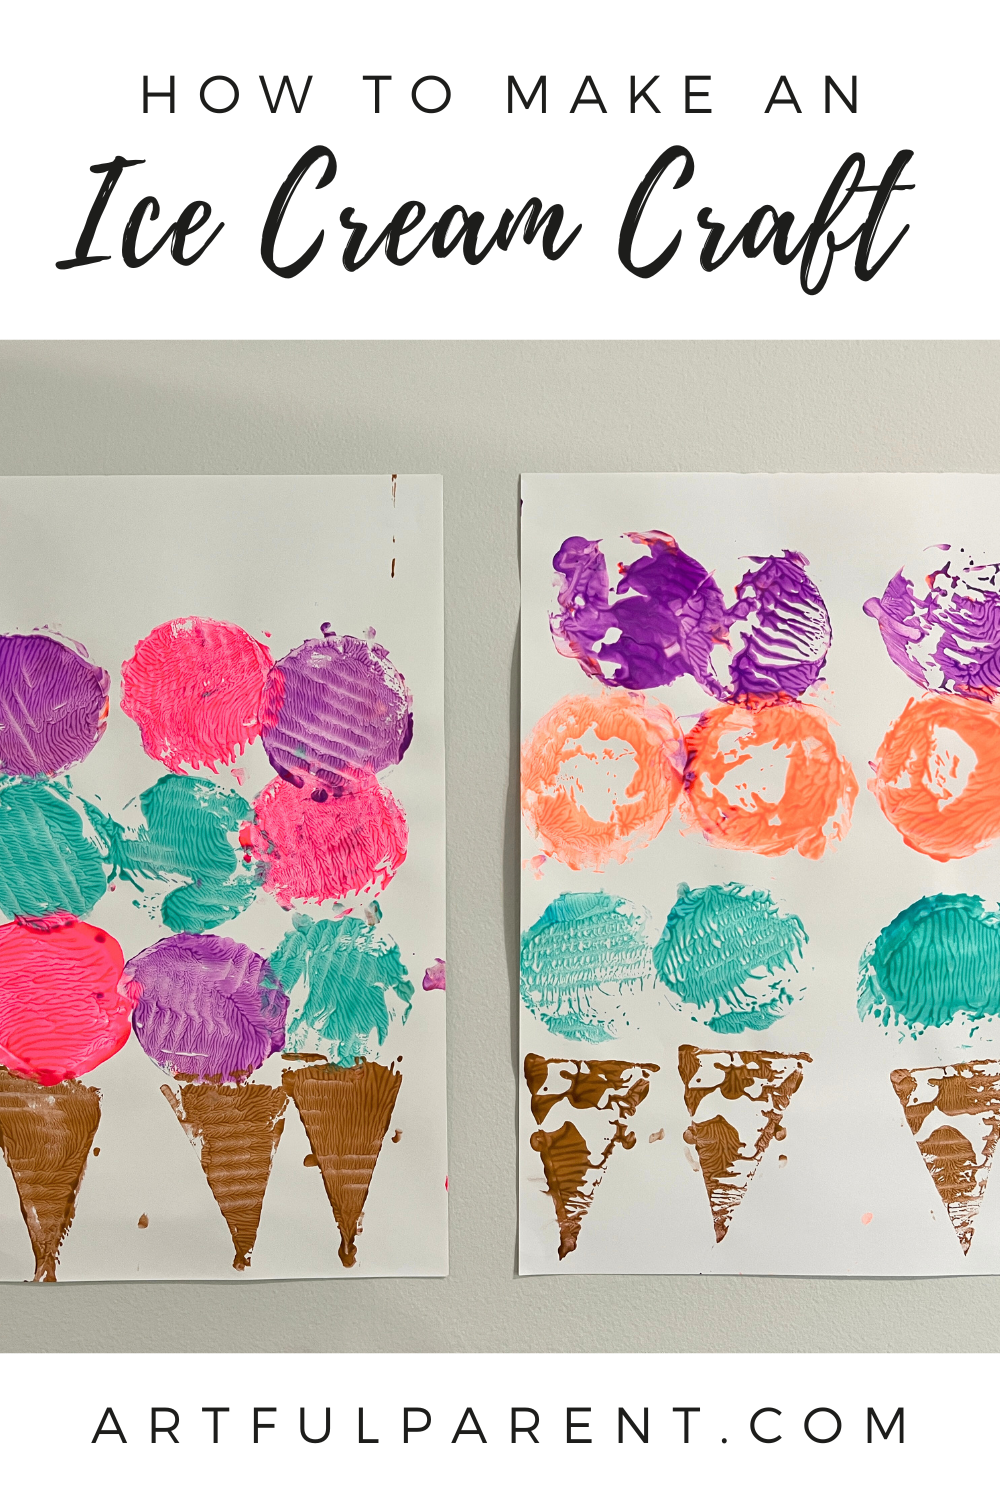
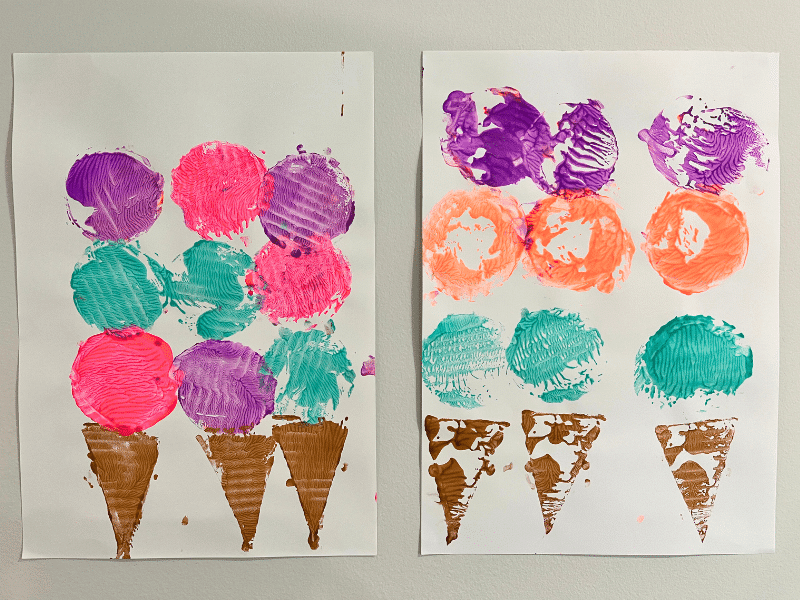
Notice how each printed scoop has its own texture as well as color. This creates a more dynamic and whimsical final print.
Enjoy your yummy-looking prints!
More Summer Crafts for Kids
- 11 Ways to Have a Creative Summer with Kids
- 12 Best Summer Art Ideas for Kids
- 100+ Summer Crafts & Activities
- 10 Ocean Crafts for Kids
- How to Do Pizza Printmaking for Kids
- How to Paint with Cars
Pin It for Later