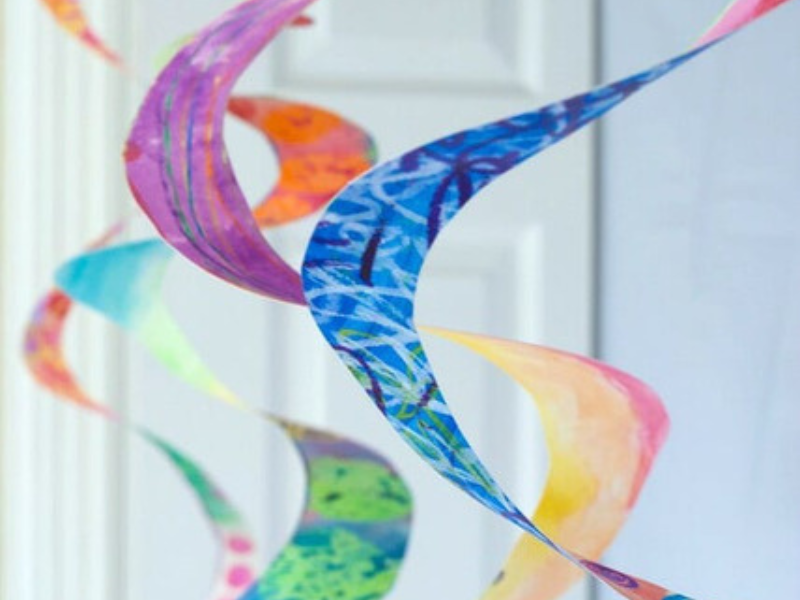
Paper twirlers are easy to make and mesmerizing to watch! Here’s how to make your own paper twirlers to hang around the house.
Updated August 2024
You’ve probably made spiral paper twirlers before, either as a kid or with your own kids.
I have done both, but it’s such an easy and satisfying activity with mesmerizing results that it’s worth doing again.
We combined the simple cut paper activity with the super-saturated color of a crayon and watercolor resist art. Oh, and we did this on a big scale, but you can do this small scale if you like, either with paper plates or smaller circles of posterboard.
This watercolor resist painting technique makes easy paper twirlers extra fun and extra beautiful!
How to Make Beautiful Paper Twirlers

MATERIALS
- White poster board*
- Crayons (we used these crayon sticks)
- Watercolor paint
- Scissors
- Brush
- Hole punch
- Yarn or string
*I cut a couple of circles each out of large pieces of white poster board, but you could do this on a smaller scale if you like with paper plates, watercolor paper, or card stock.
INSTRUCTIONS
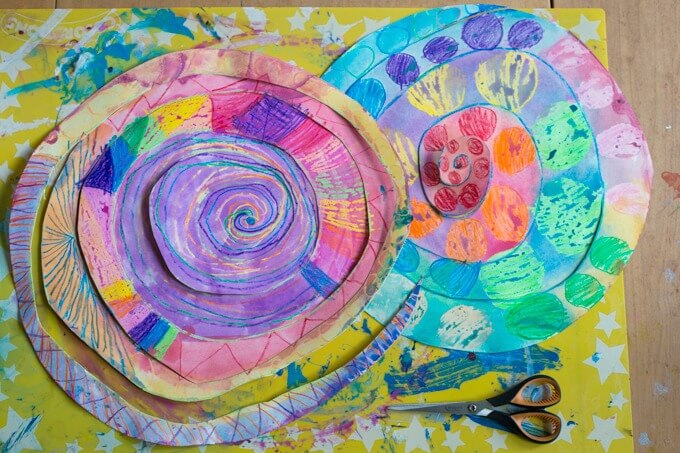
- Cut your circles out of your poster board
You can trace a large mixing bowl for a perfect circle or just wing it.
- Draw your spiral
Start from one point on the perimeter of the circle and draw your spiral all the way to the center of the circle (but don’t cut it yet).
Tip: Make the spiral relatively thick, so the twirler can be hung up.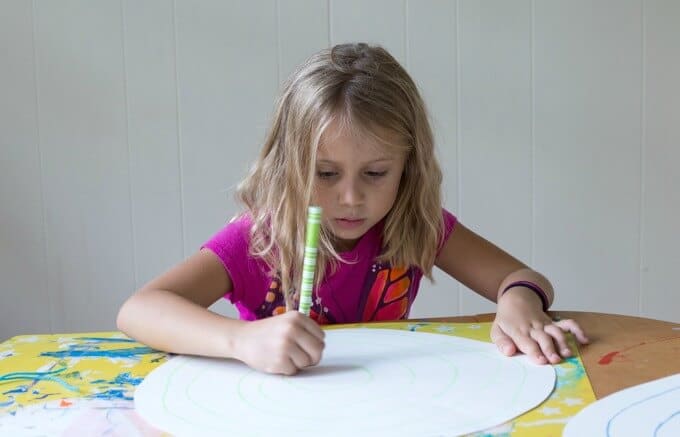
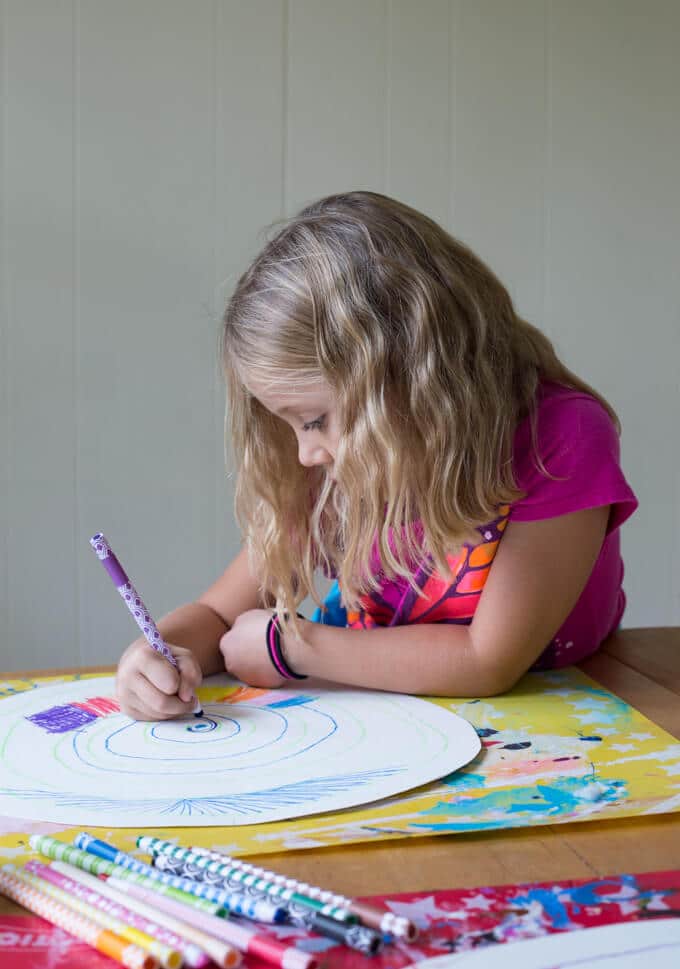
- Decorate your spiral with crayon drawings
You can do any designs. But make sure to use lots of color! You could stick to seasonal colors if you like or decorate the spiral like a snake, but we just went for lots of color and design.
- Paint with watercolors
Paint over the crayon drawings with watercolor paint. Let dry.
Turn the circle over and paint the reverse, too, as you’ll see both sides as it spirals through the air. Let dry.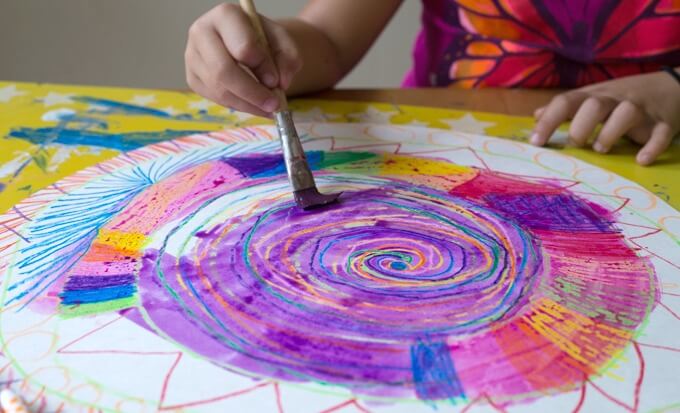
- Cut your twirler
Cut out your twirler along the spiral line. Punch a hole in the center and tie a string there for hanging.

Finally, hang your new color paper twirlers! You can hang these in a window or near a fan or on the porch or anywhere you’d like!
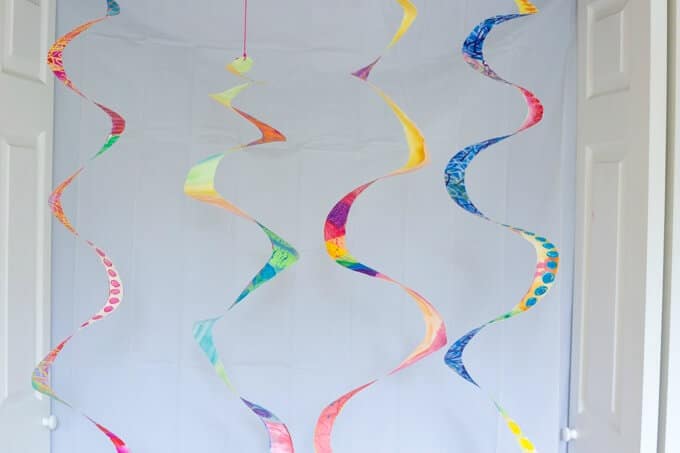
Admire and watch the paper spirals twirl in the wind or by your puffs of breath. It’s mesmerizing to watch!
How about you? Have you made paper twirlers before?
More Art Activities for Kids
- 7 Fun Painting Ideas for Kids to Try
- 14 Easy Dot Art Ideas for Kids
- 11 Fun Watercolor Ideas for Kids
Pin It for Later
