Try these two salt dough ornament ideas for Christmas. These lacy hole punched ornaments and beaded suncatcher versions are beautiful!
I had some salt dough left over (wrapped and refrigerated) from our stamped salt dough extravaganza and on a whim invited a friend over for some salt dough fun. She wanted to try stamping the dough, while I tried a couple of new salt dough ornament ideas I’ve had in mind: creating a lacy effect by punching holes in the dough with a straw, and using beads to make stained glass ornaments.
Our toddlers wove in and out of the action with playing, snacking, fighting over toys, and working with the salt dough themselves.
I’m including my salt dough recipe at the end of the post, in case you want to give it a try! And for even more craft and ornament ideas, check out my post of 11 Salt Dough Crafts Kids Can Make!
Two New Salt Dough Ornament Ideas
MATERIALS:
- Salt Dough (see my recipe below)
- Parchment paper
- Straws
- Glass beads
INSTRUCTIONS:
- For Lacy Punched Salt Dough Ornaments
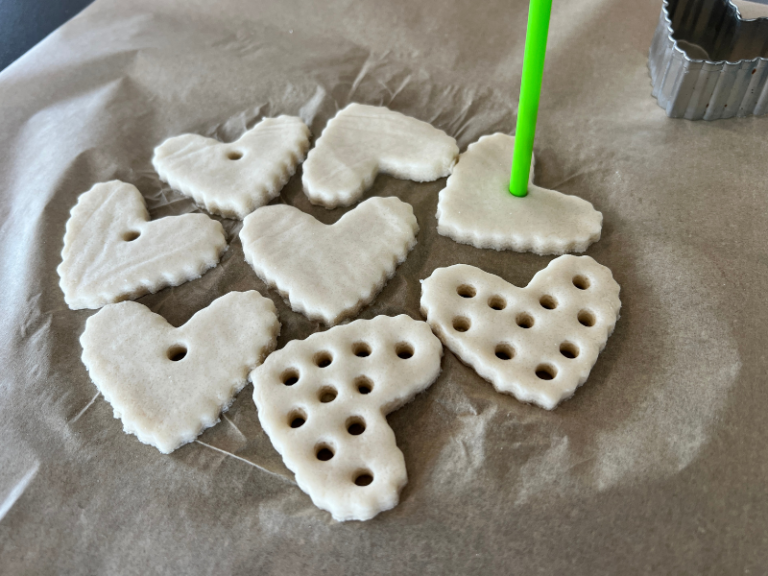
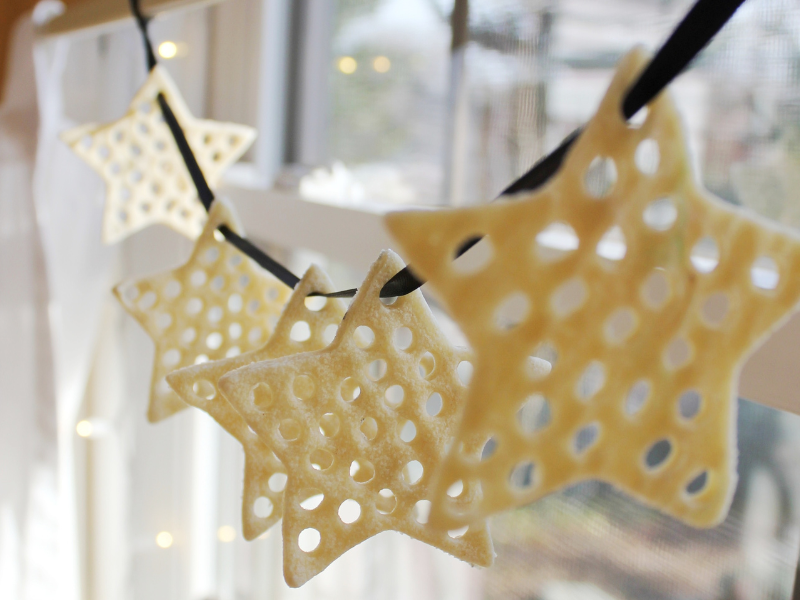
The first idea I wanted to try involved punching holes in the salt dough ornaments with a straw to create a lacy effect.
We usually use straws to punch a single hole in the top for hanging; this time I punched holes all over.
After a while the hole end gets too gunked up to use so I would turn the straw piece upside down, use the other side, then toss it and grab another. (I cut the straws into thirds first to reduce waste.) - Beaded Salt Dough Ornaments
I also tried beaded salt dough ornaments, pressing small glass beads directly into the uncooked dough.
I pressed them pretty far in, hoping that they would act kind of like stained glass and allow light to shine through the bead.
Daphne made a few beaded ornaments, too. She loves poking beads in dough and has done it a few times in the past with playdough. - Bake the Ornaments
Bake in a 275F oven for 2-3 hours or until the salt dough is hard, but not browned. Let cool.
Here is my cookie sheet of punched and beaded ornaments (with a couple of them combining the two techniques) ready for the oven.
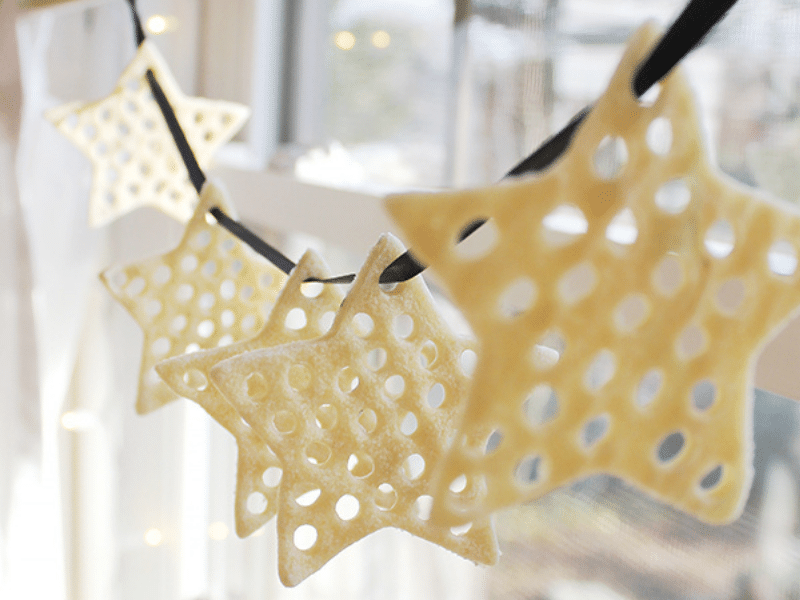
I LOVE the lacy salt dough stars! They worked so well and are quite sturdy despite being only a 1/4 inch thick and punched full of holes.
But I think I love the beaded stained glass salt dough ornaments even more, especially with the sun shining through them. This sweet one was made by Daphne. Love, love, love!
How to Make Salt Dough + Salt Dough Recipe
I’m including my favorite salt dough recipe with the basic instructions because I know you’ll want to get right to making your own salt dough ornaments after seeing these two beautiful ideas!
PrintMy Favorite Salt Dough Recipe
- Prep Time: 15 minutes
- Cook Time: 3 hours
- Total Time: 3 hours 15 minutes
- Category: crafts
- Cuisine: n/a
Description
We’ve tried so many salt dough crafts and made lots of variations of salt dough ornaments over the years. Here’s my favorite salt dough recipe with instructions to get you started.
Ingredients
- 4 cups flour
- 1 cup salt
- 1 1/2 cups cold water (+ extra 1/4 cup of water if needed)
Instructions
- Mix flour with salt then stir in water. If the dough doesn’t come together, add another 1/4 cup of water or so.
- Turn out the salt dough onto a countertop and work together with your hands until evenly mixed.
- Store in a plastic bag in the fridge until ready to use.
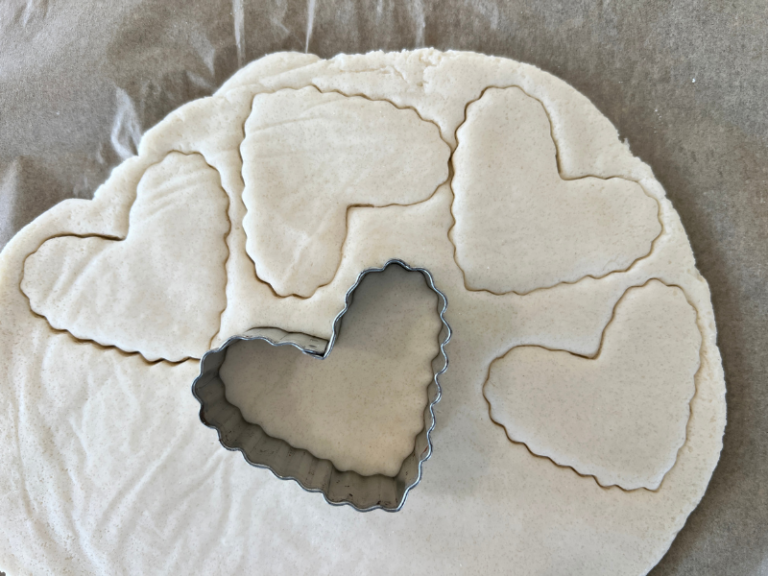
- Place a fist-size piece of dough on a sheet of parchment paper and cover with a second sheet of parchment paper. Roll dough out with a rolling pin to an 1/8 – 1/4 inch thick.
- Use cookie cutters to cut out the desired shapes. Pull away the extra dough from around the shapes with the cookie cutters still in place.
- Use the end of a drinking straw, a skewer, or a chopstick to poke a hole at the top of each ornament for hanging.
- If you plan to decorate the ornaments, do that step now. I recommend: a.) stamps and a stamp pad, b.) poking a pattern of holes in the dough with the end of a straw, c.) poking glass beads into the dough.
- Gently move the sheet of parchment paper with salt dough ornaments onto a cookie sheet at bake in a 275F oven for 2-3 hours or until the salt dough is hard, but not browned. Let cool.
- (Optional) Add a coat of Mod Podge or some paint (we like BioColor paint for these) and glitter.
- Add a ribbon through the hole and hang in the window or on the tree!
Keywords: salt dough ornaments
More Salt Dough Ornament Ideas
Pin It for Later
30 Comments
Rashmie @ MommyLabs
December 15, 2011 at 10:56 amGosh, these are totally beautiful. So creative.
I’d also want to know – you baked the ornaments with the beads on?
molly
December 15, 2011 at 11:41 amI LOVE the stained glass ornaments. Reminds me of something I saw on Pinterest where someone had drilled holes in a fence and put colorful marbles. Great work. :)
molly
December 15, 2011 at 11:43 amAlso, I wonder if you could use something like Pearler beads (sp?) that are supposed to be melted anyway. I wonder if the length of baking would be too long? Thinking as I type…
molly
December 15, 2011 at 2:10 pmI just tried to post a reply and it vanished so if this comes up twice please delete!
You are probably right, it would be a mess, I have just always found perler beads kind of boring because they only go in certain shapes — I want to melt a big mess in the oven and see what happens. It can’t be a good idea though, eh? :)
(PS, some of the beads are transparent — kind of sparkly, some glow in the dark too. We have a bucket of about 6000 of them and I’m looking for other fun uses. Maybe other readers have some ideas?)
Two Chicks and a Hen
December 15, 2011 at 10:41 amWow–what a great variation on these. I love it! Can you just clarify–you did actually bake the beads? And there were no problems? I’m totally pinning these right now.
Jean Van't Hul
December 15, 2011 at 11:13 amYes! I baked the ornaments with the beads in them. They are glass beads and the oven temp was low. I wouldn’t try this with plastic beads.
Jean Van't Hul
December 15, 2011 at 11:14 amThanks! Yes. The beads were added before I baked the ornaments.
Carin
December 15, 2011 at 5:27 pmThese look like so much fun! Love, love, love!
Jean Van't Hul
December 15, 2011 at 12:47 pmHaven’t heard of Pearler beads. What are they?
Jean Van't Hul
December 15, 2011 at 12:49 pmJust looked them up. The plastic perler beads aren’t transparent like the glass beads so wouldn’t have the same effect. Also it looks like you just swipe an iron over them quickly to fuse them together. 3 or more hours in an oven might not be a good idea.
Jean Van't Hul
December 15, 2011 at 3:13 pmWell, hey. if you decide to try the oven idea (or anything else fun) with the perler beads, let me know how it goes.
Sheau
December 15, 2011 at 4:52 pmThese look so colorful and fun!
Rachelle | TinkerLab
December 16, 2011 at 1:25 amWhen I made salt dough ornaments with my 3 year old, she unintentionally made lacy ornaments when the single hole intended for hanging turned into a hole punching party. Half the ornaments got the punched hole treatment, and those ornaments are my favorites. Yours came out so pretty — love the glass bead affect.
[email protected]
December 16, 2011 at 2:01 amThese are just gorgeous, Im thinking we will make salt dough ornaments tomorrow. Last night we finished up some candy cane play dough gifts which my children loved (and today other children loved receiving), thanks for the inspiration! You can see them here: https://thegreendragonfly.wordpress.com/2011/12/16/candy-cane-play-dough/
Ive just recently started subscribing to your blog and I love it- you are very talented!!!
Luisa
December 17, 2011 at 4:04 pmAwesome! I have 2 kids on my lap that want to try this now! But I think I’ll till tomorrow for this activity sounds fun :)
Melissa @ the chocolate muffin tree
December 20, 2011 at 5:56 pmThese are gorgeous! Pinning this for the future!
Quincy
December 21, 2011 at 10:48 amI used the perler beads just as an experiment and they did fine in the oven. FYI.
Quincy
December 21, 2011 at 10:51 amSorry, I meant the regular plastic beads not perler. Need more coffee.
make handmade
December 26, 2011 at 3:09 amSo cute! i love it very much. thanks for sharing.
Amanda
December 29, 2011 at 3:18 amI’ve never thought of this before, what a great idea. Were they very fragile after they dried?
Blessings,
Amanda
[email protected]
January 4, 2012 at 9:23 amPlastics can let off harmfull gases when heated, I wouldn’t advise putting perler beads in the oven for too long.
Melaniepllockhart
December 2, 2012 at 2:49 pmWhat size beads did you use and where could I find them?
Shyla
May 10, 2013 at 1:13 pmHow long and at what temp do you bake these?
Jo Ros
June 27, 2013 at 5:45 amThose are beautiful! I cannot wait to try this..and the great thing is I have everything on hand..nothing to buy. I particularly love the black ribbon..looks fab…Thank you!
Cassi
December 5, 2013 at 9:39 pmI love both versions! I’ll be sharing soon on The Crafty Crow :)
h.
December 7, 2013 at 3:02 pmSimply beautiful, what a great idea. Thank you for sharing.
saraaustin
December 8, 2013 at 1:29 pmThese are beautiful! Where did you purchase the glass pony beads? I’m tempted to try these with the regular plastic ones, but glass would be even nicer to use for parent gifts.
Laura
December 16, 2013 at 9:34 pmyou could maybe use candy too in there? hard candy? gorgeous, I think I might try it.
Chris
December 27, 2013 at 6:04 pmWhat are the glass beads called? What size? Where can I get them? (New to all of this…) Thank you for your wonderful blog!
Melissa
October 21, 2017 at 8:45 amI know this is late, but I thought about the plastic beads in the oven and came up with some things for people to think about. First, do what you are comfortable with! That said, when I first started doing salt dough figurines, etc, we always just let them air dry. It might take a week or so, but it works. They do NOT have to be baked. You might want to turn them over after they are firm enough to do so–the underside will still be damp and will dry sooner when exposed to air.
A game changer for me as a preschool teacher was when, somewhere along the line, I read that you can bake saltdough at a super-low (for an oven) temp, like 175-200 degrees. (Great! I can speed up the drying time on class projects! A child was gone for 2 weeks and came back just before Mother’s Day? I’ve got it!) Back to the topic of heated plastic in the oven. Well, I live in Phoenix. The inside of our cars gets close to that hot. (110 degrees plus 1/2 hour equals 145 degrees). I suspect the beads would be just fine if baked on the lowest setting. Better yet, turn the oven off after it reaches tempetature. However, if you start to smell plastic, I would take them out and air-dry them.