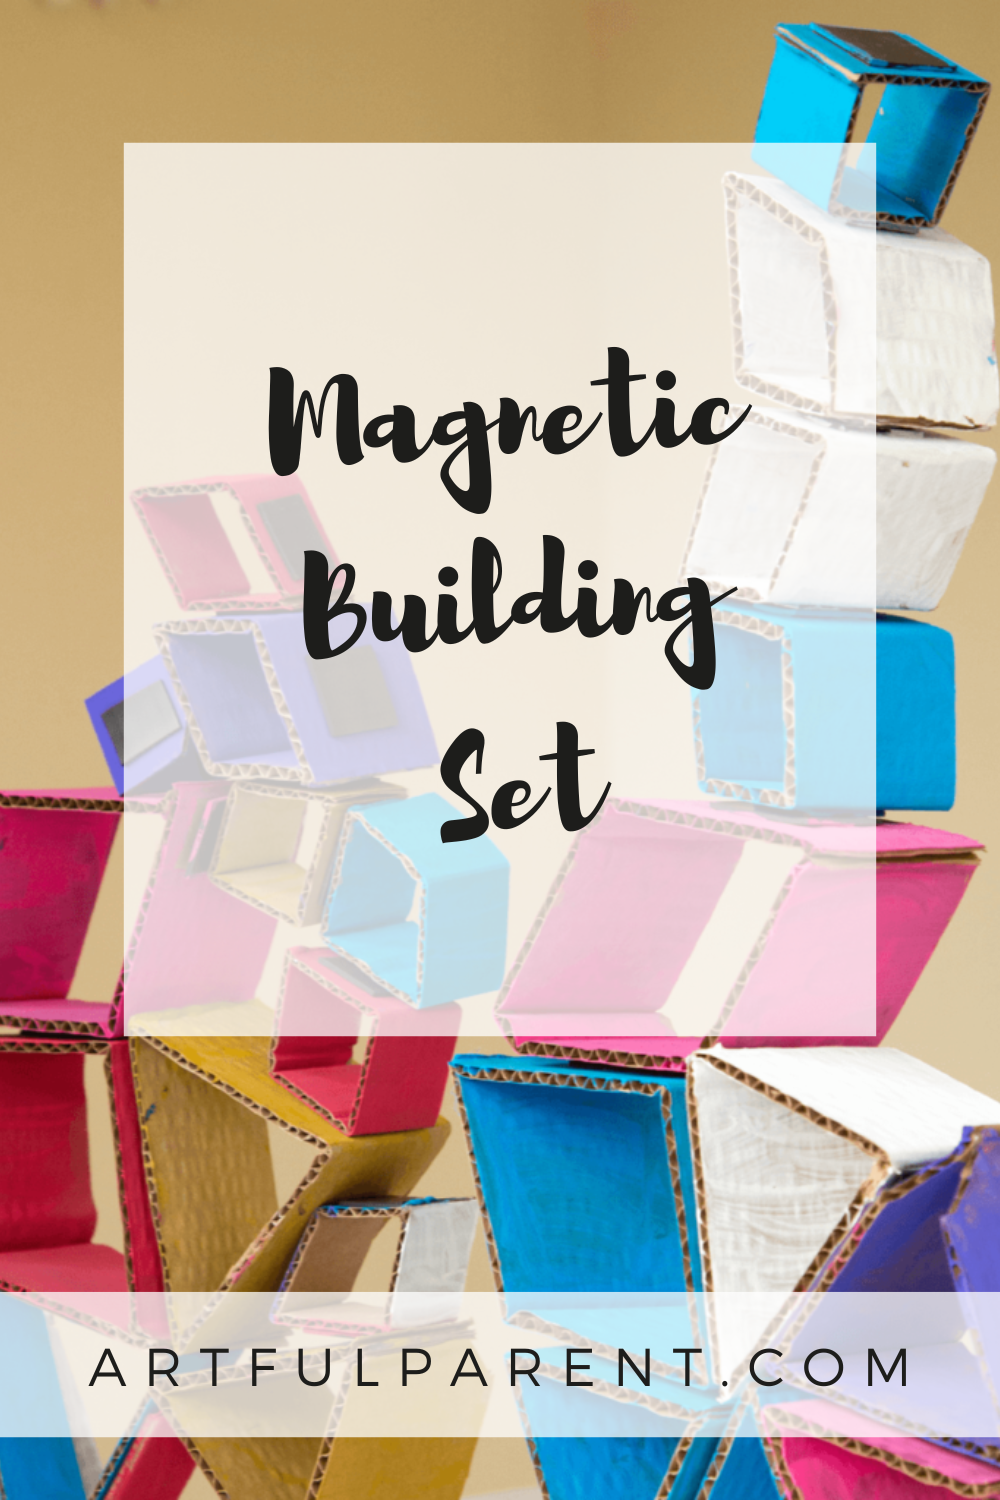
Make your own magnetic building set for kids using cardboard. These sculptural magnetic shapes are easy to make, fun to play with, and cheap!
Updated March 2025
*A big thank you to Sylvan Learning for sponsoring this post; as always, all opinions expressed are my own.
We have a new magnetic building set in the house and I am ridiculously excited about it.
It’s awesome. Seriously.
Want to hear all the reasons why?
- The shapes are fun to play with and very creative.
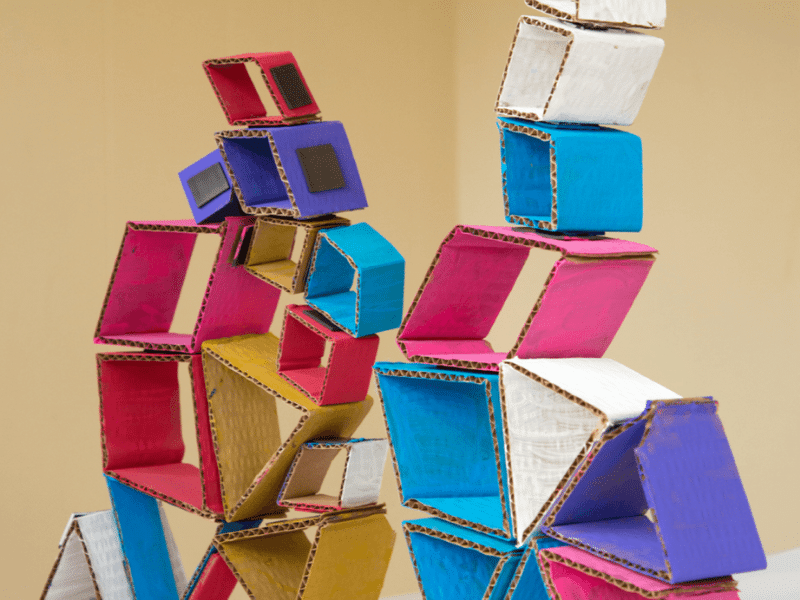
- You can build modern abstract sculptures in all kinds of fun configurations.
- You can explore magnetic properties and build in ways that are not possible with regular building blocks. In fact, because of the lightweight cardboard, you can build in ways that are not possible even with other magnetic building sets.
- All we used were cardboard, some glue, and a coil of magnetic tape. Even the paint is optional as the magnetic shapes look awesome with or without it.
- This activity does a great job of exposing your kids to STEM. Incorporating STEM into fun activities like this magnetic building kit is a great way to start introducing your kids to STEM!
I know you’re going to want to make a set for yourselves, so I’ll show you how, with step-by-step instructions.
Make Your Own Magnetic Building Set with Cardboard

MATERIALS
- Recycled corrugated cardboard
- Utility knife
- Hot glue gun
- Paint (optional)
- Magnetic tape, adhesive
- Scissors
INSTRUCTIONS
- Cut your 3D cardboard shapes
Use a utility knife to cut cardboard strips against the grain. (You want the corrugation lines to run across the width of the cardboard strip.) I cut my cardboard pieces about 2 inches by 10-12 inches.
Fold your cardboard strip into your desired shape, such as a triangle, square, rectangle, or trapezoid. - Glue your shapes together
Now that you have your fold marks, run a line of hot glue along one edge of the cardboard strip, then fold the cardboard back into shape, holding the two ends together for 30 seconds or so until the glue hardens.
Repeat with more cardboard strips and shapes. Make as many as you like! You can experiment with different shapes and sizes, too. - Add your magnetic tape
Apply your magnetic tape to the cardboard shapes. To do so, cut a section of the magnetic tape (perhaps 1-2 inches long depending on the size of the cardboard piece you’re applying it to). Bend the magnetic tape against its natural curvature to flatten it out, then remove the paper backing, and press the adhesive side to one side of the cardboard shape. You can add the magnet strips to one or all sides of the cardboard shapes as desired.
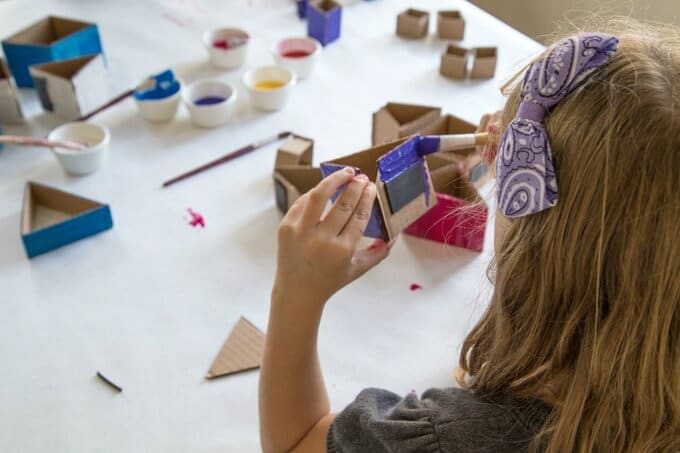
Note :: If you know you want your magnetic building set to be colored, I suggest painting the cardboard shapes first, before applying the tape. We were figuring things out as we went and did this a little backwards.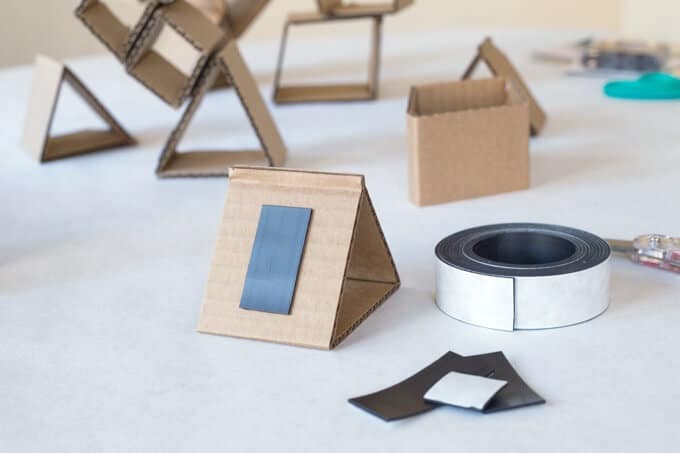
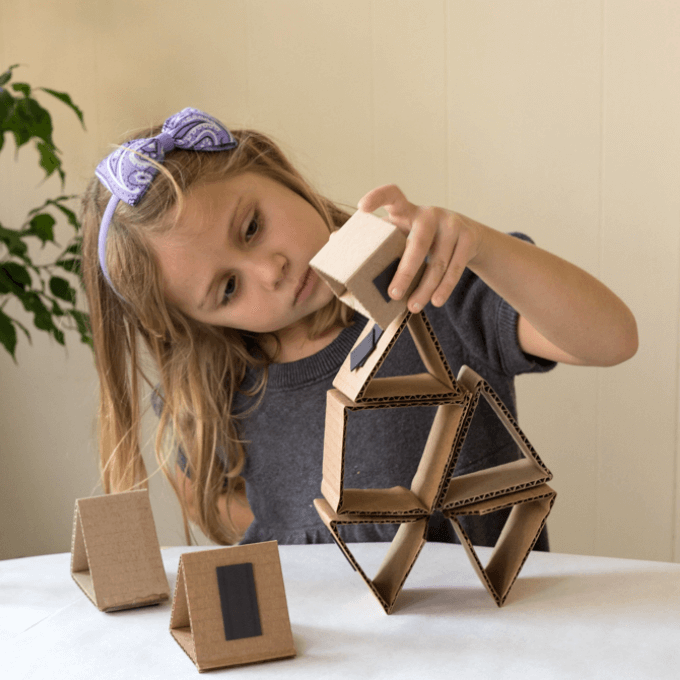
- Try them out!
Now, try out your new magnetic building blocks!
We especially liked how we could build at an angle instead of just vertically. Because of the lightweight nature of the cardboard and the 3D shapes, we could build quite differently with this magnetic building set than with our magnetic tiles.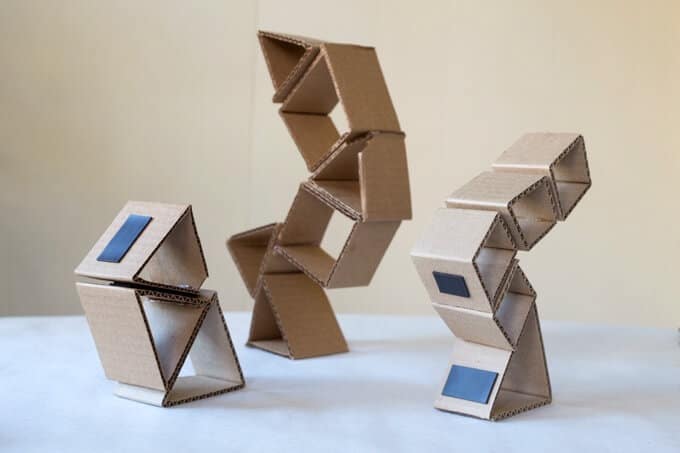
Don’t you just love how sculptural this looks?! I actually really like the plain cardboard look of these, but we voted to paint our shapes. The painted ones look even better! - Paint your cardboard building blocks
We used tempera paint, but acrylics or BioColors would work too.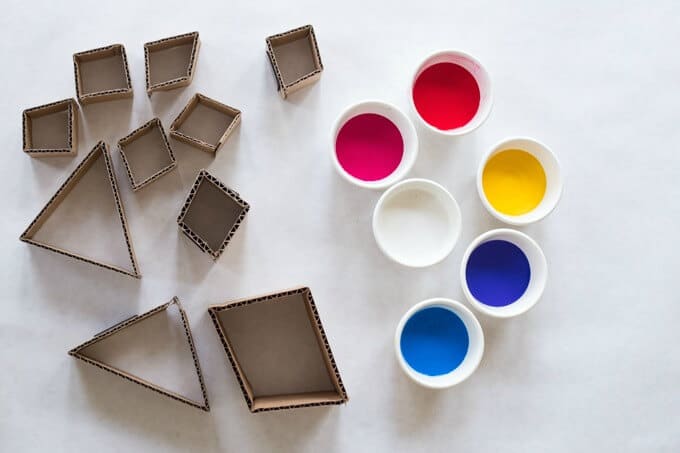
We had to be careful to paint around the magnets, which is why I recommend you paint your shapes first and then apply the magnets.
- Build!
Once the paint on your magnetic building blocks dries, build with them!
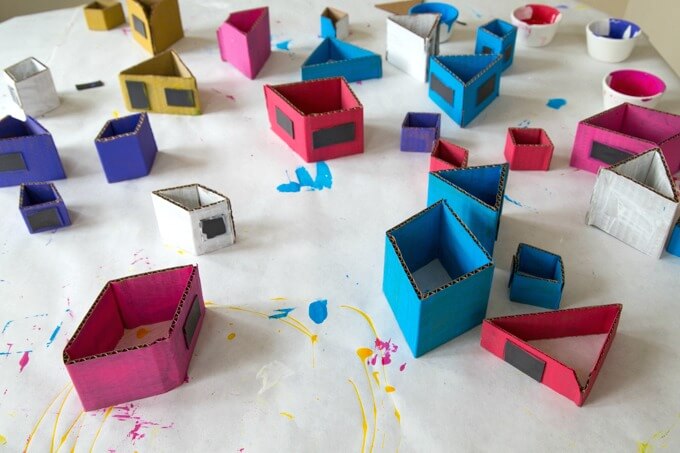
See what you can do with these lightweight, 3D, magnetic building blocks? So much!
Are you ready to build your own ridiculously cool magnetic building set now? I highly recommend you give this a try!
Thanks again to Sylvan Learning for sponsoring this post. As always, all opinions expressed are my own.
More Cardboard Building Ideas for Kids
- 5 DIY Cardboard Toys You Can Make With Your Kids
- Make Cardboard Robot Puppets that Move!
- Make a Rainbow Lighted Cardboard Dollhouse
- DIY Cardboard Building Discs for Kids
- How to Make Cardboard Tube Sculptures
- Colorful Cardboard Tree Sculptures
Pin It for Later