Create your own gratitude tree for Thanksgiving in a few easy steps! This is a great family activity to help focus on gratitude and thankfulness.
Updated October 2023
November is the perfect time to start a tradition of gratitude in your family.
For the last few years, our family has created our very own gratitude tree together. This helps us to take a few moments each day to focus on those things that we’re thankful for in our lives.
I love this project because it can be so versatile! Most years, our gratitude tree is just a few sticks in a jar.
Last year we constructed a giant paper tree on our wall like this one. We made all kinds of colorful leaves on which to write our phrases of gratitude.
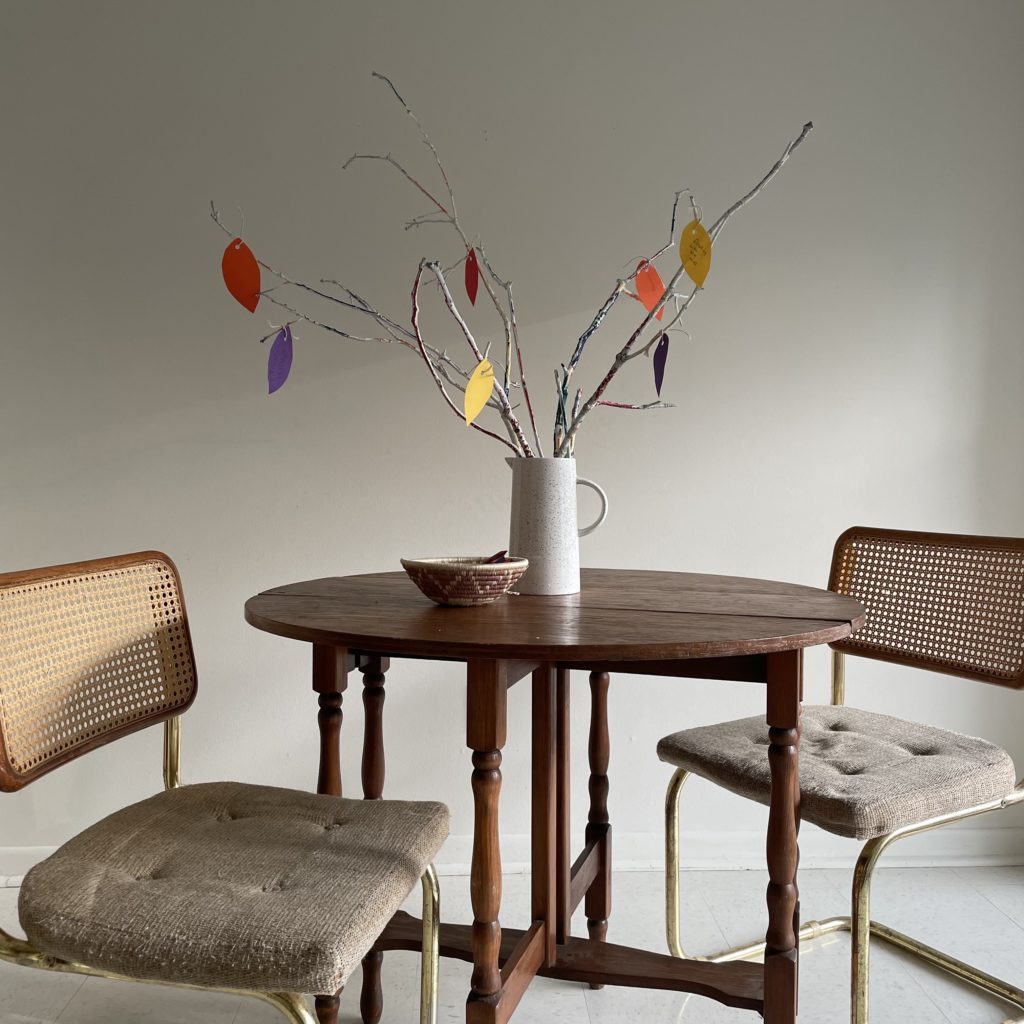
This year, we took our “sticks in a jar” concept one step further, and I’m LOVING the results!

Gratitude Tree for Kids

MATERIALS
- Sticks
- White spray paint
- Tempera paint sticks
- Jar or vase
- Paper
- Hole punch
- String
Time needed: 1 hour
INSTRUCTIONS
- Prepare the sticks
These days, it’s easier to get my kids on a walk with me if they have a job to do so gathering sticks was the perfect excuse for an autumn stroll!
We had fun exploring the woods near our house and we gathered LOTS of potential sticks for our gratitude tree.
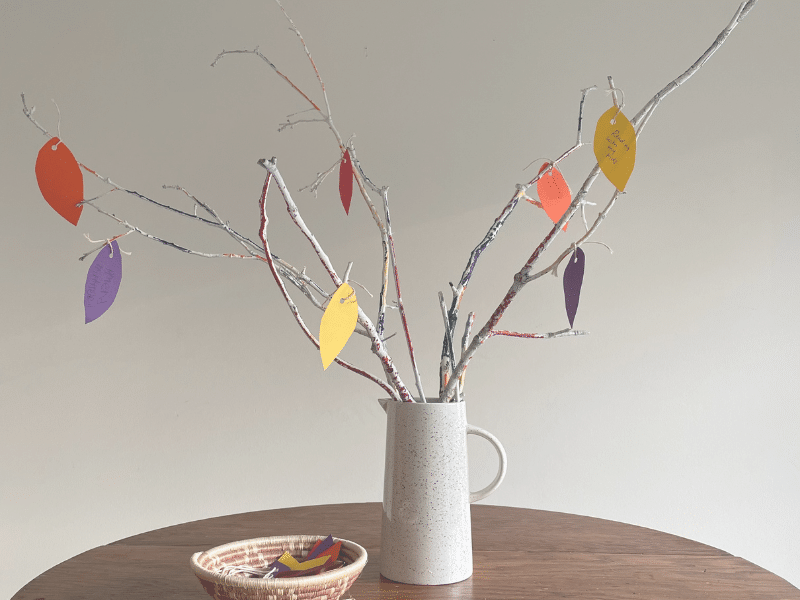
Next, I chose a few sticks that I thought work best for my vessel (a cute little pitcher from the Target dollar spot). Then I gave the sticks a few light coats of white spray paint.
This step is not strictly necessary, but I love how it makes the paint colors really pop! - Decorate the “tree” branches
Tempera paint sticks are the perfect way to decorate your gratitude tree branches! They’re super easy, low mess, and fun to use for all ages.
I love how they glide so smoothly on just about any surface–even these bumpy sticks!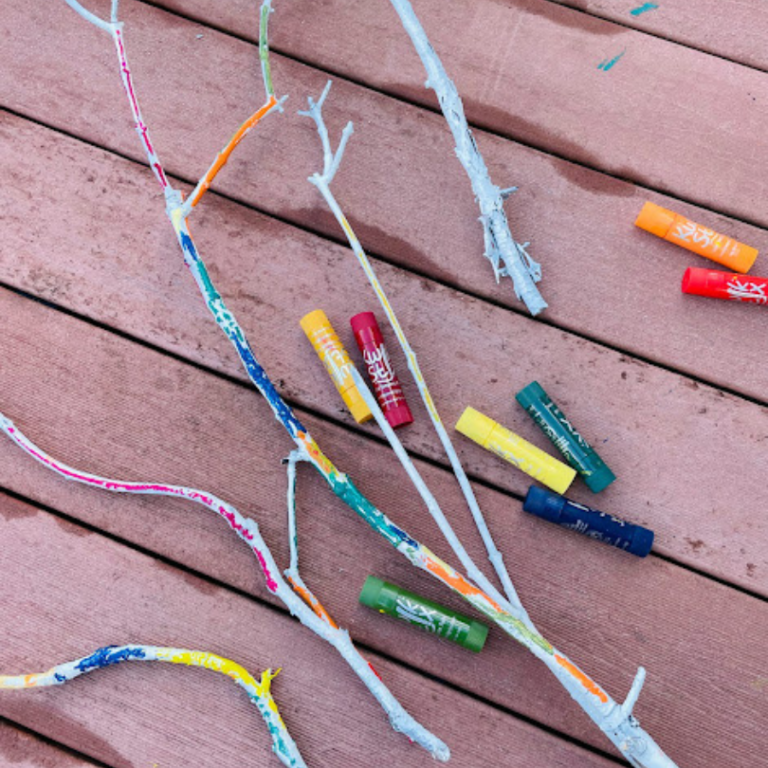
- Arrange your gratitude tree
Place your sticks in your jar or vase. It may help to anchor them with sand or rocks at the bottom.

Then find a place in your home that’s highly visible and accessible to your kids. If your tree is tucked in a dark corner, it will likely be forgotten by next week.
I like to put our gratitude tree in a central location which helps to remind us to add new leaves every day. - Add leaves
Cut simple leaf shapes from construction paper. (You might also upcycle painted paper into colorful leaves!)
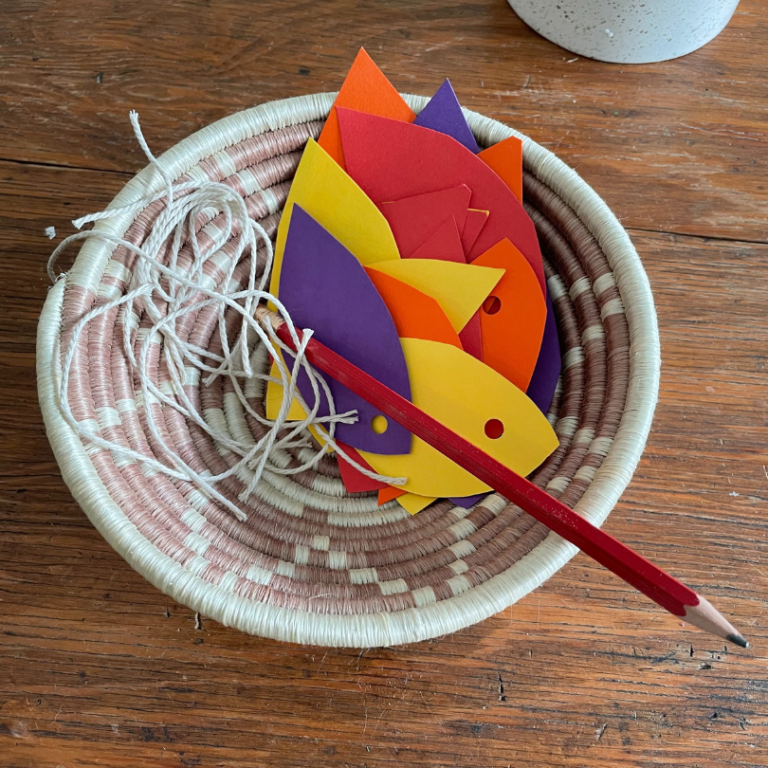
I usually spend a few minutes and cut out a couple dozen leaves. Then my kids help me punch holes in the leaves. The paper leaves, pencil and string go into a basket next to our newly crafted tree.
Each day, we think of what we’re most thankful for and add a few leaves to our tree.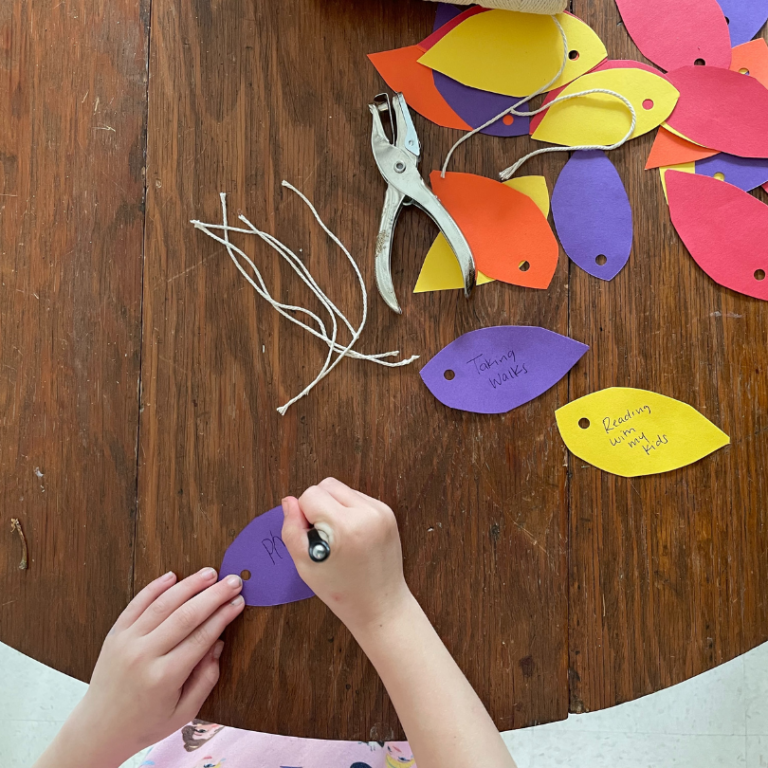
This tradition combines so many wonderful elements.
I like that it gives me a good excuse to spend time outside with my family, create something beautiful together, and develop the practice of gratitude.
More Activities for Kids
- 15 Thanksgiving Children’s Books
- How to Make a Thanksgiving Garland with Handprints
- 30 Thanksgiving Activities for Kids
- How to Make a Thankful Bunting for Kids
- 13 November Crafts and Activities for Family Connection & Celebration
- 15 Fall Children’s Books for Your Family
Want even more creative ideas?
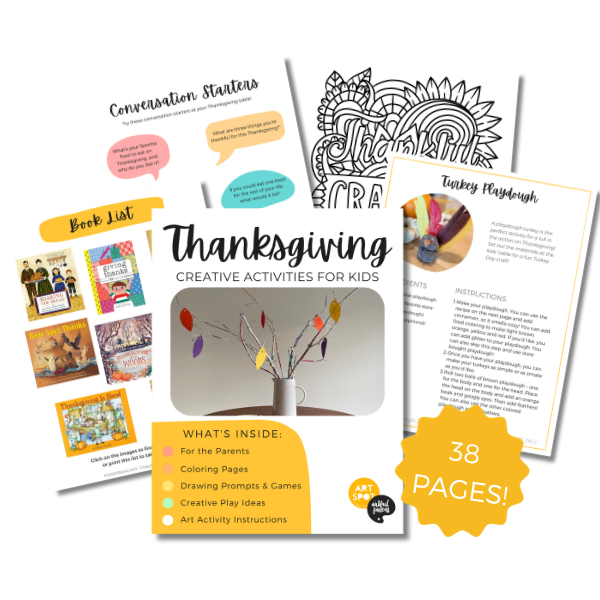
Check out our Thanksgiving Creativity pack!
Full of wonderfully fun ideas to help your family practice gratitude this season, this 38-page printable eBook includes: Drawing Prompts, Conversation Starters, Art Projects, and more!
Pin It For Later