Learn how to make DIY paper wings for kids. A great project for a handmade kids’ costume idea or as a creative play idea for kids!
Updated June 2025
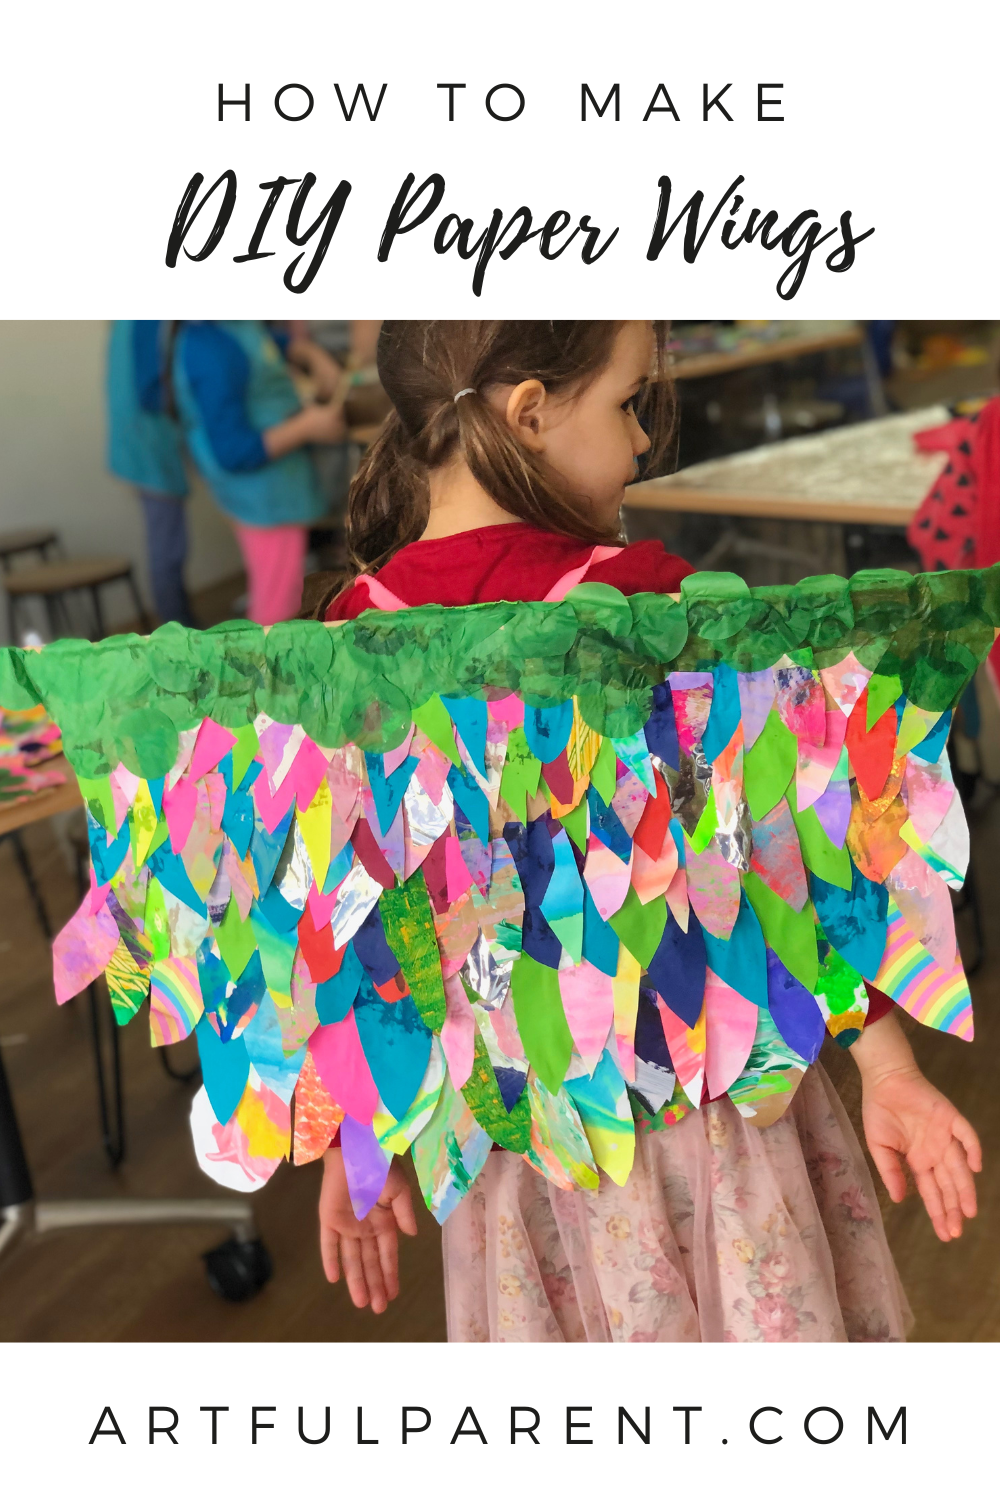
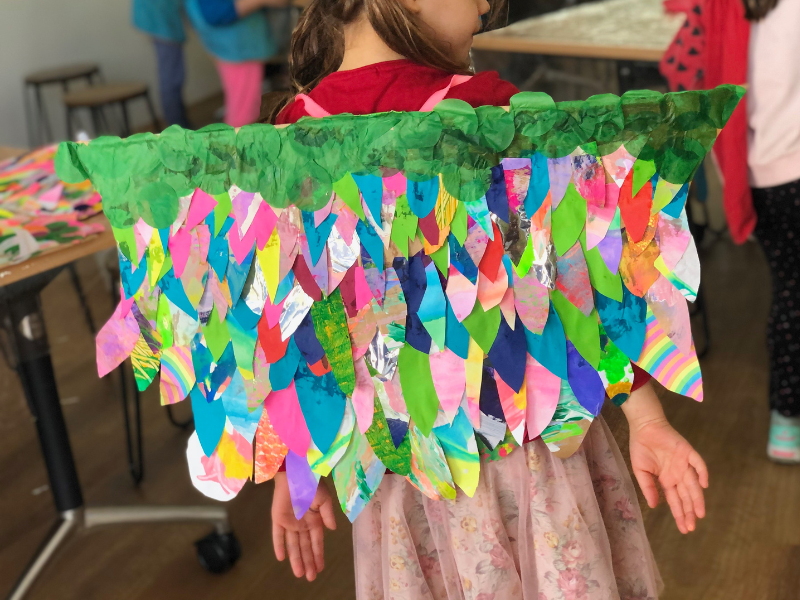
These DIY paper wings are so fun and easy to make. And with this tutorial, you can create dragon wings, angel wings, fairy, or butterfly wings!
I think this makes a lovely project to create together with your child. It’s the kind of craft that invites imagination and play—and becomes even more special when made side by side.
The construction is actually quite simple aside from attaching the elastic. And once the main wing structure is complete, kids will spend a long time working on these—decorating with markers, paint, glitter, tissue paper, or even cutout shapes.
Whether it turns into a dress-up prop, a storytelling costume, or something to flutter around the backyard in, this is one of those crafts that keeps the creativity going long after the making is done.
How to Make DIY Paper Wings
MATERIALS
- Plastic rod or thin dowel
- Brown kraft paper roll
- Scissors
- Clear glue or Mod Podge
- Large + small paintbrush
- Pencil
- Selection of colored papers, painted papers, patterned papers, recycled wrapping paper, tissue paper, shiny foil papers, any sort of pretty paper you have
- 1/2 inch elastic
- Duct tape
- Hot glue gun + hot glue
INSTRUCTIONS
- Create the wing shapes
First cut a piece of kraft paper (around 20 in x 20 in) and then fold it in half. Then carefully draw a wing shape (bat wing-style for dragons, bird-wings, or even butterfly wings) using pencil. If your kraft paper is thin, you’ll want to double the thickness; if you have kraft paper of a decent thickness, you can probably get away with single piece.
Next, open the paper back up and place the plastic rod or dowel along the fold. Then carefully brush a light layer of glue over the paper. Fold it and smooth it shut.
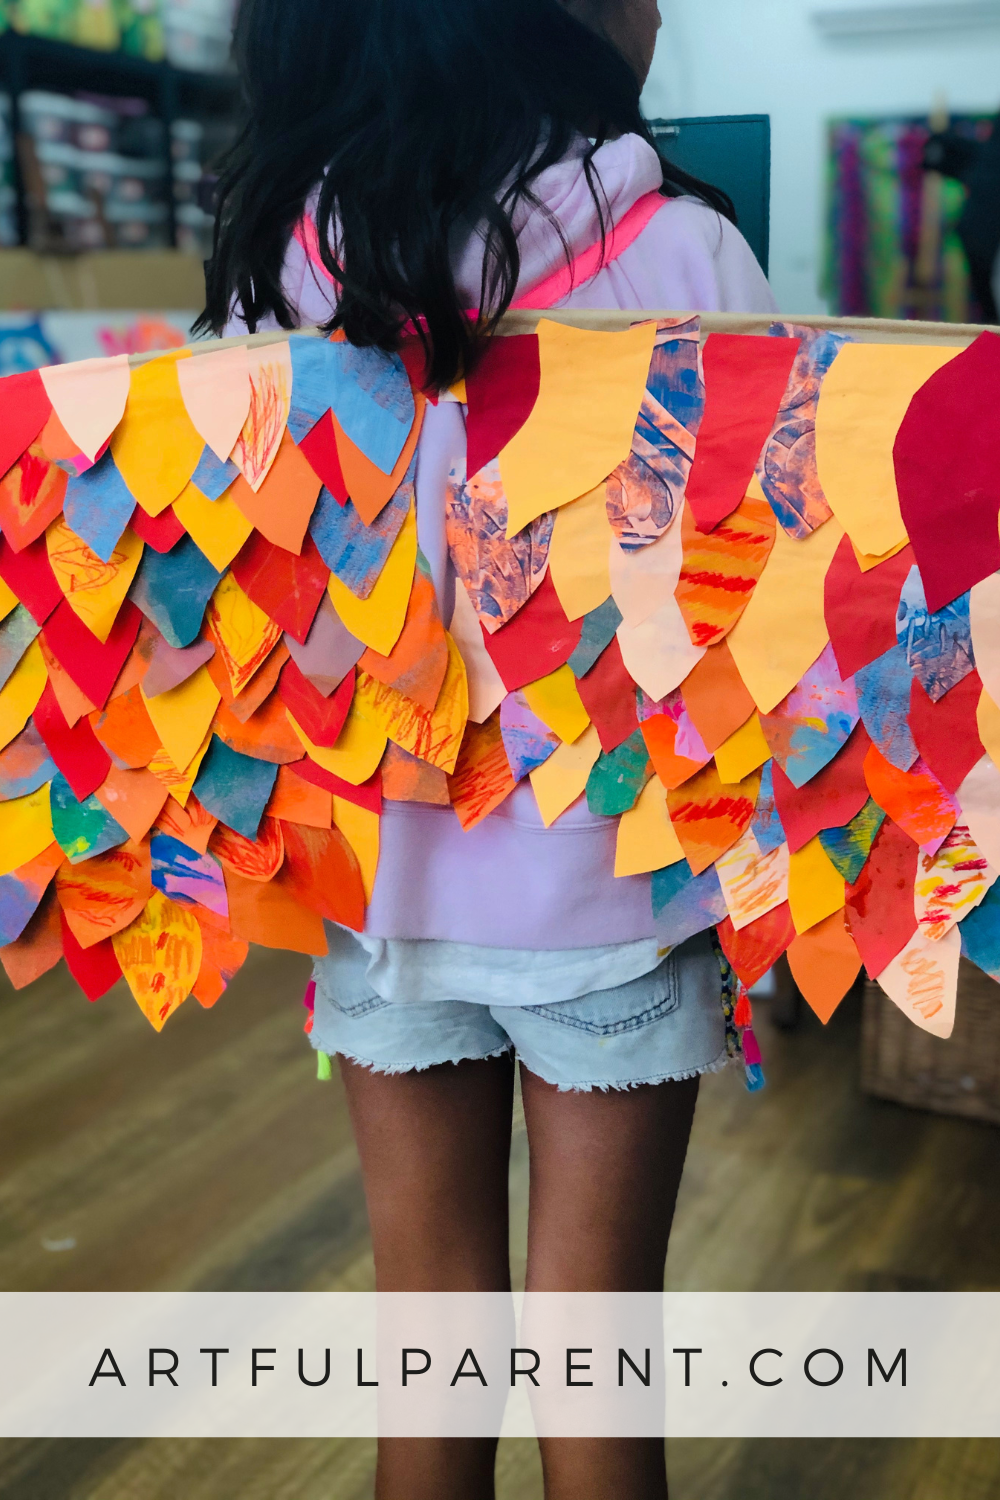
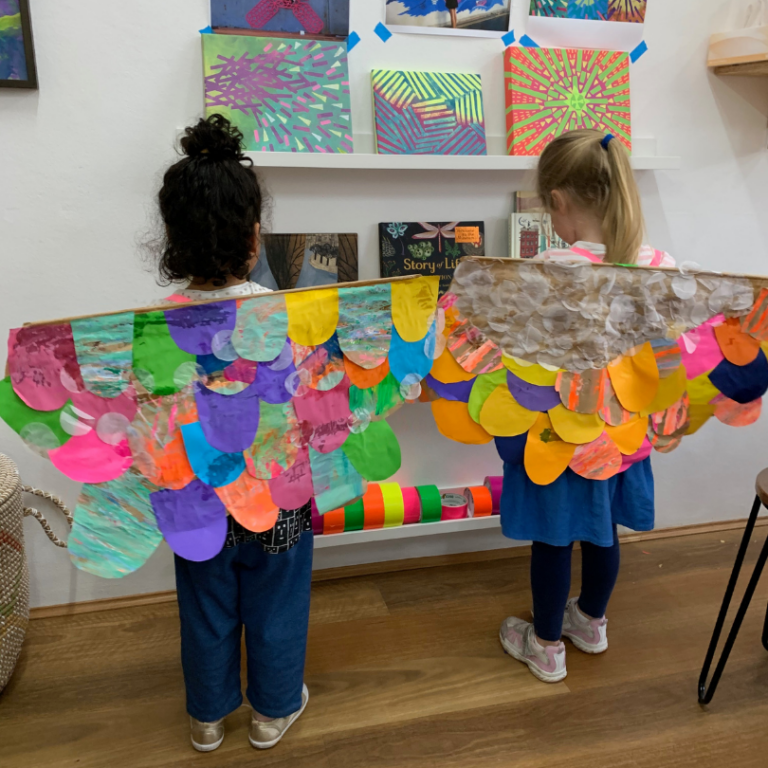
Finally cut along the pencil lines and glue together any parts that are not already joined properly. - Add scales or feathers to decorate
Next is the fun bit!
First show kids how to cut a dragon scale or a bird feather shape. Then let the kids cut their own feathers or scales out of a variety of papers in different colors.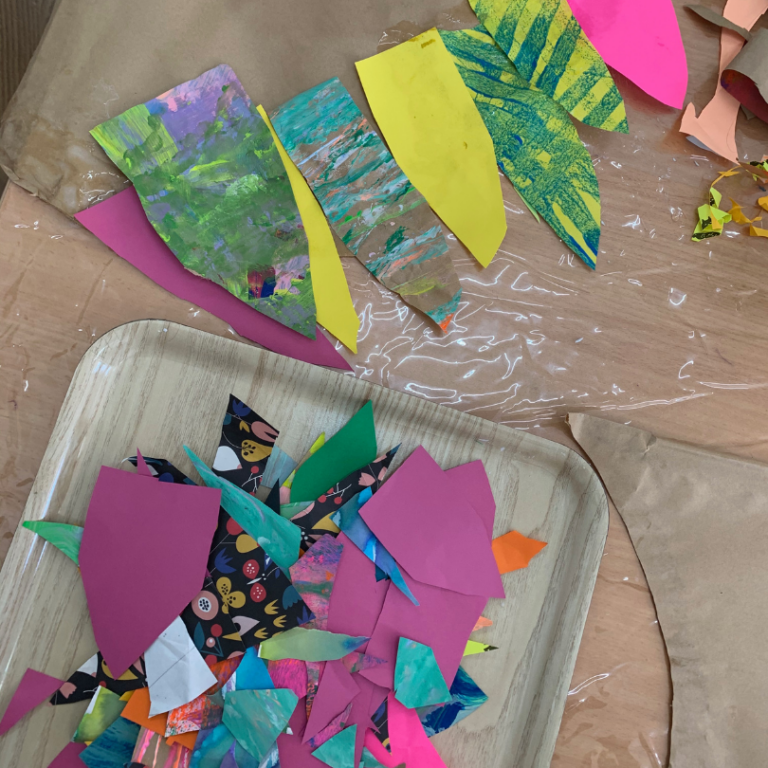
It’s important to model how to glue the scales / feathers on as there are a few tricks:
– Begin gluing from the BOTTOM of your wings, this way you can achieve a nice overlap.
– Start with larger scales or feathers at the bottom and work towards smaller ones at the top.
– Try to avoid placing the same color / pattern scales / feathers next to each other.
– Try not to leave any gaps.
Younger kids tend to add larger feathers or dragon scales while more mature kids can get lost in creating intricate patterns. Either way the results are sure to impress.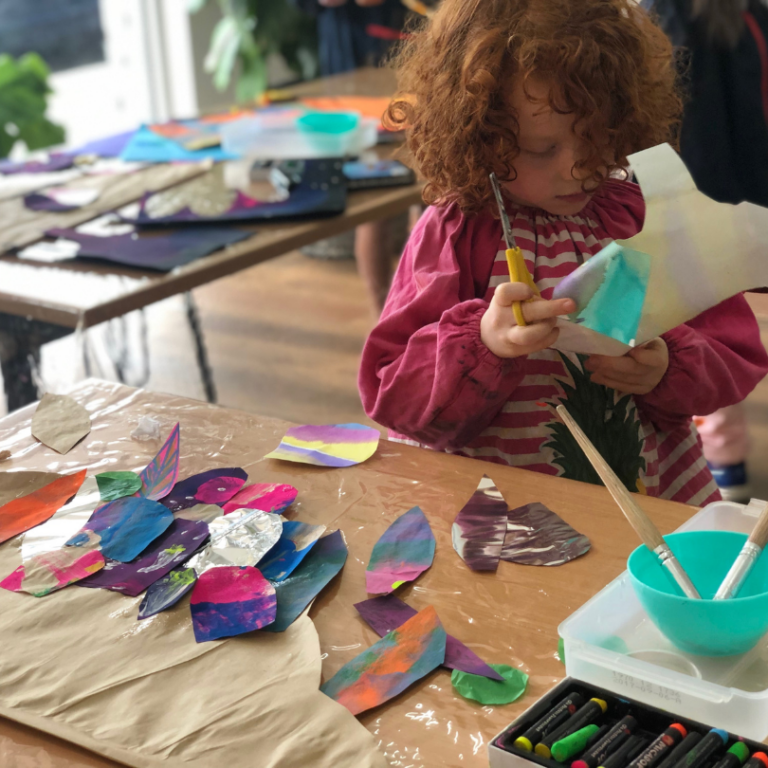
- Attach straps to the wings
Now for the tricky bit which can be done by an adult.
First, lay down a strip of duct tape along the top middle part of the wings. This adds extra strength and a workable surface. Then measure out a length of elastic against your child to form two loose arm loops. Remember looser is better to keep the wings fitting comfortably.
Attach the length of elastic (approximately 30 inches) exactly in the middle of your strip (lying horizontally) with hot glue. Then fold in the ends and secure with more hot glue.
Tape some duct tape (8 inches long) directly over the middle of the elastic loops to secure and press down.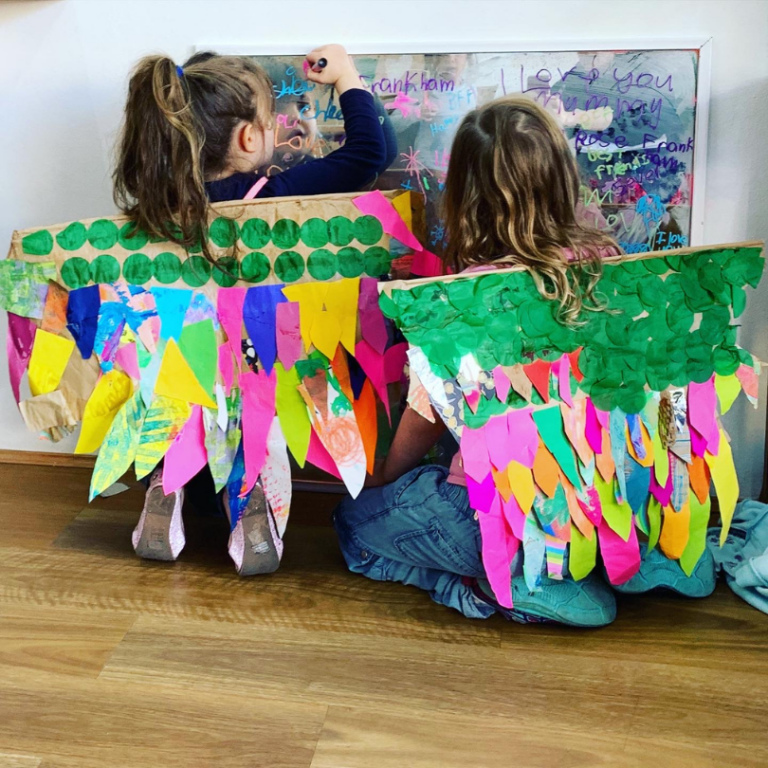
- Fly away with those fabulous wings
Take off with your amazing new wings!
These are perfect for imaginative creative play for kids or to add a handmade touch to a handmade kids costume. We’re really looking forward to creating some super-creepy versions for Halloween!
More Costume Ideas for Kids
- DIY Kids’ Costumes from Recycled Materials
- How to Host a Costume Making Party for Kids
- How to Make Cardboard Masks with Kids
- How to Make Party Crowns for Kids
- Why We Love Play Silks for Pretend Play
- Craft Ideas Perfect for Pretend Play
Pin It For Later