Learn how to paint a watercolor geode in 5 easy steps! A wonderful watercolor painting activity to pair with learning about geodes and rocks.
Updated June 2023
Want to learn how to paint a watercolor geode?
These mixed media artworks are a great activity for kids 4 year olds all the way up to adults! And you can easily swap in many of the materials for whatever you have at home.
But before we get started, what exactly is a geode?
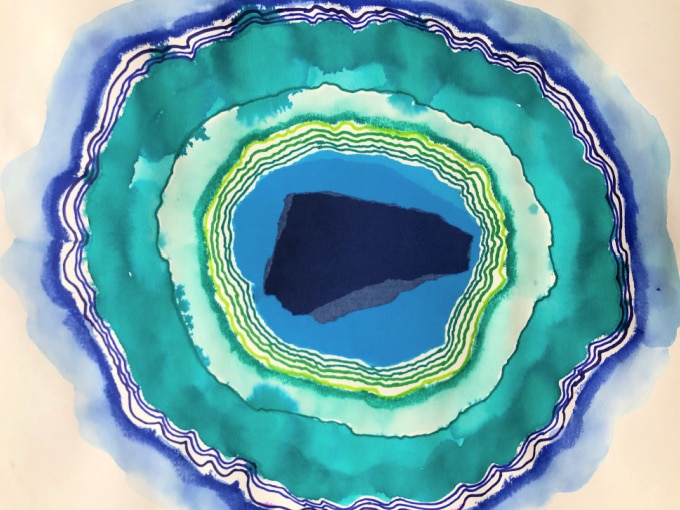
Geodes are round rocks that are hollow in the inside and lined with crystals. Pretty cool, right?
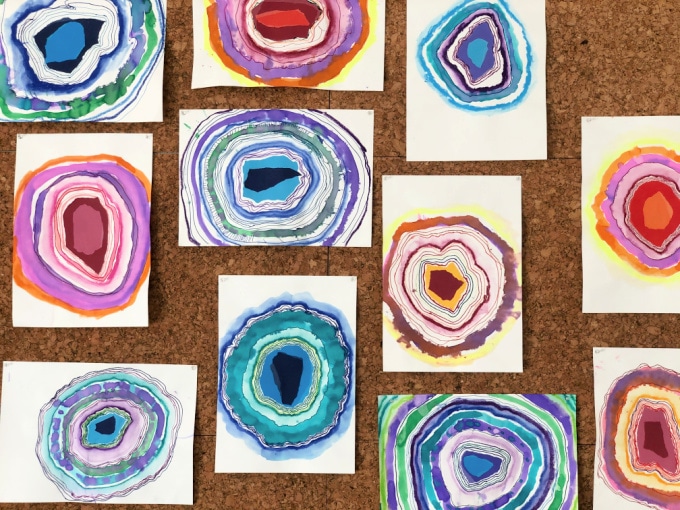
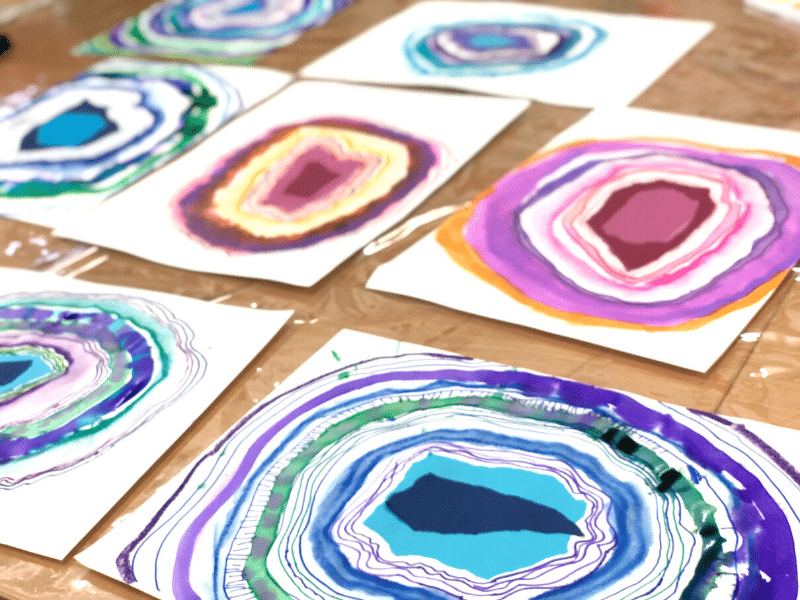
Kids find this activity almost meditative as they slip into a mindful state of flow while adding rings around the center. (I think that’s why everyone enjoys making them so much!)
Here’s how you can make your own at home.
Watercolor Geode Painting for Kids
MATERIALS
- thick paper, like drawing paper or watercolor paper
- colored paper in warm & cool colors
- colored sharpies or markers
- water soluble pastels, crayons or colored pencils
- watercolor paintbrushes
- water
- liquid watercolors or whatever type of watercolors you have
- glue stick
Time needed: 30 minutes
INSTRUCTIONS
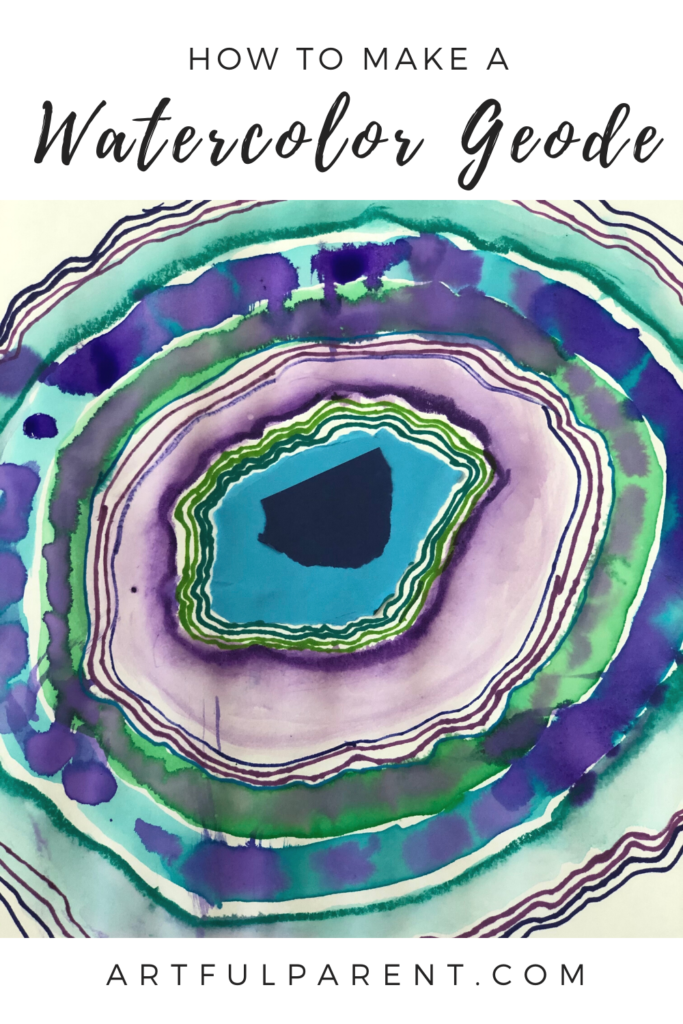
- Choose a color scheme
Begin by looking at pictures of geodes, or better yet, find a real one if you can get hold of such a treasure! Kids will be fascinated for sure.
Choose a color scheme to work with such as warm colors (reds, yellows, oranges, hot pink) or cool colors (blues, greens, cool violet).
Pro tip: It is really important to stick to your chosen color theme throughout the artwork as it has a big impact on the final effect.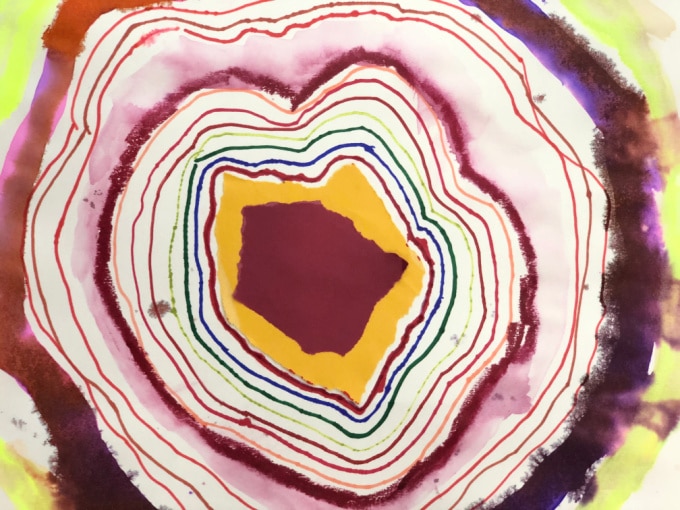
- Rip & glue the paper
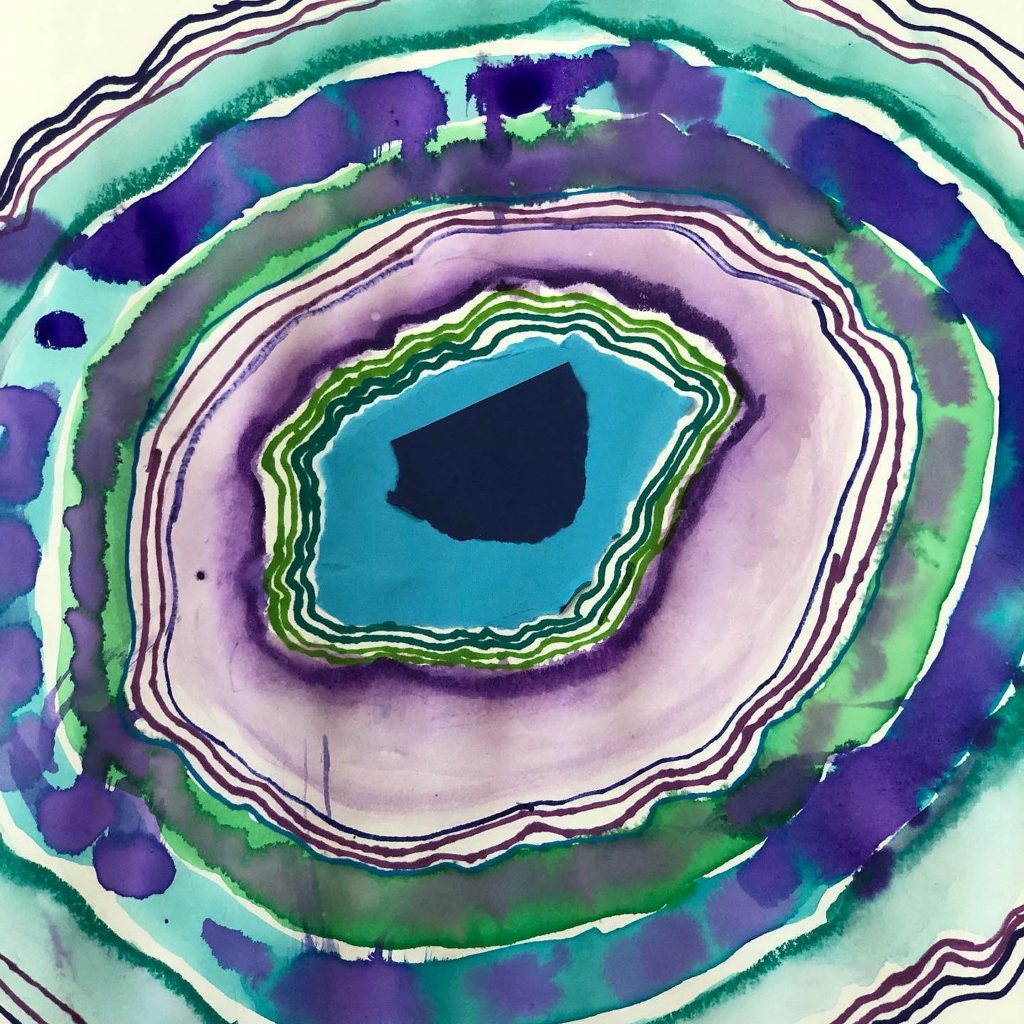
Once you’ve chosen a color scheme, rip two pieces of paper which are roughly oval/spherical with one bigger than the other. (The larger should be no bigger than a child’s hand. The smaller should be darker in color to give the illusion of depth.)
Glue the larger piece into the middle of your sheet of drawing or watercolor paper with the smaller piece on top.
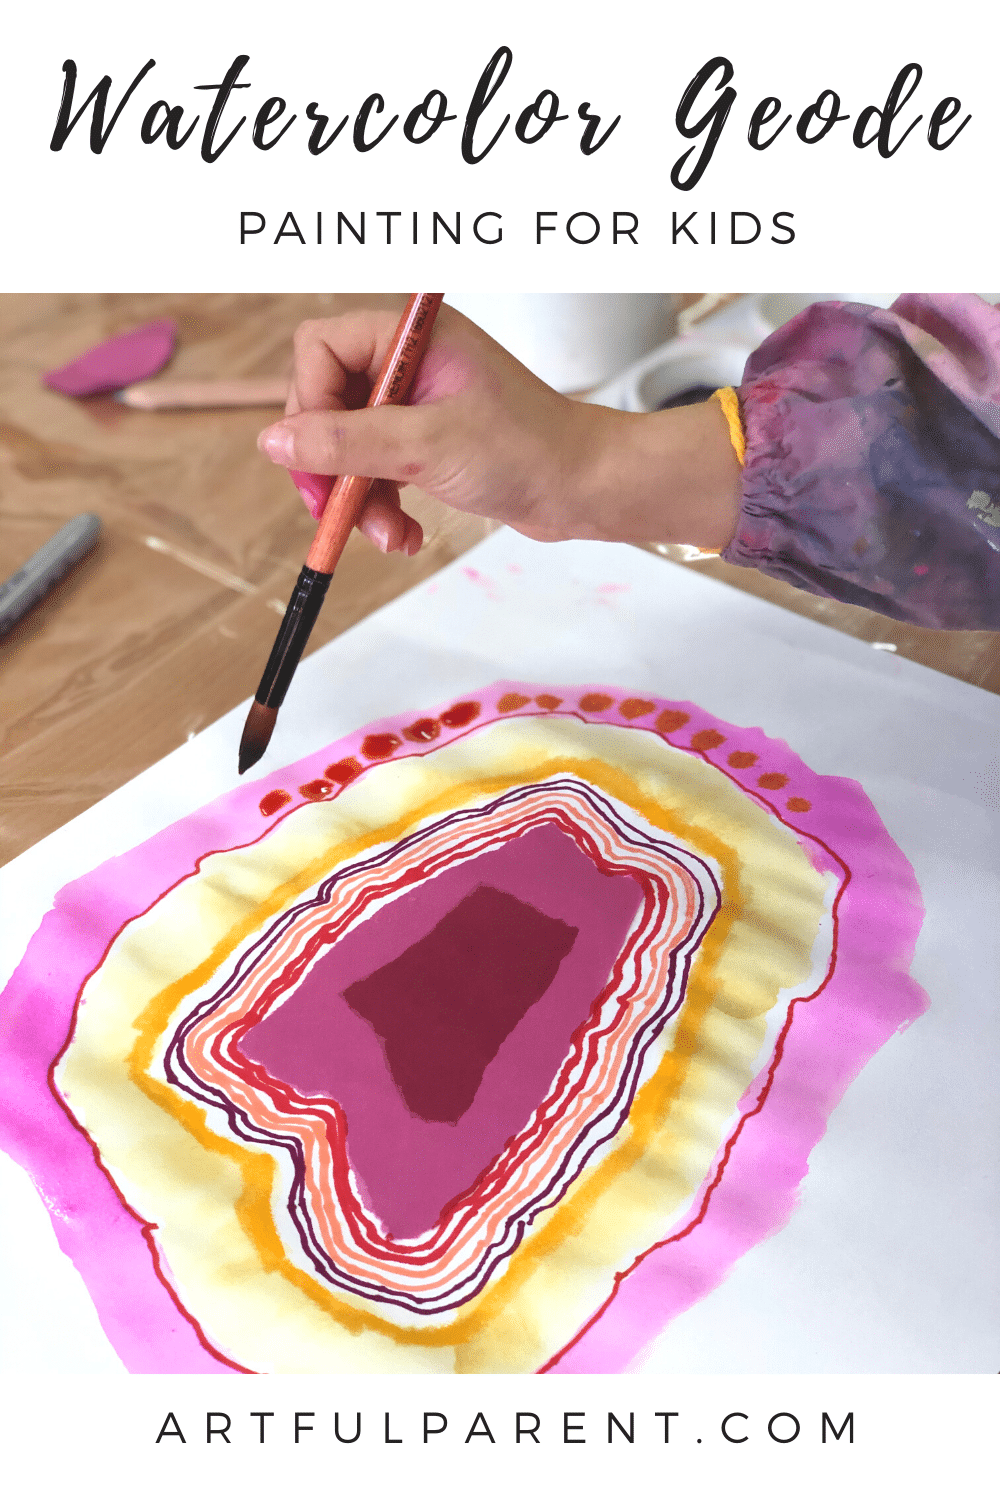
Pro tip: It is important to rip and not cut as it gives a more “organic” feel to your shape. - Add detail with marker
Add a line of marker carefully around the entirety of the large paper shape, being careful to leave a thin gap between your marker and your colored paper.
Pro tip: Keep physically turning your page as you work to ensure total control of your line work. Add another marker line, then another (3 or 5 lines looks best). You might experiment with “rainbow lines” but only in cool or warm colors, not both.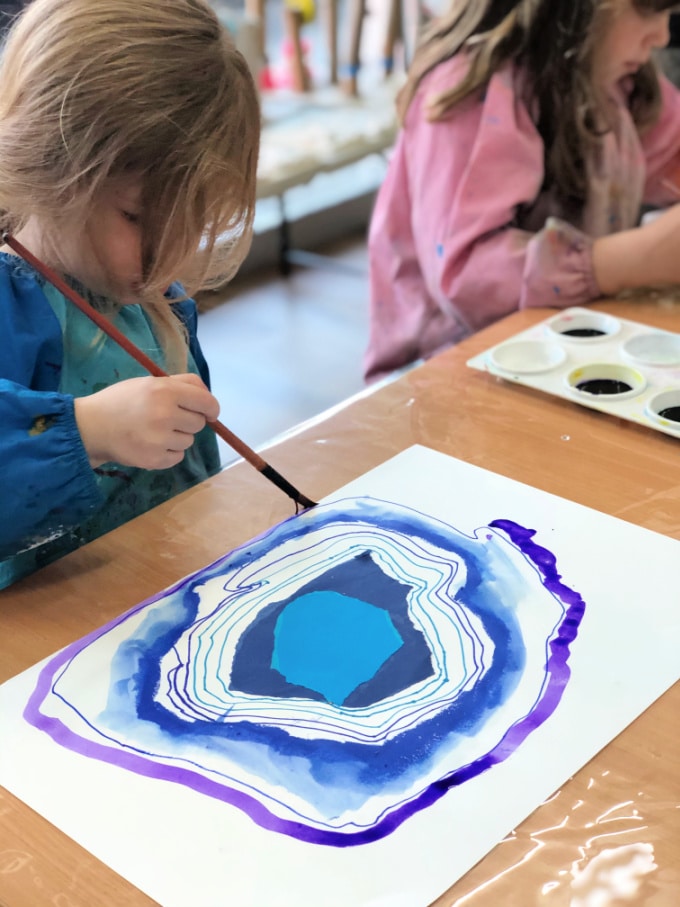
- Add some water soluble crayon, marker or pencil
Carefully add a line of water-soluble drawing material around your shape. Use a watercolor brush to diffuse your line with water and create a beautiful, flowing line all around your shape.
- Add more marker & liquid watercolors
This time just a single line of marker and then a wide wash of vibrant liquid watercolor all around your shape.
Keep adding “layers” around your central shape. Experiment with alternating marker lines, water soluble crayons, watercolor, then intermittently leave a small white gap to finish off your artwork.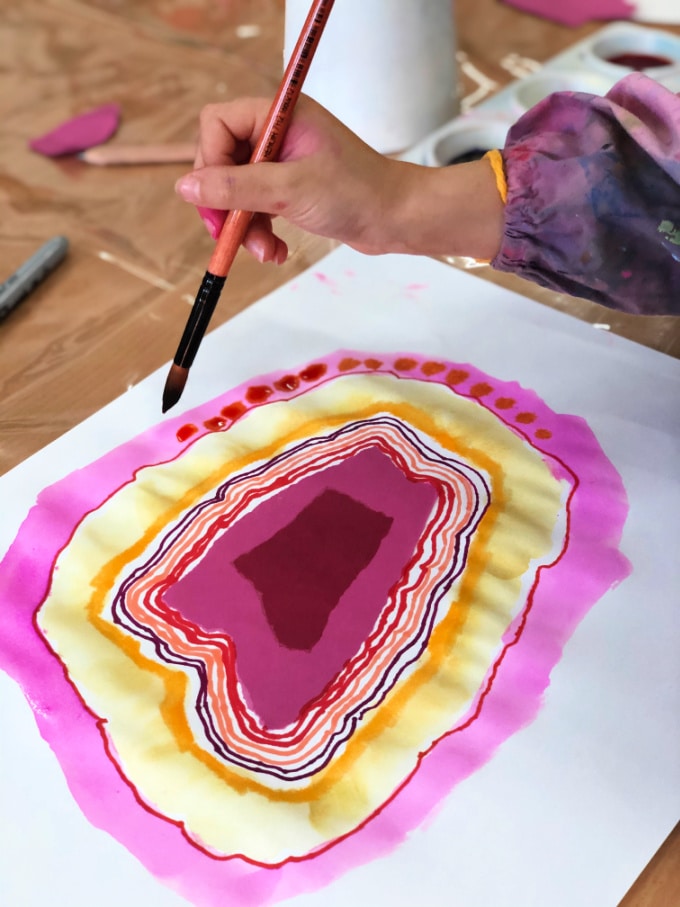
Extend the activity for adults: If you wish to do this activity with adults or teenagers, try thick watercolor paper, colored tissue paper, artist-quality watercolors, water soluble pencils, colored drawing inks, gold pens and even gold leaf and glitter for extra-fancy results!
More Watercolor Activities for Kids
- 6 Amazing Watercolor Resist Techniques To Try With Kids
- How to Make Raised Salt Paintings
- 11 Fun Watercolor Ideas for Kids
- Blow Painting with Straws + How to Video
- 7 Watercolor Techniques for Kids
Pin It for Later
