Learn how to do paper marbling with liquid starch. This is a beautiful technique for creating holiday crafts, cards, and handmade gifts!
Updated February 2025
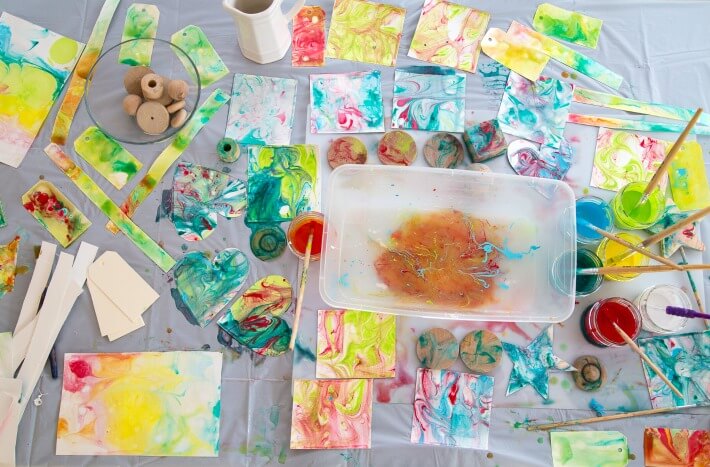
Paper marbling is one of our favorite art activities and one that we’ve done many different ways over the years, but this technique is especially easy and fun.
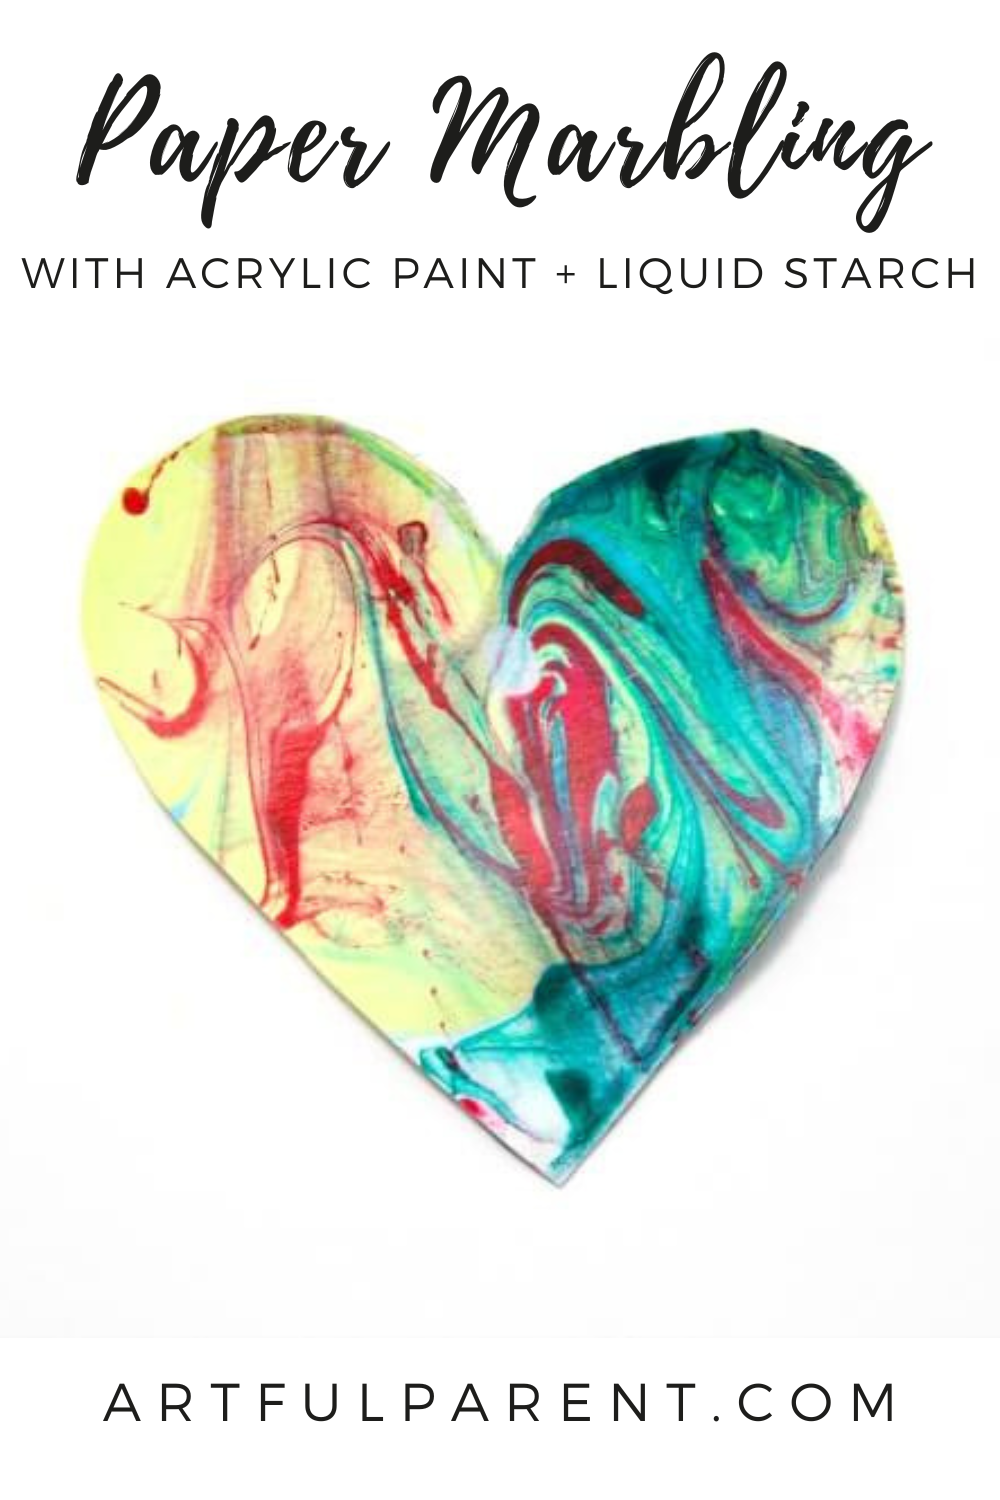
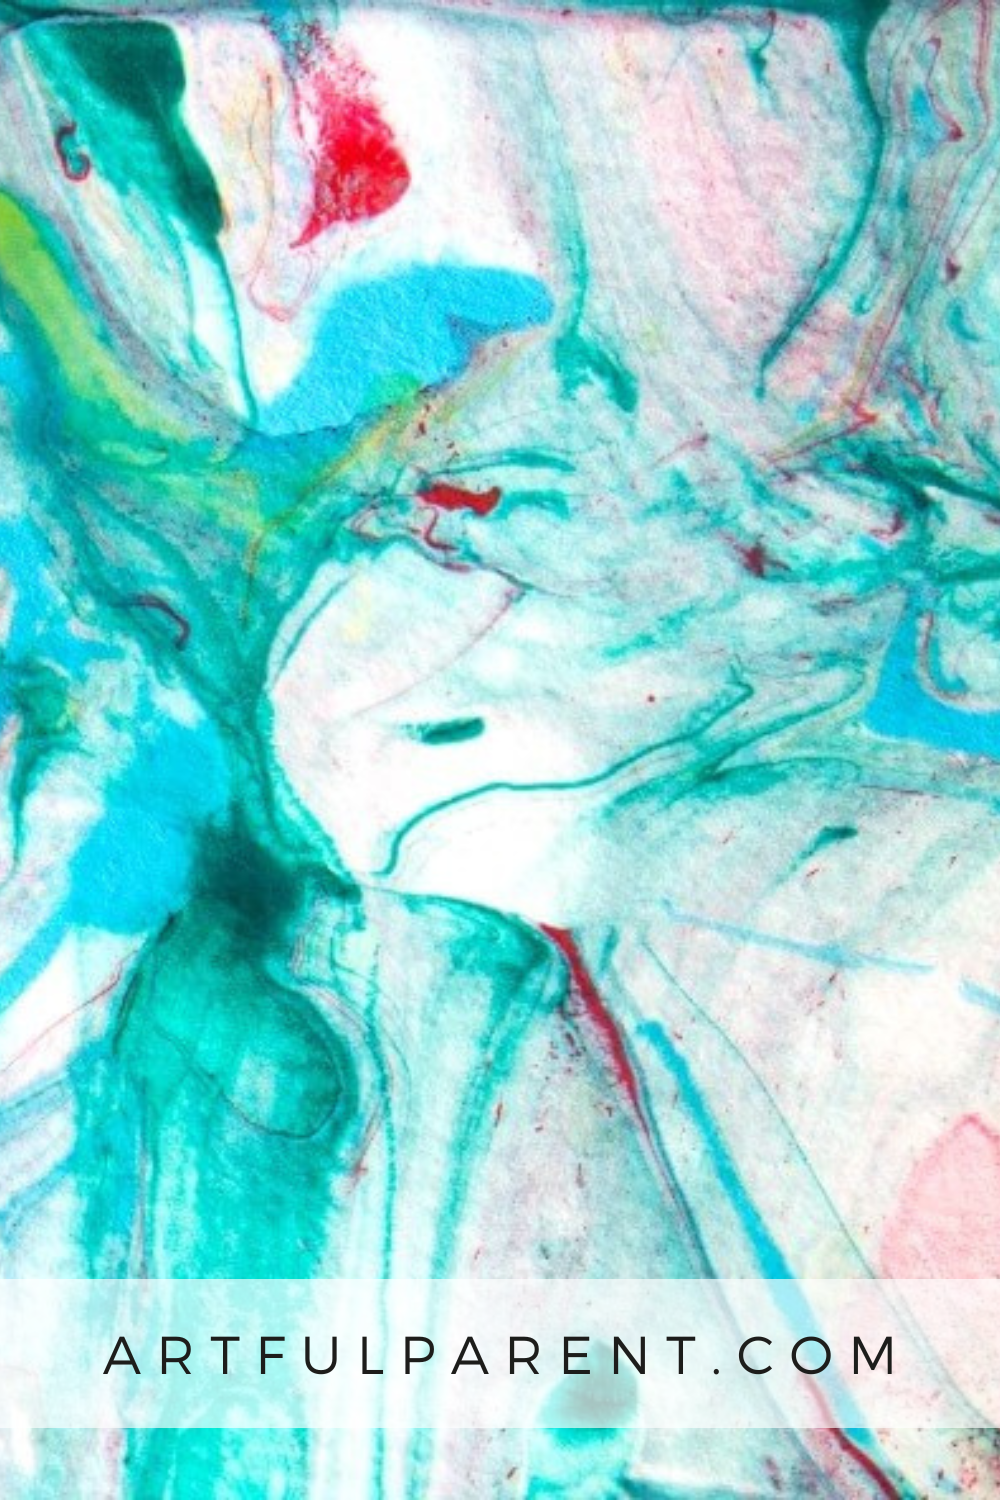
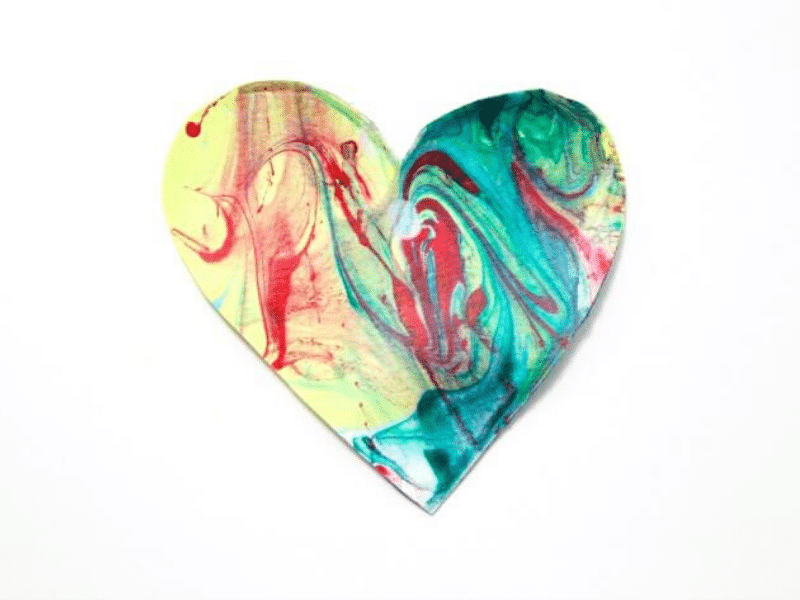
Using acrylic paint and liquid starch creates beautiful and unique designs on your paper. Although pretty messy, this activity is perfect if you’re looking for handmade cards and gifts for the special people in your life!
And you don’t just have to marble paper! We’ve tried other items like wood pieces, blank ornaments or blank gift tags
Paper Marbling with Acrylic Paint and Liquid Starch

MATERIALS
- Acrylic paint
- Liquid starch
- Thick paper, such as watercolor paper or card stock
- Paint brushes
- A plastic tub or bin to do the marbling in
- Something to protect the table such as a plastic tablecloth – you definitely want to protect your table and your clothing for this activity!
INSTRUCTIONS
- Create the marble design
Pour 1/4 to 1/2 inch of liquid starch into your plastic tub. Then add drops of the liquid acrylic paint.
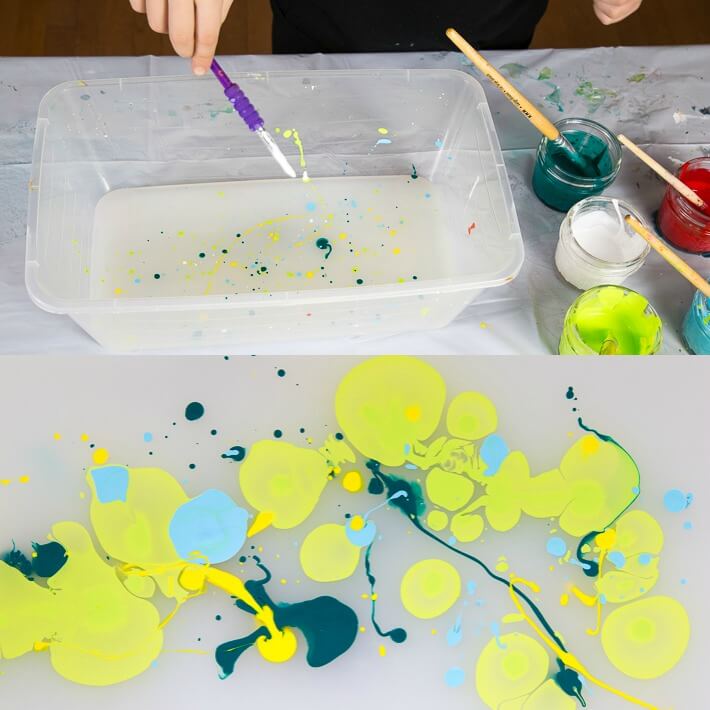
Note: We made our thick acrylic paint liquidy by putting a dollop in our cup then adding an equal amount of water and mixing completely with a paint brush.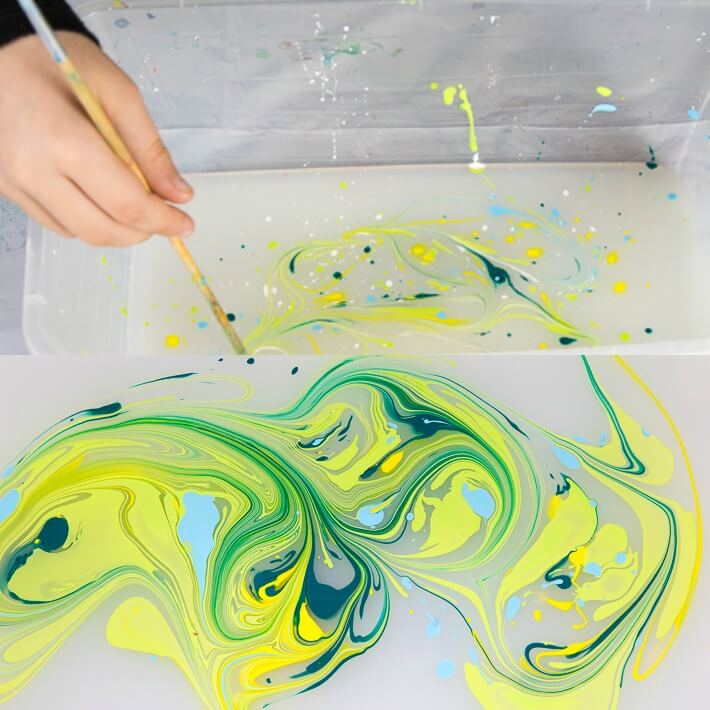
Swirl around with the end of a paint brush. - Transfer your marble design to paper
Set a piece of paper (or, in this case, a blank gift tag) on top of the starch and paint design. Press slightly to make sure that the marbled design transfers to the paper evenly and there aren’t any air bubbles.
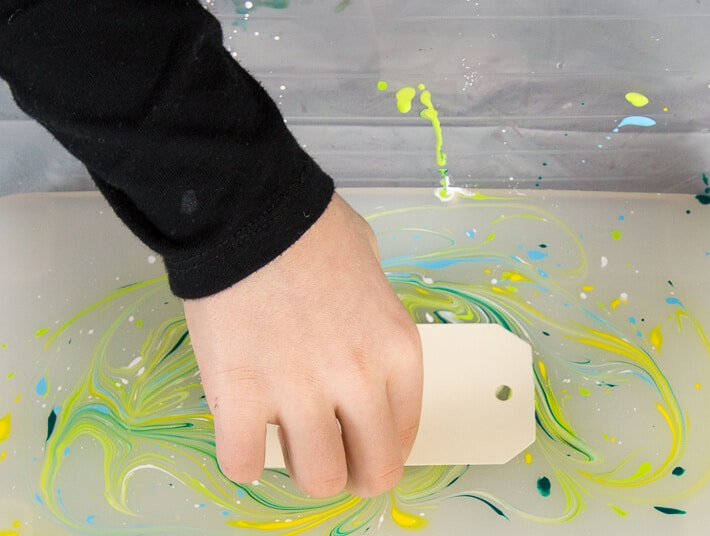
Lift up and admire your marbled paper.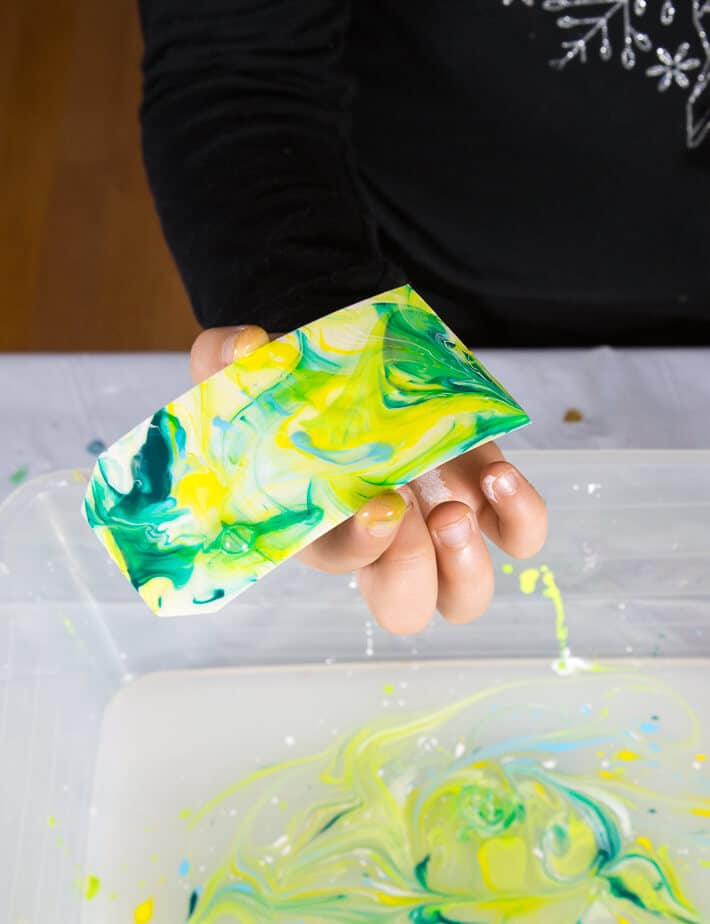
- Let Dry
Set down on the plastic tablecloth or on a piece of wax paper to dry. The liquid starch will stick to most other things as it dries, which you don’t want!

- Marble more things!
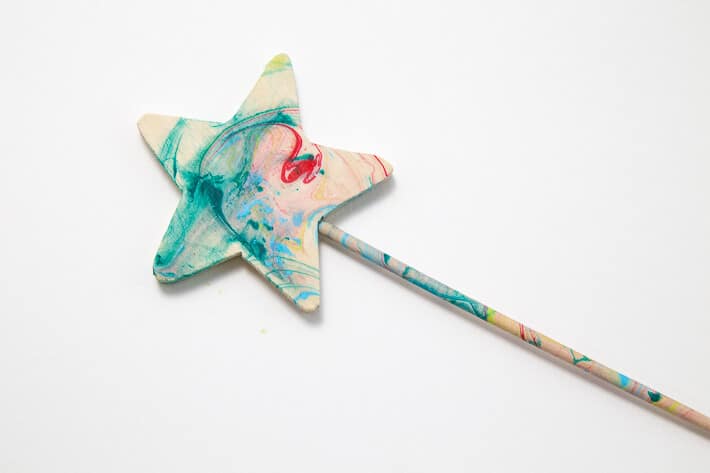
Repeat the steps above to make more beautiful marbled paper or to marble other things such as pieces of wood or canvas as well as paper shapes and strips.
We love this wooden star wand that we picked up at the craft store for $1!
NOTE: The acrylic paint is permanent so keep that in mind as you work and protect your work surface and clothing. You can also do this with tempera paint.
More Marbling Ideas for Kids
- 6 Easy Paper Marbling Techniques
- How to Do Shaving Cream Marbling
- Marbled Paper and Tips for Success
- Marbling with Oil and Food Coloring
- How to Make Marbled Paper Art Collages for Kids
Pin It for Later