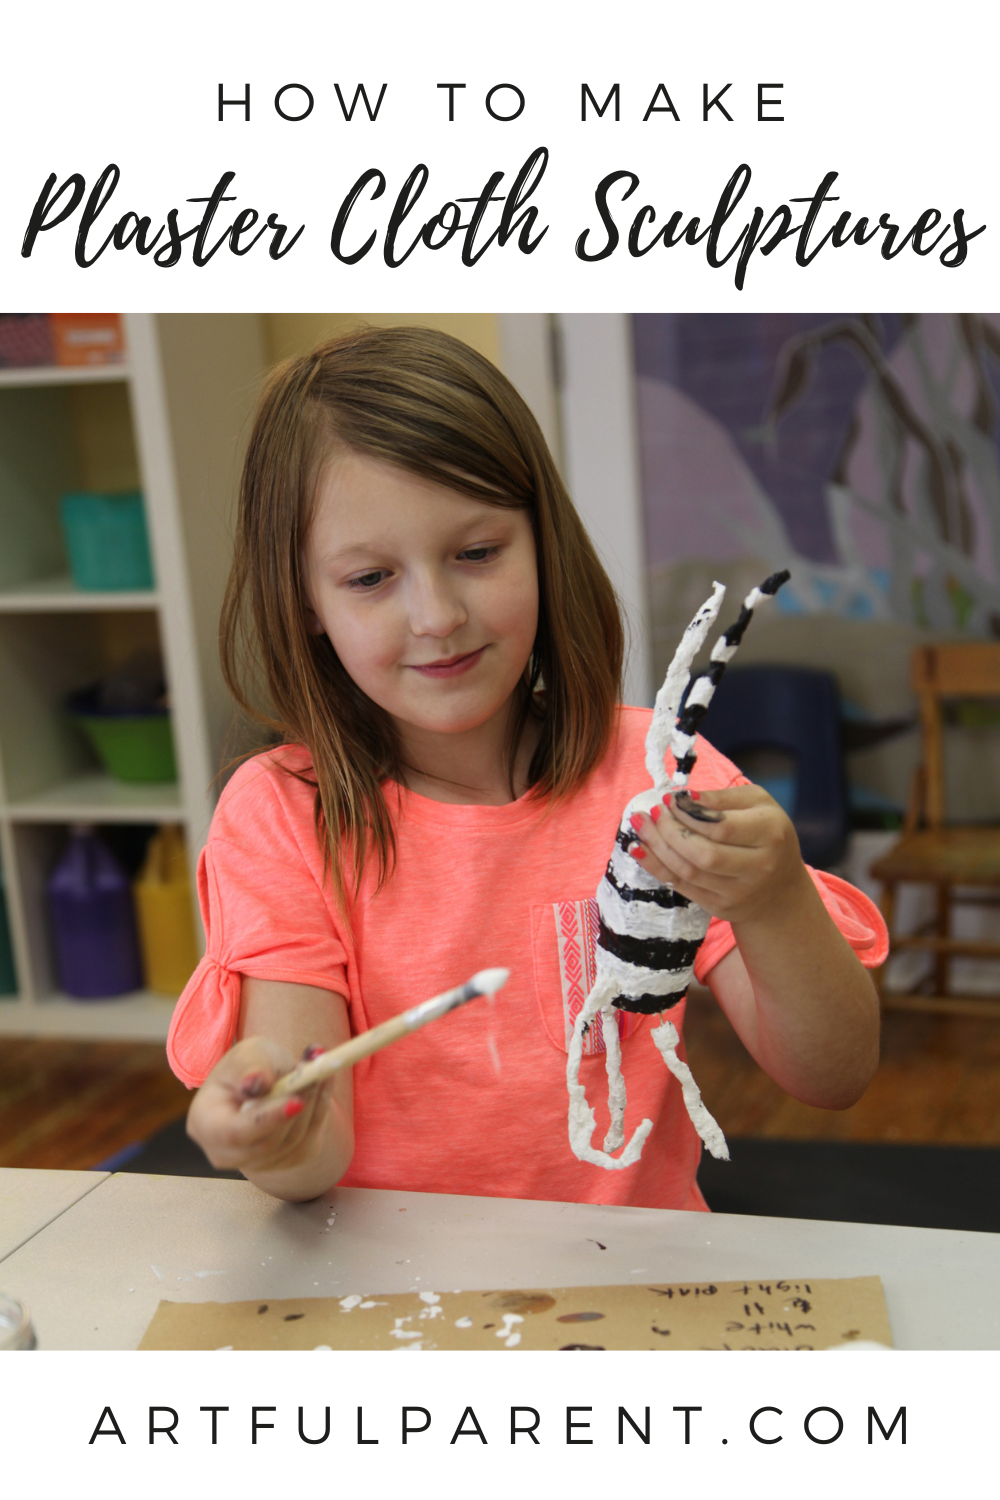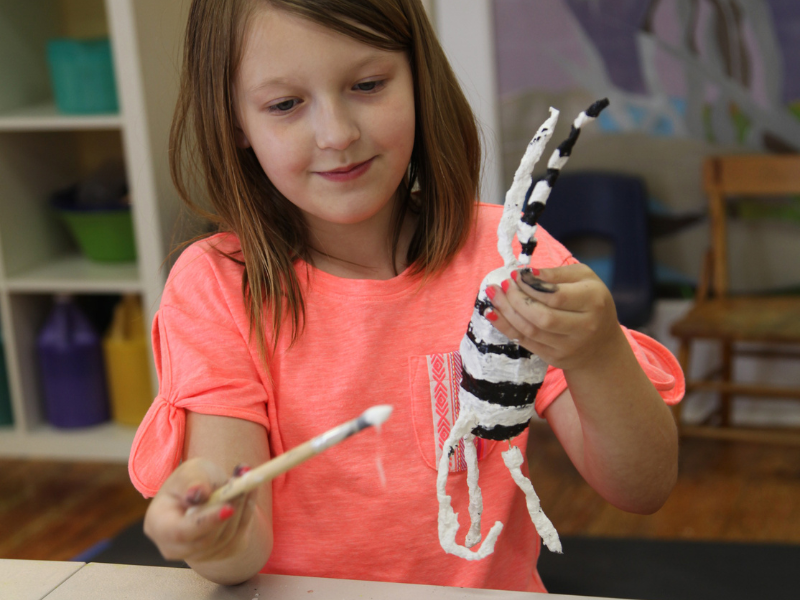
Plaster cloth is a fun material for kids to create amazing sculptures. It’s a less messy alternative than paper mache and engaging for a variety of ages.
Updated May 2025
I love paper mâché projects. While using simple materials, just about anyone can create a refined sculpture. Add some painted details when the newspaper and glue are dry, and you have a lovely, long lasting finished project.
But I have found that many children don’t really enjoy the process of creating paper mâché. The feel of the sticky glue paste sometimes bothers kids and clean-up is a bit of a hassle, even for someone who is okay with messes!
Plaster cloth has become a game changer for making really great sculptures for kids. It looks like heavy gauze dipped in plaster, comes in a roll, and can be found online. Sure, it’s still a little messy, but wiping up plaster dust is way easier than dealing with glue, and most importantly, my students didn’t mind the feel of the plaster wrap–hooray!
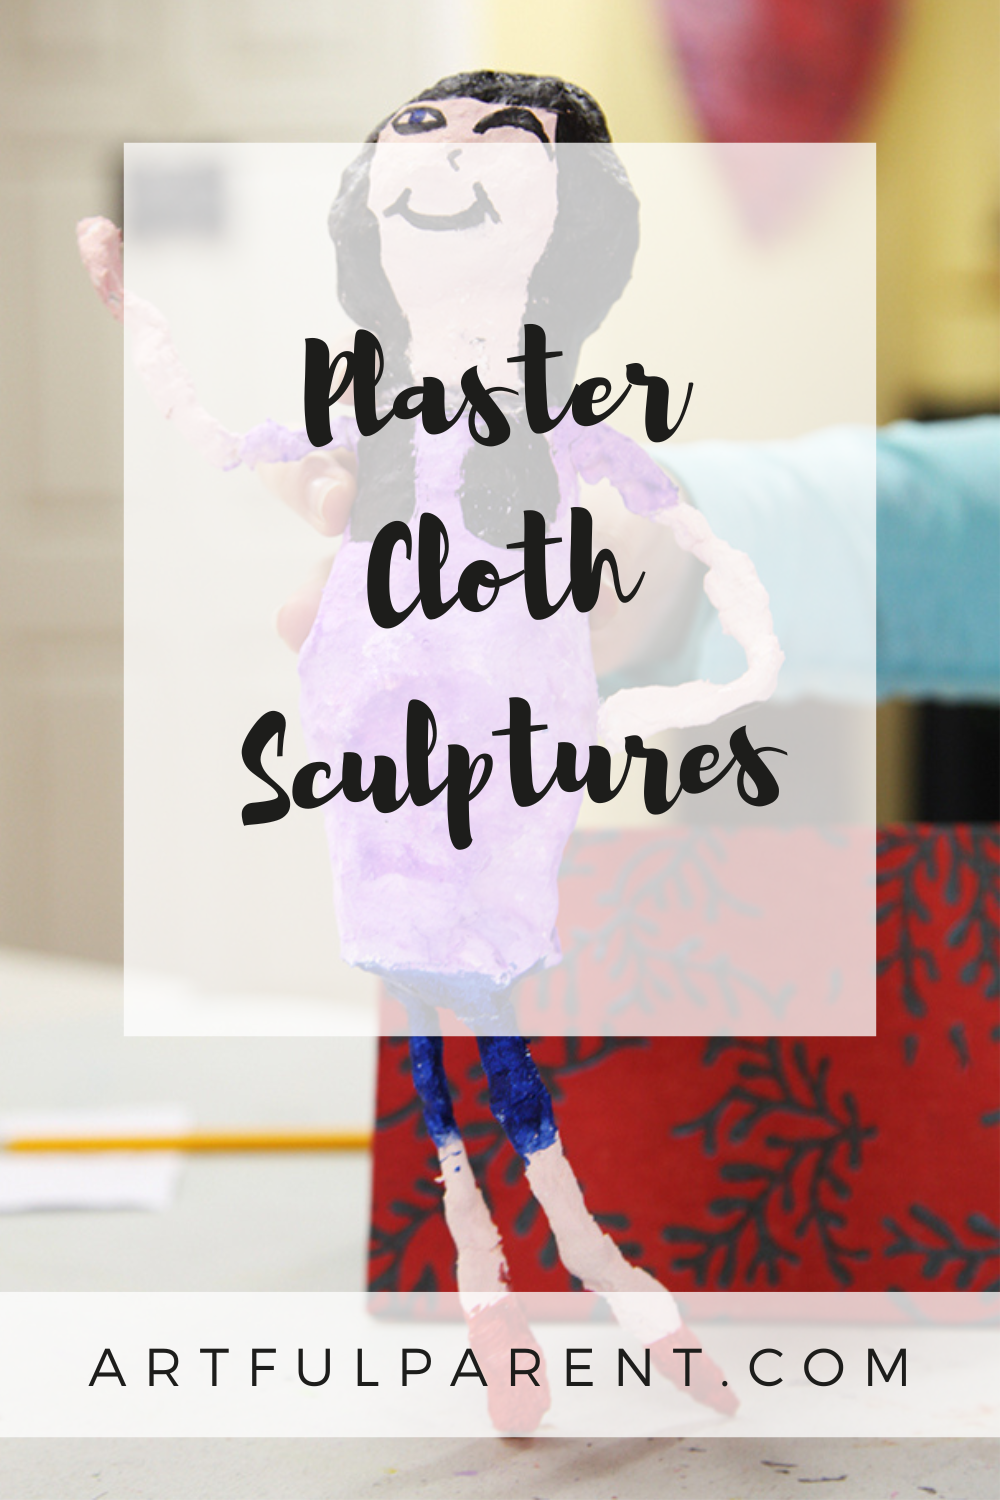
We used the plaster cloth to make sculptural dolls or puppets for kids. We had so much fun making these dolls and then displaying them somewhere special!
Here are some simple steps for using this material to create a small sculpture.
Plaster Cloth Wrap Sculptures for Kids

MATERIALS
- Plaster cloth wrap, also known as Rigid Wrap, cut into small strips
- Dixie cups
- Styrofoam ball
- Wire and wire cutters
- Small pliers (or strong fingers!)
- Masking tape
- Ring of cardboard–we save and use the cardboard rolls from tape, but you could also cut a ring from a tube
- Hot glue gun
- Small dish of water
INSTRUCTIONS
- Prep sculpture
Prepare your figure by poking small holes in Dixie cups for the wire. Cut one length of wire for the legs and one for the arms.
Thread the wire through the holes in both cups as in the photo. Use your pliers or fingers to shape the ends of the wire into little circles to resemble hands and feet.
Tape the two Dixie cups together so the openings are facing each other. This makes the body of the sculpture.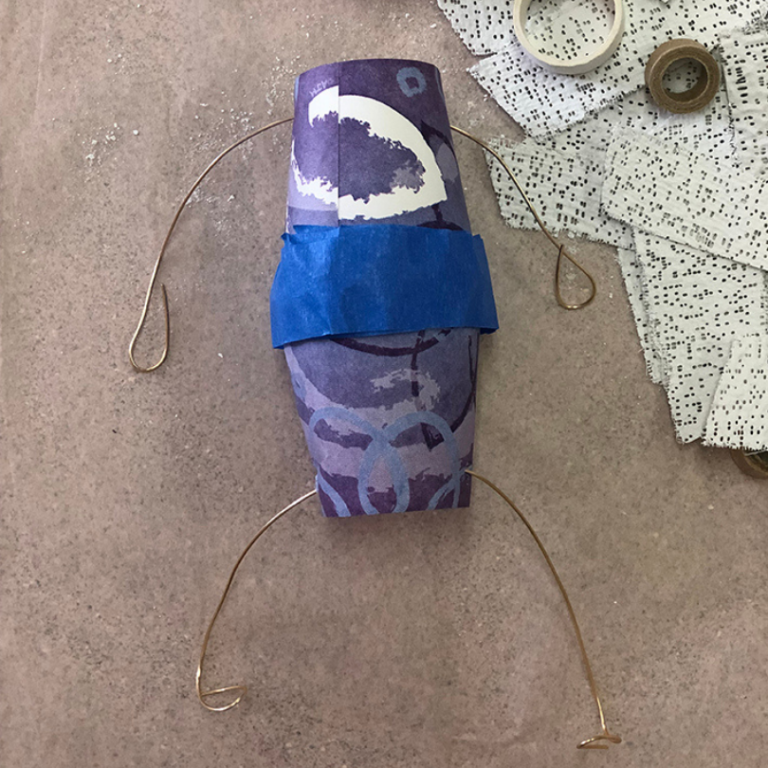
- Create head and neck
The styrofoam ball and the cardboard ring will create the head and the neck of your sculpture. This could be varied depending on what you are making.
And we found that it works best to make the body and head separately and then attach the two pieces with hot glue later.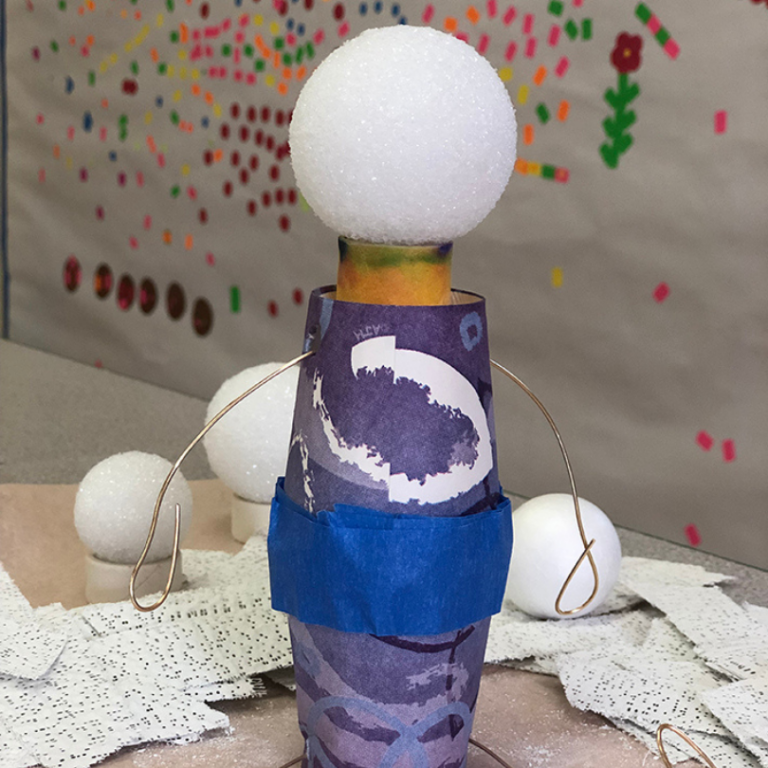
- Add plaster cloth wrap
Time for the plaster cloth! Put a few strips of the plaster wrap in a small dish of warm water. Use the plaster wrap to cover the armature.
Also, it’s important to let some of the water drip off the wrap before adding it to the sculpture –this prevents it from getting too wet while you are working.
Smooth out the plaster as you go. And try to make it look like one solid piece, so you can’t see the gauze underneath. Create 2-3 layers of plaster wrap on your sculpture, depending on the look of your creation.
Let it dry for 24 hours.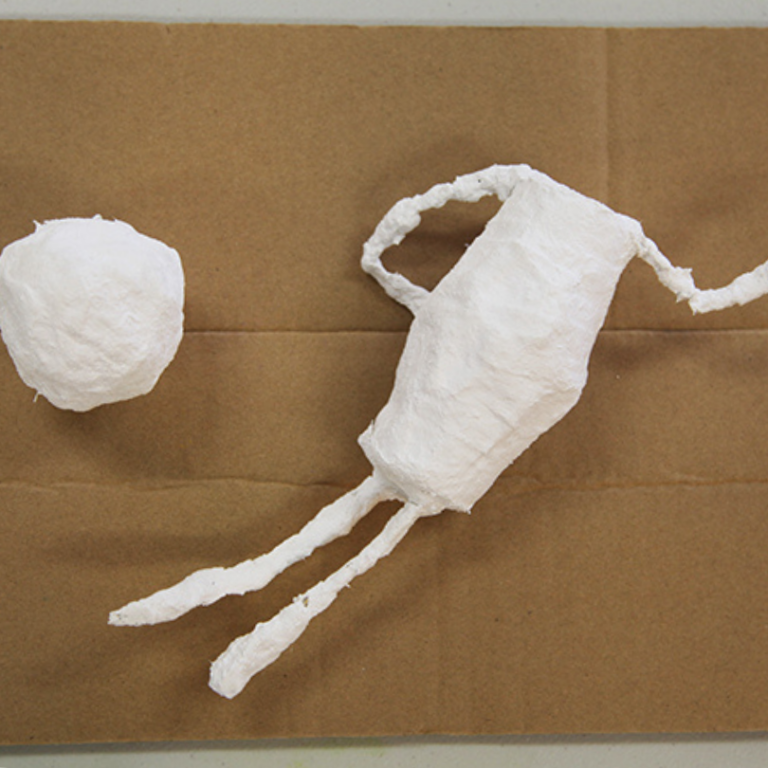
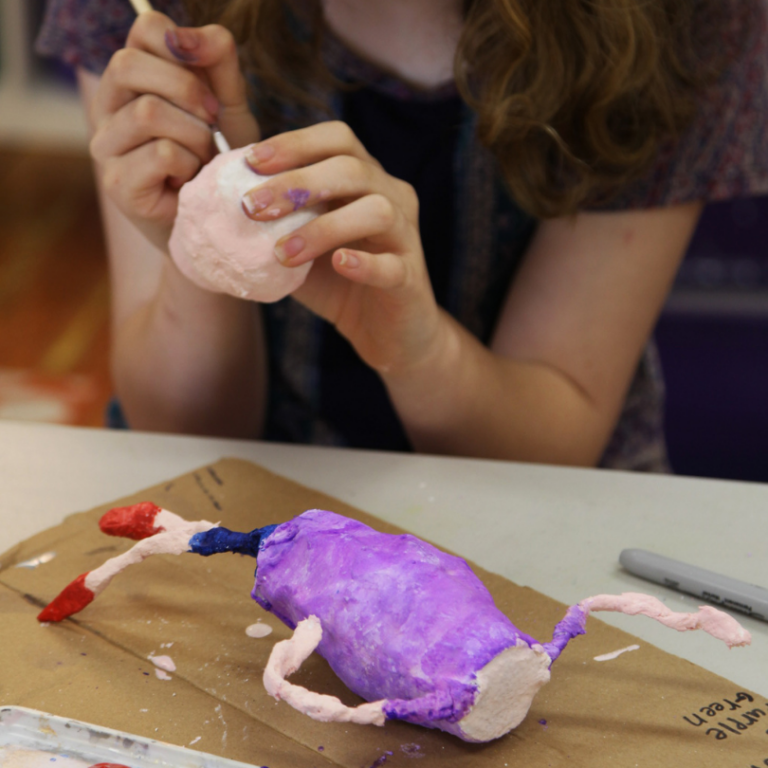
- Paint sculpture
Now comes the really fun part–it’s time to paint your creation! Use tempera or acrylic paints to add all the details needed to make your sculpture come alive!
- Attach head and neck
Next, use a hot glue gun to attach the head and neck. If desired, add yarn hair, button or bead facial features, feathers, felt, etc.
Once finished, display your work on a special shelf and admire your hard work!
More Sculpture Projects for Kids
- The Best Plaster Crafts to Try with your Kids
- How to Make Paper Mâché Bowls with Kids
- 5 DIY Cardboard Toys You Can Make With Your Kids
- How to Make Easy Wood Sculptures for Kids
- How to Make Cardboard Masks with Kids
- How to Make Easy 3D Sculptures for Kids
Pin It For Later