Learn how to ice dye! This is one of our favorite variations on tie dyeing and uses ice and powder dye to make amazing designs.
Updated August 2025
If you love to tie dye as much as we do, you need to try ice dyeing! It’s so easy and makes the coolest designs and patterns on the clothing you’re dyeing.
After trying this earlier in the summer (inspiration thanks to Neon Tea Party) we have already done it several times since! Slightly different than tie dyeing, when you ice dye, you layer powdered dye on top of ice cubes covering a crumpled up shirt. As the ice melts, the dye soaks into the shirt, creating unique designs.
That’s all there is to it and the results are stunning!
I even used the technique to make thank you tote bags for my kids’ teachers this year!
How to Ice Dye

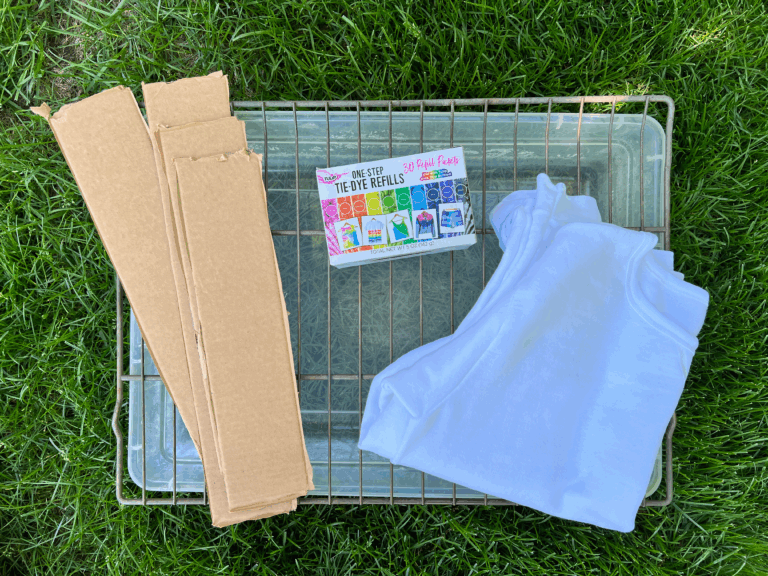
MATERIALS
- Tie dye powder (you can buy any tie dye kit and just not mix up the powdered dye with water, or buy this replacement pack that just has powders)
- White shirts (or anything white that you’d like to dye)
- Ice (either cubed or crushed)
- Pieces of cardboard cut into strips
- A large shallow bin
- A rack that fits over the bin (we used the racks from inside the oven but a large cooling rack would work, too)
INSTRUCTIONS
- Prepare your materials
This project requires slightly more preparation than regular tie dyeing.
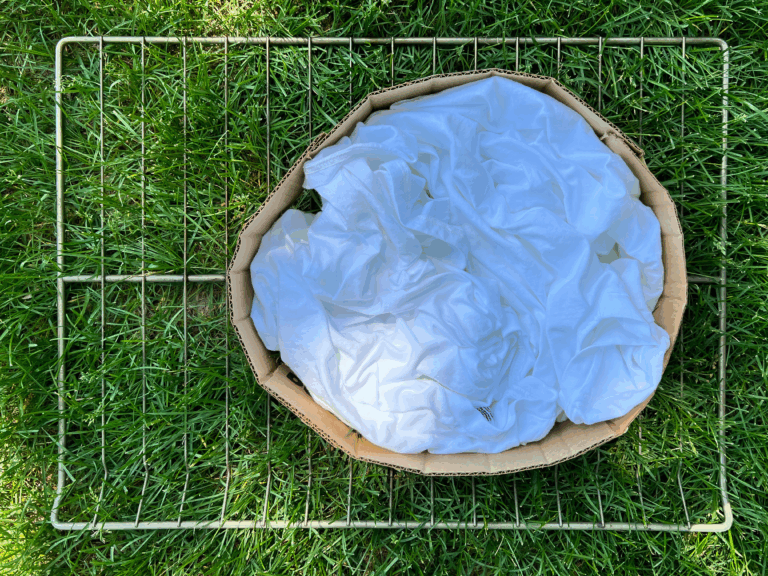
First, cut strips of cardboard a couple of inches wide and tape them together to create a hoop to keep your shirt crumpled up. This way, as the shirt gets wet, it doesn’t spread out and affect the dyeing process.
Pro tip: You can vary the size of these hoops depending on the size of the item you’re dyeing.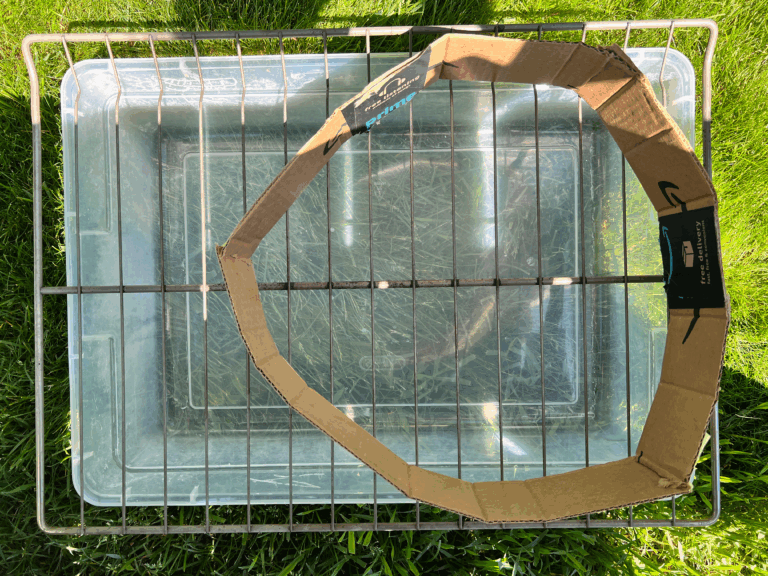
Also, make sure to wash your shirts before starting (or use pre-washed shirts from your drawers). - Set up the dyeing station
Next, set a rack on a shallow bin, to collect the dyed water. Then put the hoop on the rack. Crumple up your shirt and place it inside the hoop, but make sure it is roughly a single layer of fabric.
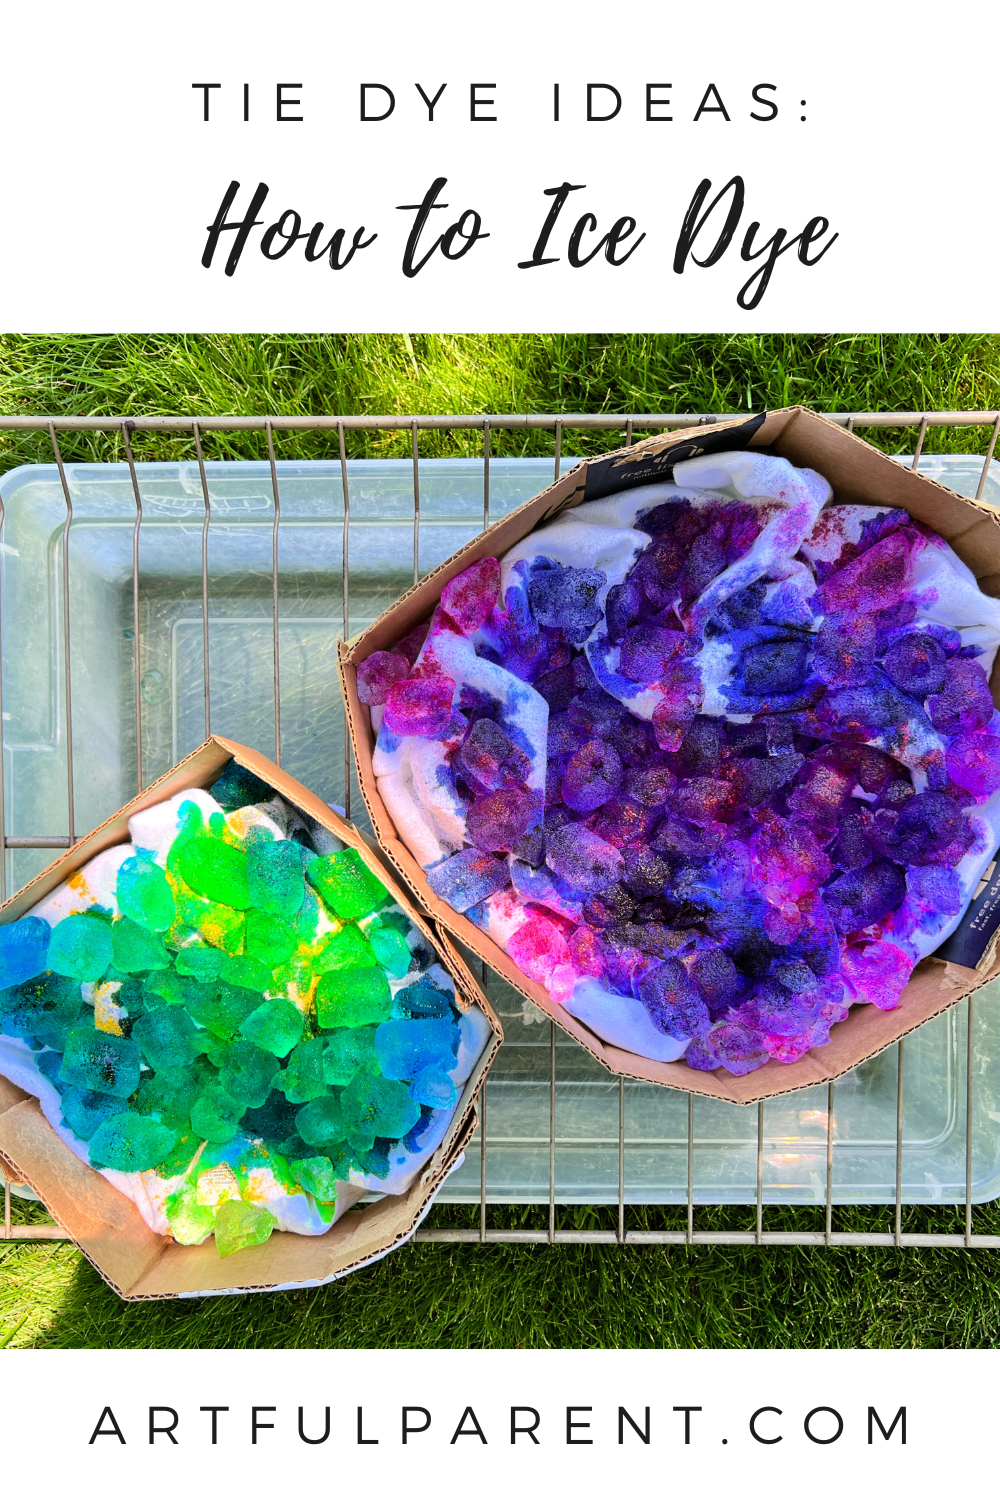
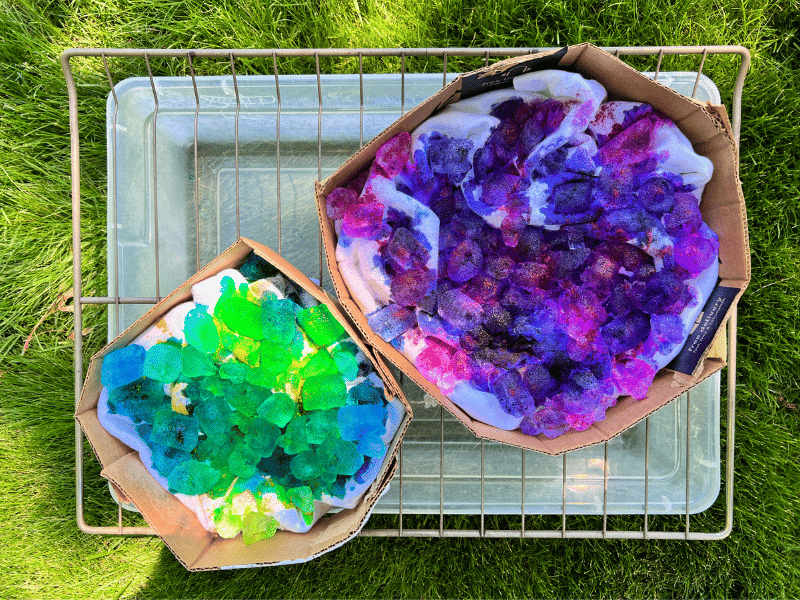
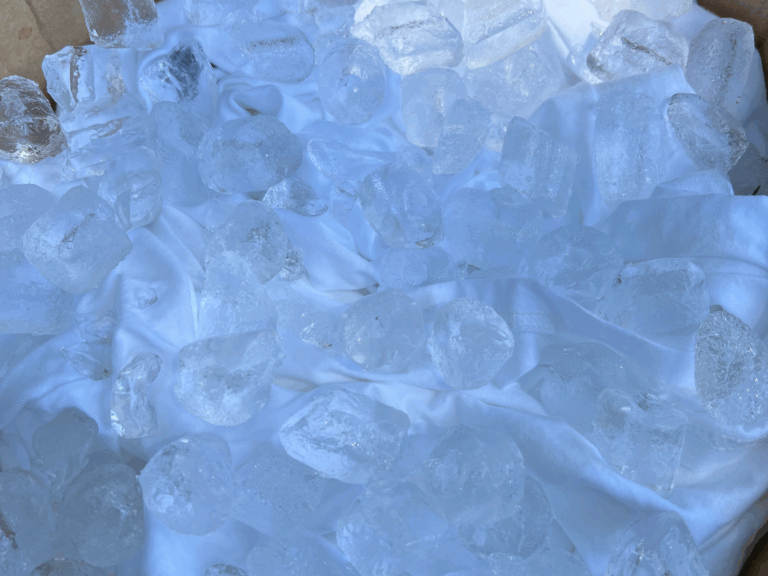
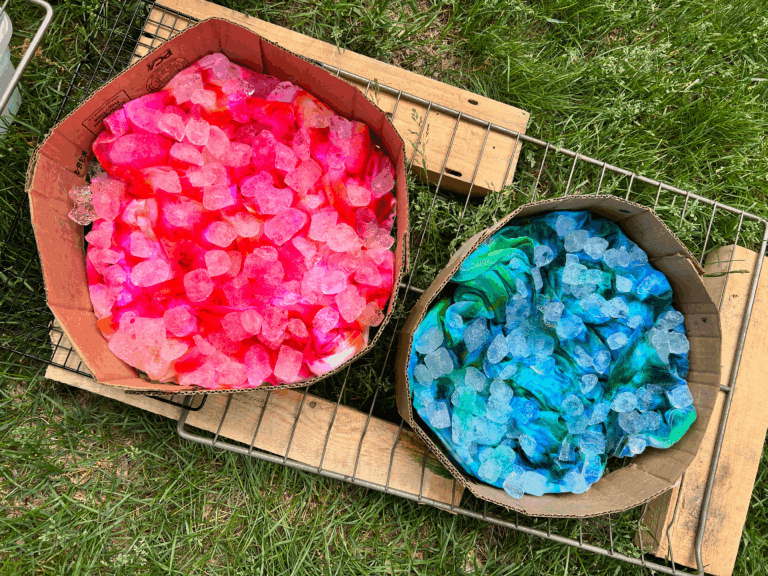
- Cover the shirt with ice
Spread ice cubes or crushed ice over the shirt. The more ice, the more water will be absorbed into the shirt, which will spread the dye around.
- Sprinkle dye over the ice
Carefully sprinkle powdered dye over the ice, being careful to avoid accidentally coloring other dye projects!
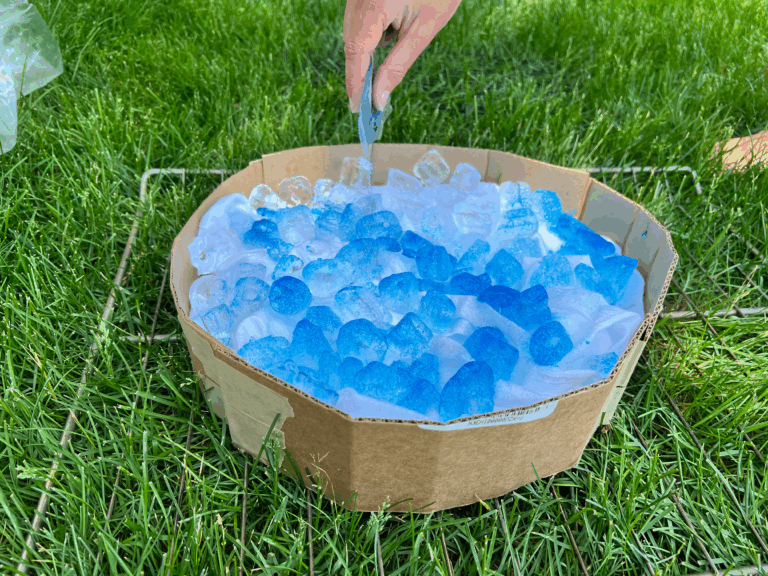
When choosing colors, make sure they are complementary. Choose either all warm colors (like orange and pink) or all cool colors (like blue and green). We used 2-3 different colors for each project.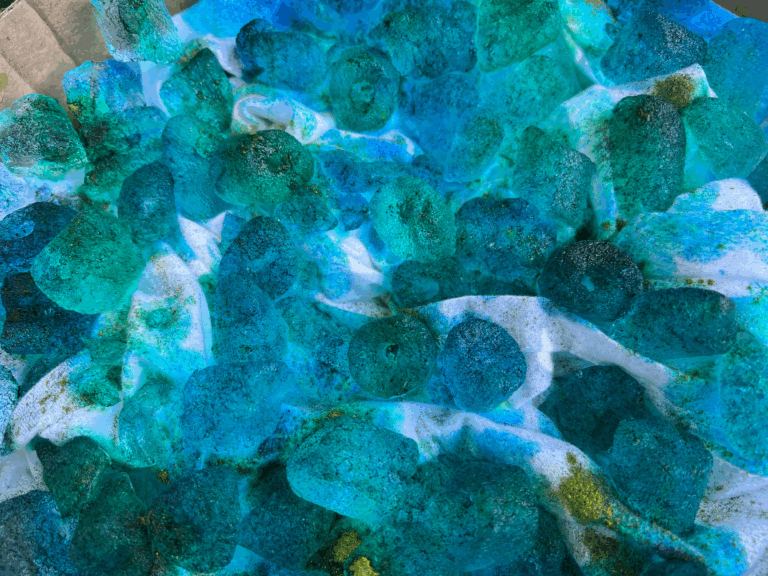
The theory behind ice dyeing is that within the powdered dye there are actually multiple colors. When mixed with water, these turn into a single shade. And when you sprinkle the powder onto the ice, you will notice that within a specific color, there are dark and light shades of powder. These melt and dye the fabric different shades. - Let sit
This is the perfect “set it and forget it” project! Once the dye is on the ice, you just let it do its thing.
Depending on how hot it is outside, the ice may be completely melted in just a couple hours or it might take much longer.
Note: As the ice melts, if there are spots where the dye is really concentrated, you can add more ice cubes to diffuse it.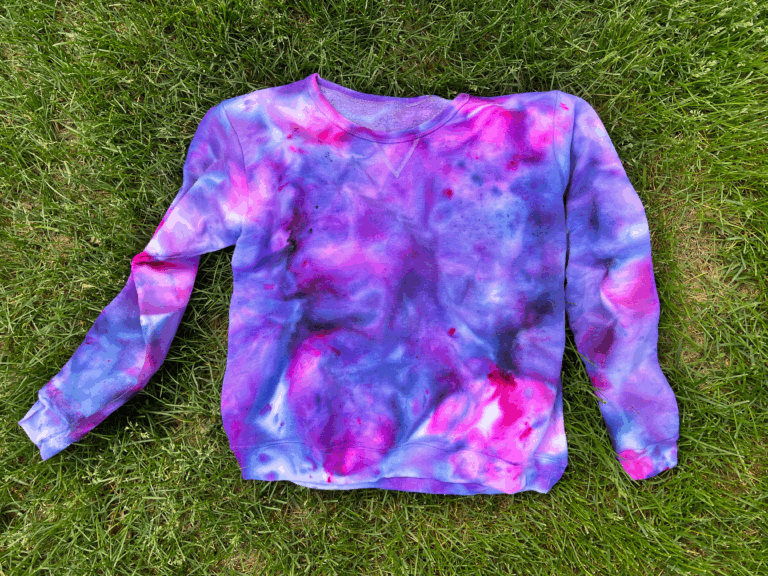
- Wait a little longer
Once the ice is melted, you’ll want to let your clothing sit for another 4-6 hours to make sure the dye is set. The longer the dye sits, the more vibrant the final product will be.
I had a hard time waiting so my sweatshirt turned out a pastel color, but it’s still gorgeous!
Finally, rinse thoroughly then wash and dry according to the tie dye package instructions.
As with tie dyeing, the big reveal never gets old! Each ice dyed item we pulled out of the dryer was better than the last!
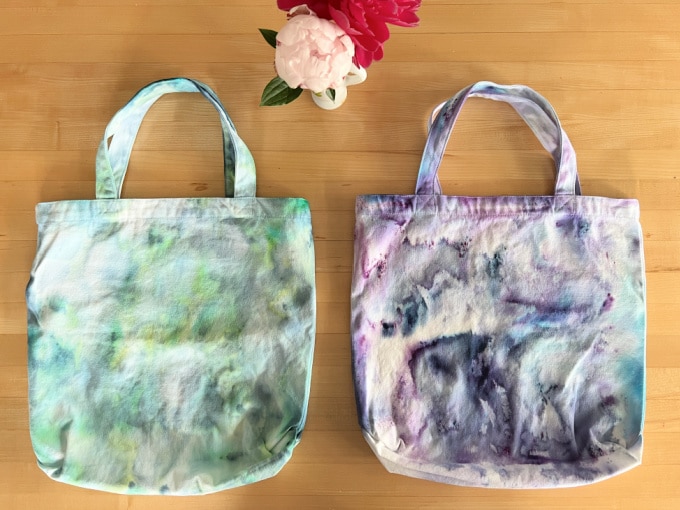
This is one of the best tie dye ideas we’ve tried so far. We dyed sweatshirts, t-shirts and bags and they all came out so different and so cool. (I think the bags might be our favorite!)
If you haven’t tried ice dyeing yet, you must give it a shot!
More Tie Dye Ideas for Kids
- How to Tie Dye Shirts
- How to Sharpie Dye Comfort Pillows
- 5 Tie Dye Ideas to Try with Your Kids
- How to Spray Dye Towels for Summer
- 11 Ways to Have a Creative Summer with Kids
- 12 Best Summer Art Activities for Kids
Pin It for Later