
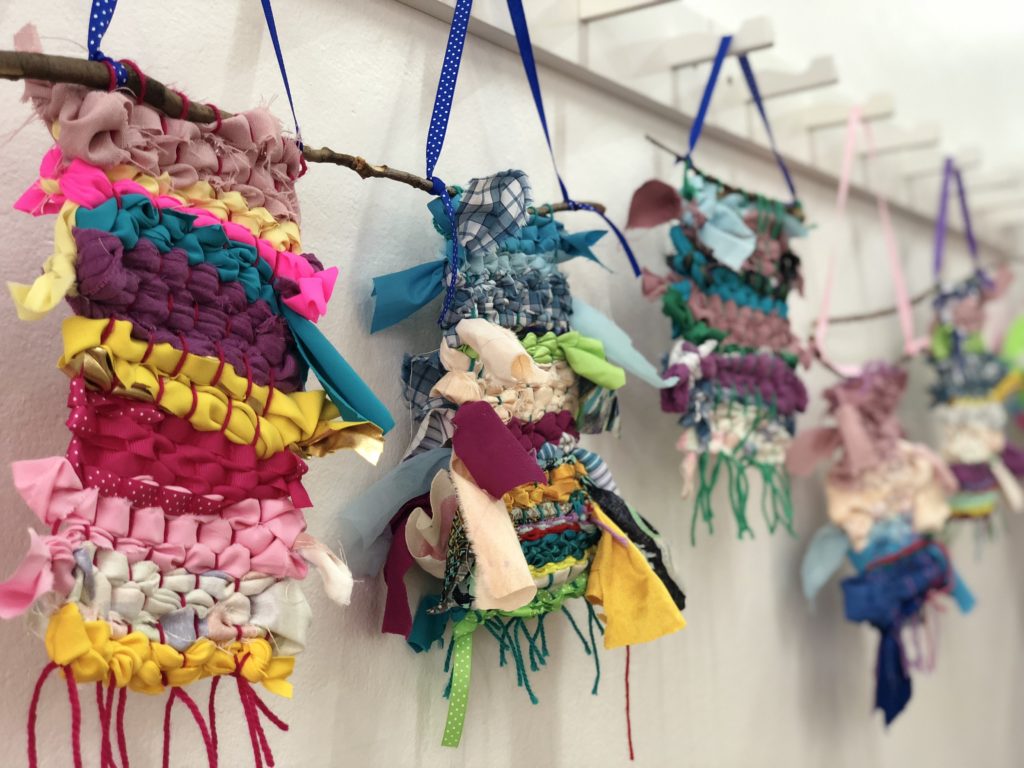
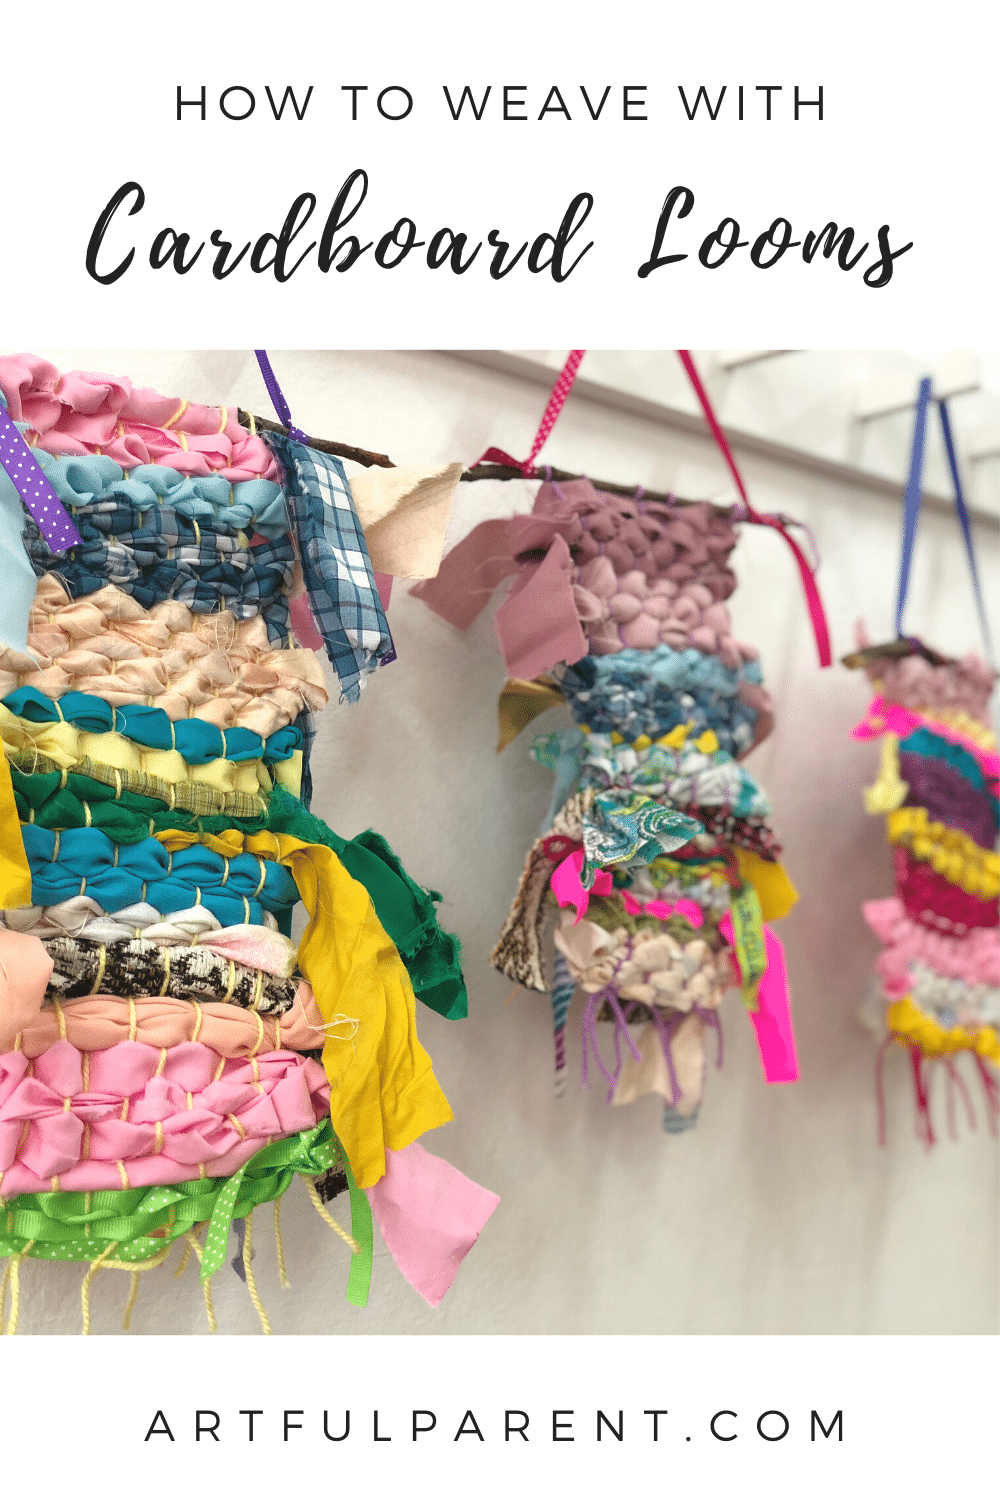
Learn a simple weaving activity for kids with cardboard looms and fabric. Create a beautiful piece of art to hang in your home!
Updated January 2023
I don’t know about you, but I have great memories when I was a young one in the seventies (oops showing my age) spent weaving on my little kid-sized wooden loom (weaving apparatus).
It’s been lovely to see this age-old craft enjoy a resurgence in popularity over the last five years or so. Instagram and Pinterest are positively inundated with contemporary weaving inspiration to feast your eyes on.
You too can easily make an attractive woven wall hanging at home with your children using a simple homemade loom! There’s no fancy & expensive craft materials required!
Today I’ll show you how to make cardboard looms with this super-quick & easy version of traditional yarn weaving (which is much more labor intensive).
Cardboard Loom Weaving

MATERIALS
- stiff cardboard (for the loom)
- scissors
- cotton twine
- fabric remnants
- ribbons
- colored yarn
- a stick or piece of dowel for hanging
Time needed: 1 hour
INSTRUCTIONS
- Make the cardboard looms
To make your simplified weaving loom, start with a piece of rectangular cardboard. The size of your cardboard will determine the size of your weaving, but it’s best not to go too big. I used a roughly A3 (12×16 inches) sized rectangle with my students.
Carefully cut evenly-spaced slits along the top and bottom of your loom that are about half an inch long and spaced half an inch apart as well.
PRO TIP: The cutting is best done by an adult to ensure a better result.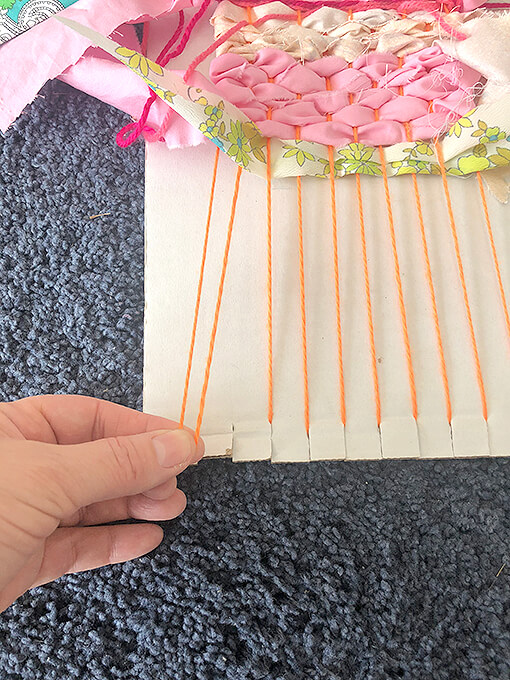
- Next add warp (vertical threads that hold the tension while you weave).
To do this, simply knot the end of a ball of cotton string or any old yarn onto the first tooth along the bottom or top.
Then loop this over the tooth on the opposite side, then back around the 2nd tooth in the row you started on and continue until the entire loom is covered in vertical strings. Tie this off onto the last tooth.
PRO TIP: Double check children haven’t accidentally gone over to the back of the loom as this makes it difficult to remove the weaving when finished.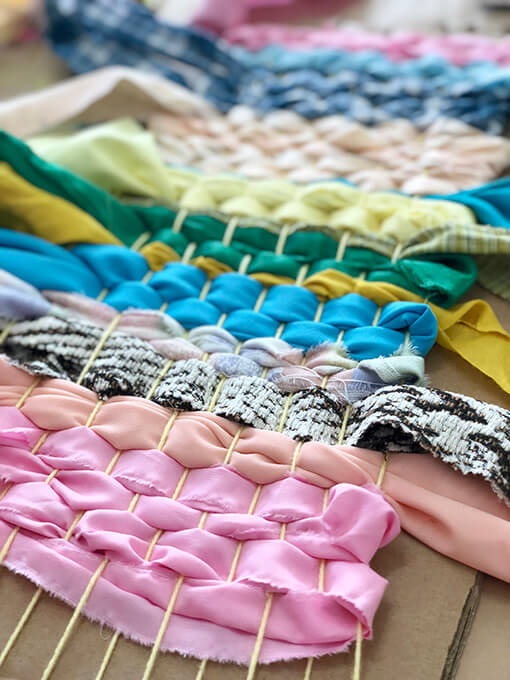
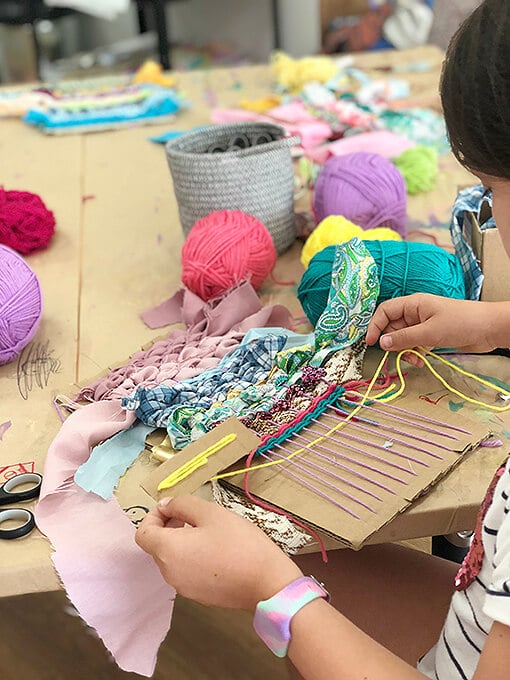
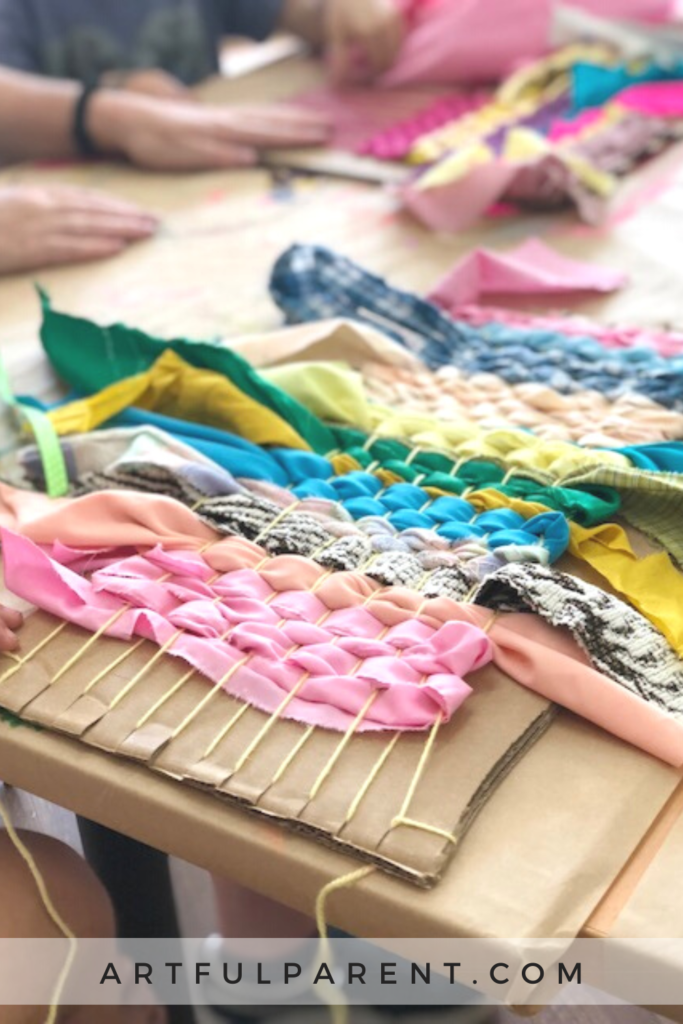
- Prepare your fabric strips
To prepare your weft (horizontal weaves), you need to cut your fabric remnants into strips about 1–2 inches wide and as long as you wish.
We raided our local recycling co-op Reverse Garbage here in Sydney for colorful fabrics and interesting textures such as lace.
As luck would have it, we even found some fluorescent fabric (my fave) which provided a real pop in our color schemes.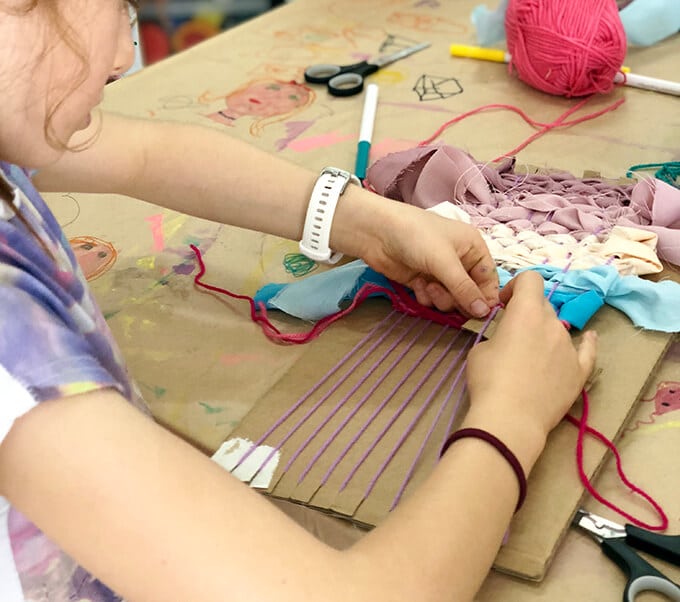
- Create your first row of weaving for kids
Weaving really is as simple as adding fabric or yarn over and under the warp thread and this is the mantra I repeat with kids as we weave.
To start weaving simply add a fabric strip by first going over a warp thread and then under, then over and so on until you get to the end of the row.
Learn a simple weaving activity for kids with cardboard looms and fabric. Create a beautiful piece of art to hang in your home! You can also weave with ribbon for contrast.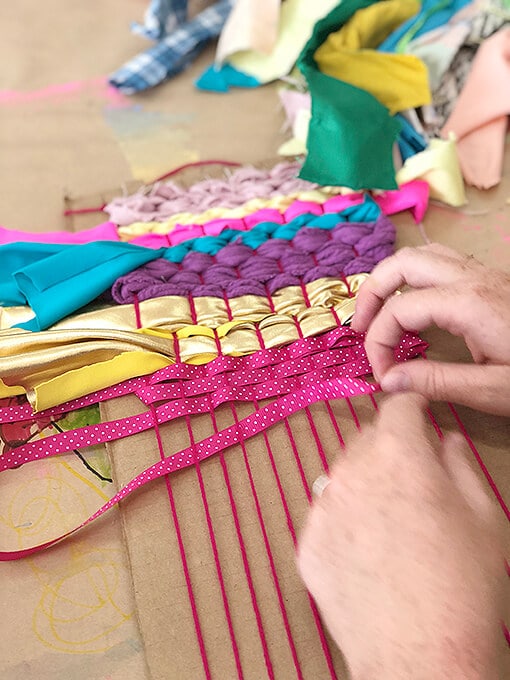
- Continue weaving in different colors
Next, weave back in the opposite direction – if your last weave was under then start with over or vice versa. Then continue weaving until the entire strip has been added. Be sure to leave adequate length hanging off the sides.
When using rag materials there is no real need to finish off ends. I like the rustic, organic look so simply tie the ends together in knots to hold them.
Be sure to squash your weft upwards towards the top of your loom before starting a new color strip.
PRO TIP: Do not pull your ends TOO TIGHT as you will end up with a wonky weaving (it’s very easy to do!).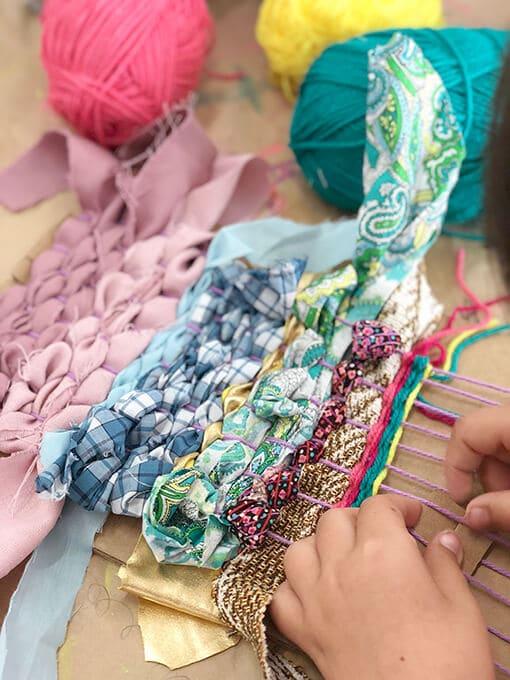
- Or try something more challenging…
Older children might want to make a more grown-up version of weaving using yarn, a proper loom and a weaving tool called a shuttle. This more traditional weaving takes MUCH longer but is a great supplement for kids who enjoy weaving.
Lastly, kids might also wish to carefully weave the yarn ends back into their work (using a thick yarn needle) so that it looks more professional.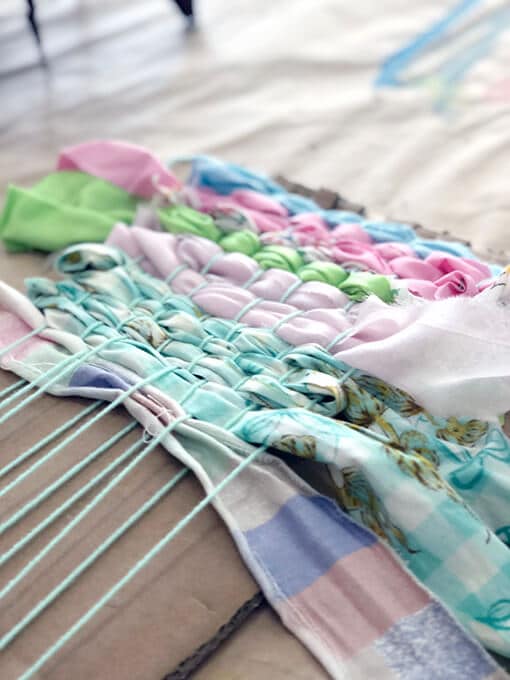
- Remove the weaving off the loom
Very carefully slide the string loops off the teeth at the top of your loom one at a time directly onto a stick or dowel.
Then remove the bottom loops, one at a time, cutting and knotting as you go. Add a string or ribbon loop to your branch or dowel for hanging. Et voila!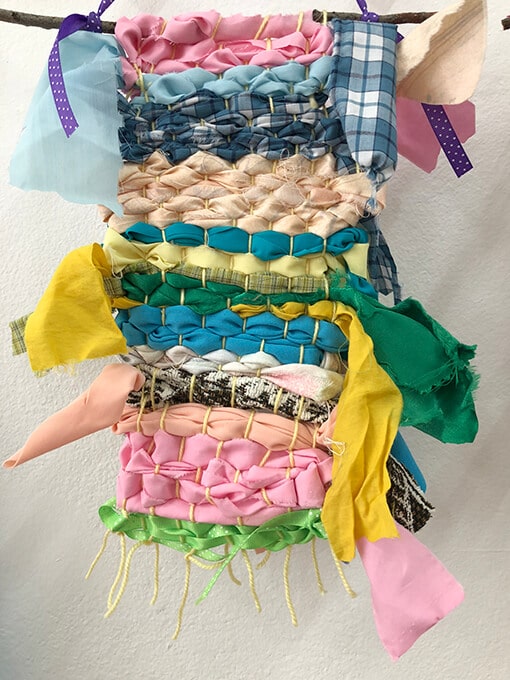
You can also add more decoration by adding beads to the hanging loop and pom poms (who doesn’t love pom poms?). Older kids might enjoy adding yarn tassels to the bottom of their weavings.
Enjoy!
More Weaving Projects for Kids
- Simple weavings for kids (with pom poms!) on Art Bar.
- Create a circular weaving for kids (easy enough for preschoolers)!
- Or dig out some yarn and make a simple wooly wall hanging.
And if textile art is something you really enjoy, check out Stitch + String Lab for Kids, one of our recommended art activity books for kids!
Pin It for Later
