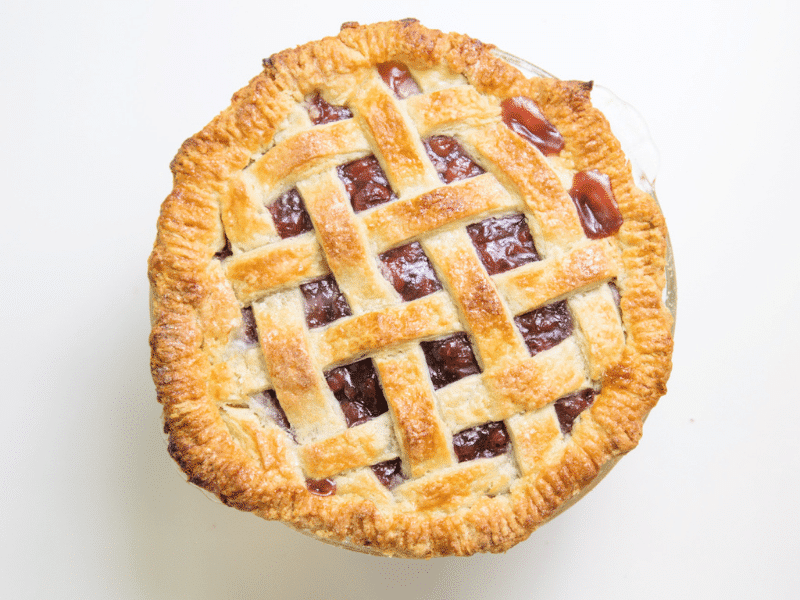
This is the best cherry pie recipe for using canned tart cherries. As a cherry pie lover, our founder, Jean, fiddled with recipes over time, and this is the best!
Updated July 2023
 Cherry pie is our founder, Jean’s, all-time favorite dessert.
She used to request cherry pie instead of cake for her birthdays growing up and still makes it not only for birthdays, but also for parties and almost all holidays.
She fiddled with various recipes over the years and finally settled on a version that is THE BEST CHERRY PIE RECIPE ever. It is adapted from a combination of others—primarily from the recipes in The Pie and Pastry Bible by Rose Levy Beranbaum and The Best Recipe by the Cook’s Illustrated folks.
It’s a canned cherry pie recipe, as canned cherries are readily available year-round, and most people don’t have a cherry tree in their backyard. However, please note that this cherry pie recipe uses cherries canned in water NOT canned cherry pie filling.
Here’s a brief video tutorial showing how to make the cherry pie. It might be helpful to watch before you get started.
Doesn’t that make it totally doable?! Now here are the step-by-step instructions. (Or jump down to the printable recipe at the bottom of the post.)
How to Make a Cherry Pie
Time needed: 45 minutes
INSTRUCTIONS
- First, make your pie crust
Everyone has their own preferred recipe. Or you can buy yours premade!
- Next, make your cherry pie filling
Make the pie filling by mixing the sour cherries plus juice from 1 1/2 cans with sugar, cornstarch, salt, and almond extract in a large, heavy-bottomed saucepan.
Bring to a simmer and cook over medium-low heat for about 10 minutes, stirring regularly, or until the liquid is thick and bubbly (partially jelled).
Set aside to cool completely. You can do this step a day ahead if you want to pace yourself. - Assemble a beautiful cherry pie
Roll out the bottom pie crust and arrange in pie pan. Pour your cooled pie filling in the pan.
Next, roll out the top crust. Use a sharp knife to cut the top crust into strips for a lattice crust or use a cookie cutter to make other designs.
Either drape your top crust over the pie, if you used a cookie cutter design, or weave your traditional lattice crust (if you need instructions for weaving the lattice, here’s a YouTube video).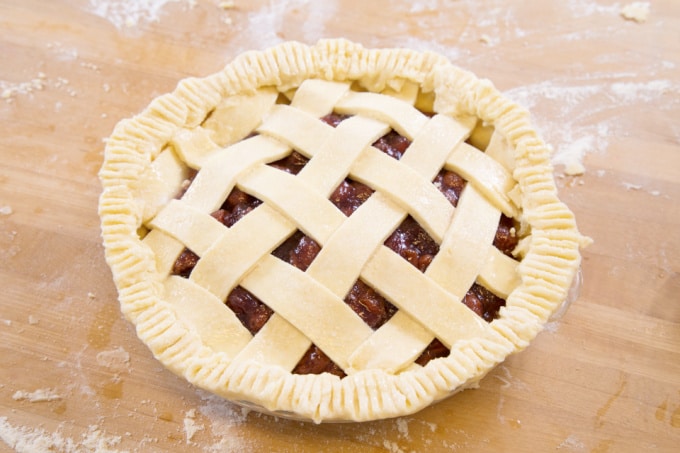
- Finally, bake your pie
The house is smelling delicious now!
But wait! Don’t eat it yet!
You really want to let your fresh-baked cherry pie cool for a few hours, until it’s totally cool and the filling has set.
It’s okay if you don’t. We’ve been known to eat it while still warm more than once.
But think of it as an opportunity to admire the pie on the table, take a few photos, and let the anticipation build.
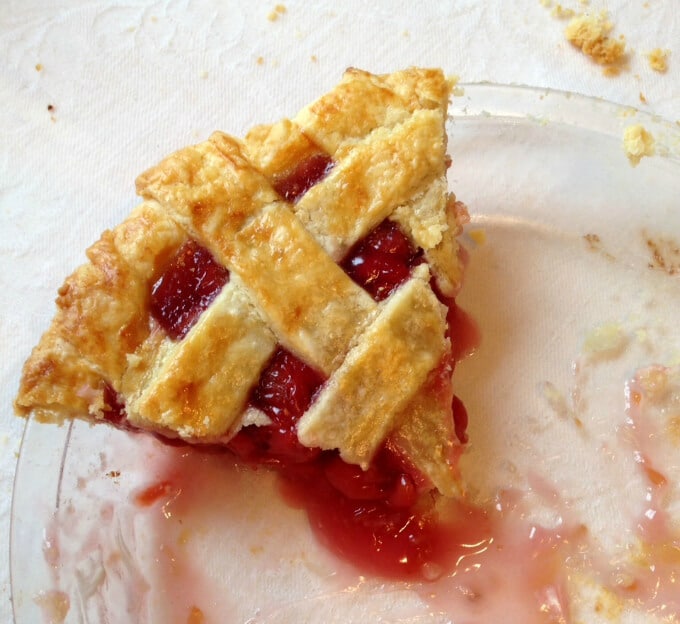
And then… finally… Eat and enjoy! This sour cherry pie is especially delicious with whipped cream or vanilla ice cream.
Here’s the complete recipe! we hope you love it as much as we do!
Print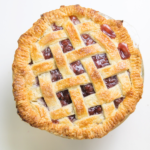
The Best Cherry Pie Recipe
- Prep Time: 1 hour
- Cook Time: 1 hour
- Total Time: 2 hours
- Yield: 1 Pie 1x
- Category: Dessert
Description
This cherry pie recipe uses tart or sour cherries and is the BEST. Seriously. Plus, by using canned cherries, you can make it anytime of the year rather than waiting for fresh cherries.
Ingredients
Pie Crust Ingredients
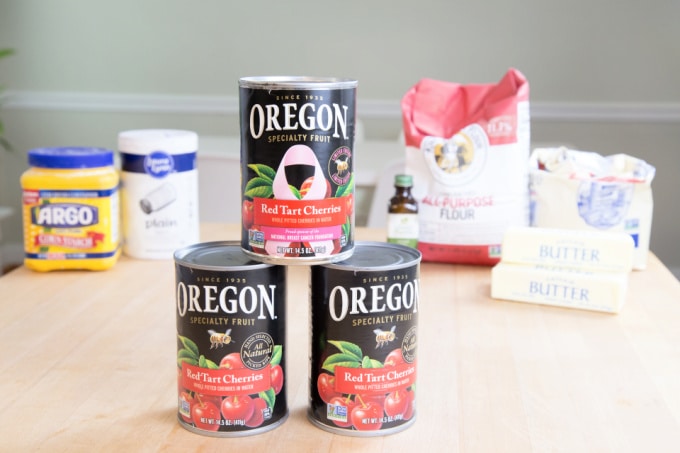
- 2 1/2 cups all purpose flour
- 1 teaspoon salt
- 2 tablespoons sugar
- 12 tablespoons unsalted butter, chilled
- 8 tablespoons Earth Balance, or comparable vegetable shortening, chilled (or simply use all butter)
- 8 tablespoons ice water
Ingredients for Cherry Pie Filling
- 3 cans tart cherries in water (I buy Oregon Fruit Products Red Tart Cherries which are often with the canned fruit rather than in the baking aisle of the grocery store; you can also order them online)
- 4 tablespoons cornstarch
- 1 1/4 cups sugar
- 1/8 teaspoon salt
- scant 1/4 teaspoon almond extract
Instructions
How to Make the Pie Crust
- Mix the flour, salt, and sugar in a food processor. Cut butter into smaller pieces and add to food processor. Pulse a few times. Cut Earth Balance into smaller pieces and add to food processor. Pulse a few more times, until butter and Earth Balance are the size of peas or smaller. Transfer to a large bowl. (Note: You can do all this with a pastry blender instead if you don’t have a food processor.)
- Sprinkle 3-4 tablespoons of ice water over the dough mixture at a time, mixing and pressing with a sturdy rubber spatula until the dough comes together. Divide into two and wrap each half in plastic wrap. (I usually dump the semi-formed dough onto plastic, wrap it up, then knead it with my hands a bit until it forms a ball, then flatten it somewhat into a disk.) Refrigerate until ready to use.
How to Make the Cherry Pie Filling and Assemble the Pie
- Make the pie filling by mixing the 3 cans of cherries plus the juice from 1 1/2 cans with sugar, cornstarch, salt, and almond extract in a large, heavy-bottomed saucepan. Bring to a simmer and cook over medium-low heat for about 10 minutes, stirring regularly, or until the liquid is thick and bubbly (partially jelled). Set aside to cool.
- Preheat the oven to 425 degrees fahrenheit. Cover a cookie sheet with foil and place on a lower rack (to catch any potential drips).
- Sprinkle the counter with flour and roll out the bottom pie crust. Arrange in pie pan. Pour your cooled pie filling in the pan.
- Roll out the top crust. Use a sharp knife to cut the top crust into strips for a lattice crust or use a cookie cutter to make other designs. Either drape your top crust over the pie, if you used a cookie cutter design, or weave your traditional lattice crust.
- Trim the edges of the top and bottom crust to 1/2 – 1 inch beyond the pie pan and then fold under. Either press around the perimeter with the tines of a fork or crimp it with your fingers.
- If desired (and I always do), brush the crust with a beaten egg white (or cream) and sprinkle sugar on top.
- Bake for 20 minutes at 425 degrees F then lower the oven temperature to 375 F and add a pie crust shield (or a foil tent with the center cut out) to protect the outer edges of the crust from burning. Bake for another 30-40 minutes, until the crust looks nicely browned and the juices bubble up thickly.
- Remove from the oven and let cool for 3 hours or so before eating. This is the hard part but it really helps to have the filling gel properly. Plus it looks and smells so nice sitting on the table!
- Eat and enjoy… This cherry pie is delicious with whipped cream or vanilla ice cream.
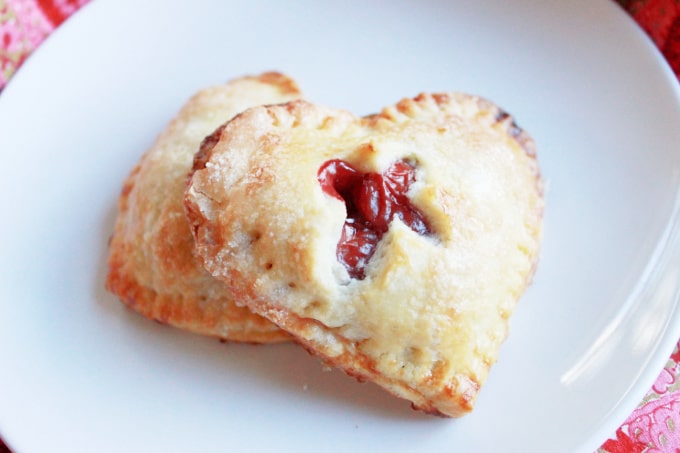
P.S. Cherry hand pies are delicious, too.
And, if you’re swimming in fresh cherries, you’ll want to check out 30 fresh cherry recipes and how to freeze them (on Peanut Blossom).
People Also Ask:
- What cherries are best for pies? For this recipe, we love using cherries canned in water (not cherry pie filling!) because we love the sour cherry taste AND because you can make it anytime of the year rather than waiting for fresh cherries.
- How do you make a cherry pie filling not runny? Adding the sugar and cornstarch to the 3 cans of cherries plus the juice from 1 1/2 cans and cooking over medium-low heat will help the filling to get nice and thick.
More Baking Ideas for Kids
- Try This Delicious & Easy Apple Bundt Cake Recipe
- Raspberry Lemon Cream Cheese Coffee Cake Recipe
- How to Make Teddy Bear Bread – An Easy Bread Recipe for Kids
- How to Make Cherry Hand Pies for Valentine’s Day
- The Best Blueberry Muffin Recipe
- We have a whole page dedicated to cooking + baking for kids.
Want even more creative ideas?
Check out our Cooking Creativity pack!
Have a budding chef in the family? This 35-page eBook is ready for immediate download and includes a Family Meal Planner, Tips & Tricks, Easy Recipes, and more!

Pin It for Later

