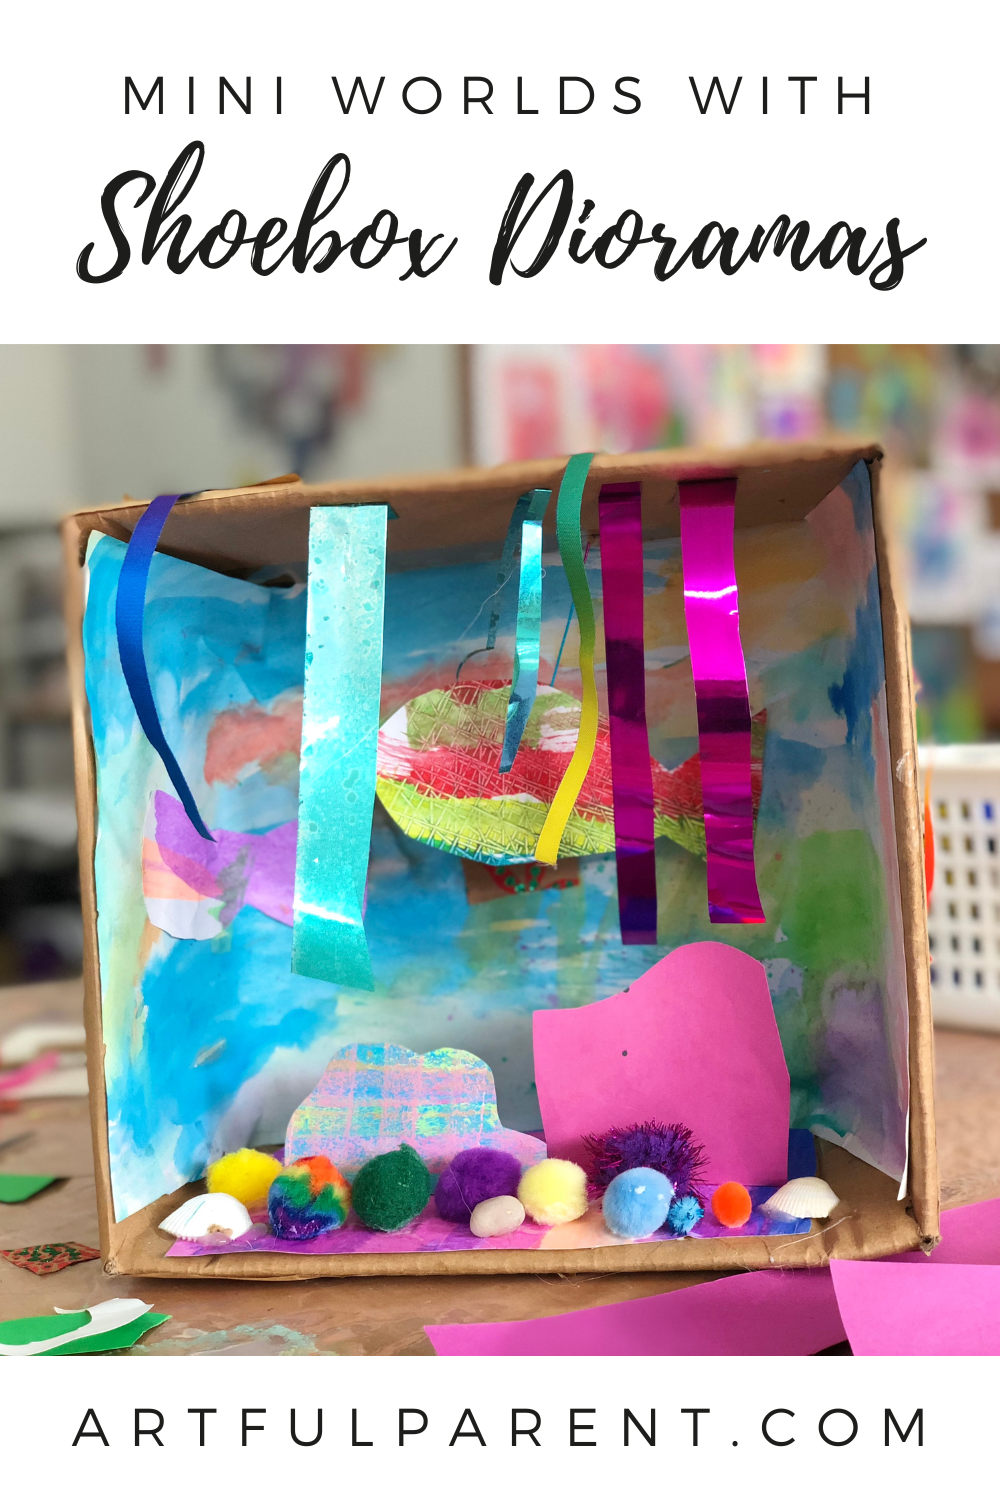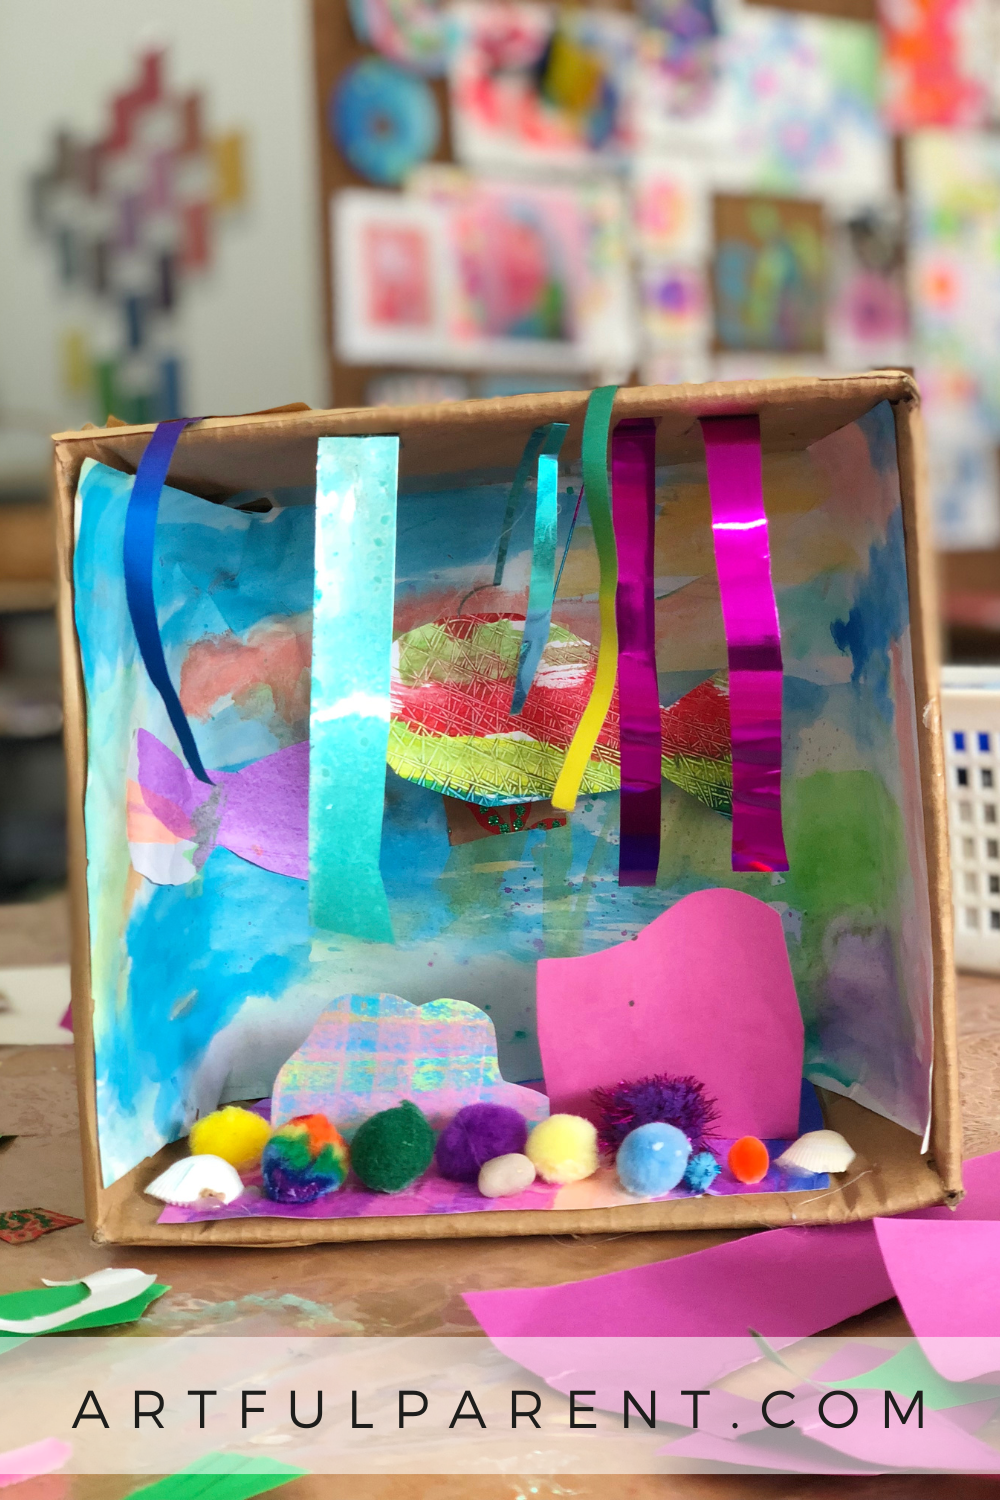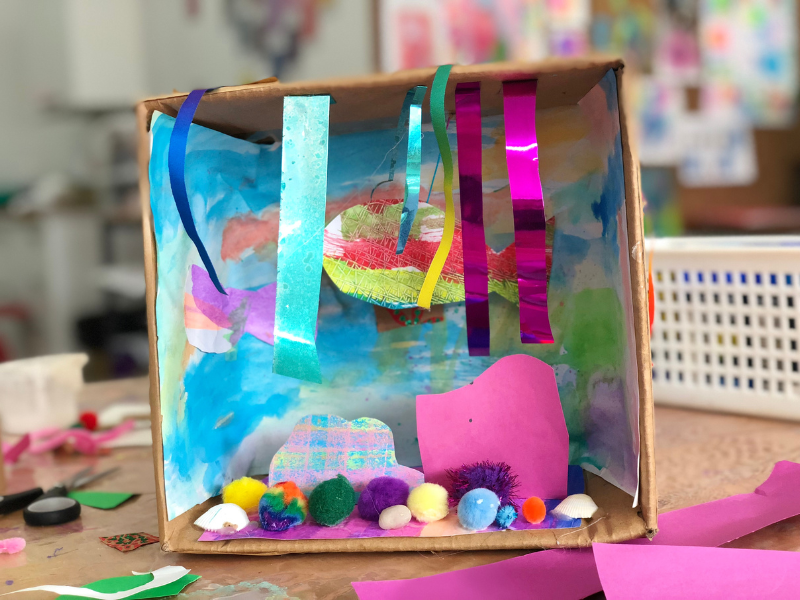
Imaginary mini worlds are so fun to create with these awesome shoebox dioramas for kids. Pick a theme or keep it open-ended! Post and project by Danielle Falk of Little Ginger Studio.
Updated February 2025
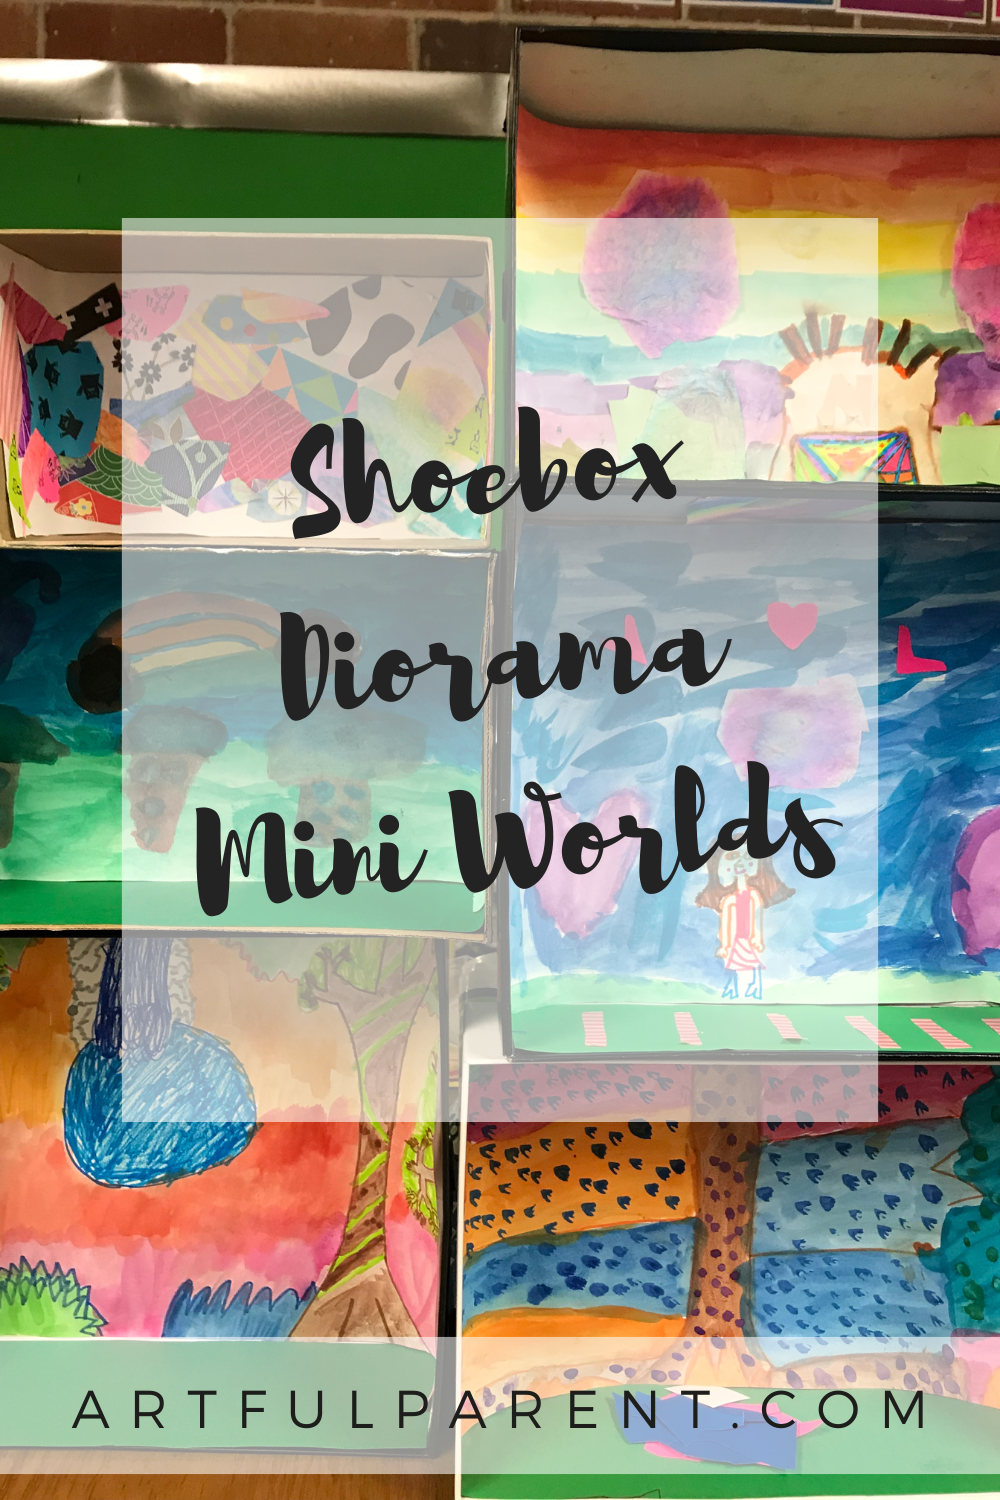
We’ve probably all made a diorama at some point in our childhood. So why not revisit this classic activity with your kids?
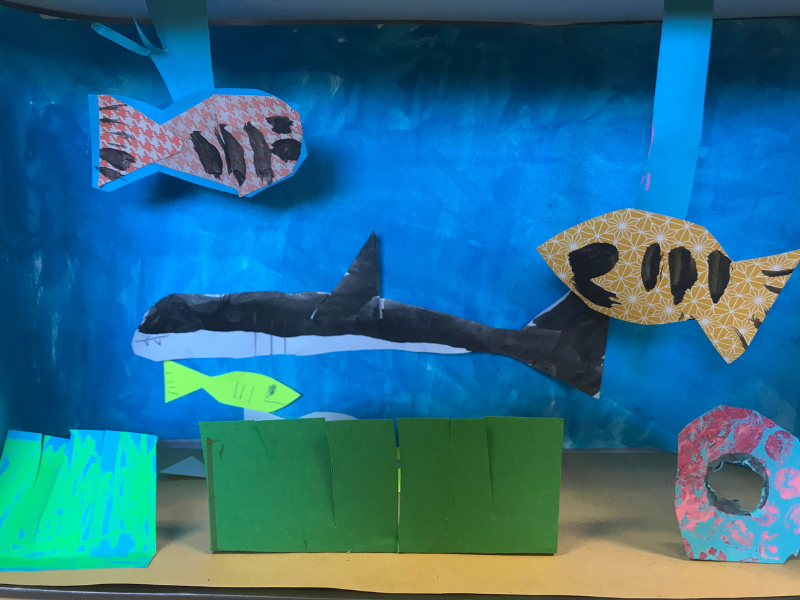
The beauty of dioramas is that you can either leave them as a completely open-ended activity and let children’s imagination take them in wild directions or they can be themed (under-the-sea, the jungle, etc.)
The other great thing about dioramas is that they can actually encompass all sorts of artistic skills and crafts, anything from painting to needlework.
They can also include smaller crafts and artworks such as clay figures, weavings, paper sculptures or even natural materials.
With that said, the dioramas I will show you are simple to make, use limited materials and were all made in one sitting.

Shoebox Dioramas for Kids
MATERIALS

- a nice clean and sturdy shoebox
- writable brown packing tape
- cake watercolors
- paintbrushes
- water
- sturdy paper
- scissors
- glue stick
- thin floral wire
- Scotch tape
- colored cardstock or leftover artwork
- pencils
- craft items: pom poms, shells, pebbles, corks, ribbon, shiny streamers for decorating
- hot glue gun
INSTRUCTIONS
- Paint a scene for the shoebox dioramas
Once you or your child have decided on the theme or setting of your diorama, it’s time to create an eye-catching backdrop.
Grab a piece of white paper, and use the box to trace what will become the “back” of your shoebox diorama. Trim your paper so that it neatly fits along all three walls. (The back wall and two side walls will all form part of your scene / landscape / interior).
Paint your scene. It can be as simple as a sunset or more complex.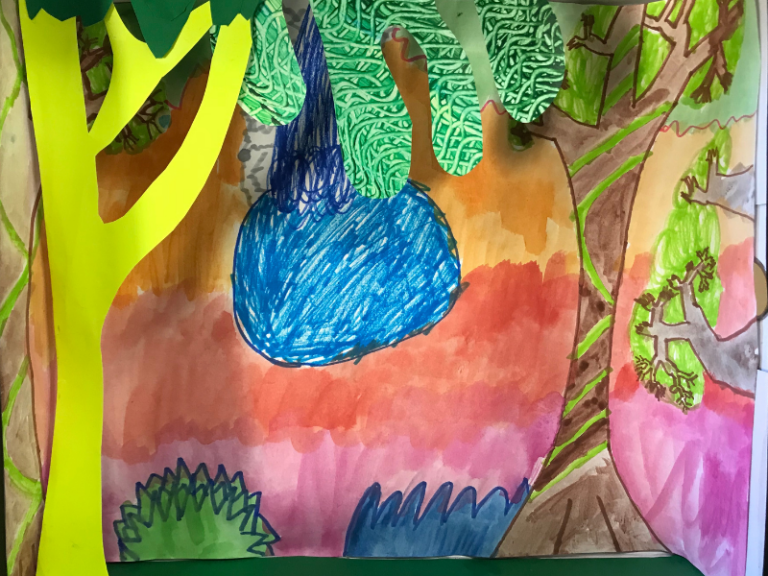
- Cover the exterior of your diorama
It’s a nice idea to cover any writing on the outside of the diorama to make it look a bit cleaner. I used the brown packing tape for this purpose, or you could use paper if the box is white.
You might like to add a theatrical look and decorate the diorama in rich colors and fancy trims and curtains, as if it were a stage! - Add in the paper elements
Start by carefully gluing in the painted background. Simply run the glue stick along the ends and press firmly so it’s attached to the side walls. Let it curve gently across the back corners of the box.
Create some elements of your scene that will hang down (such as a canopy in a forest, clouds, flying birds or a lampshade) or stand up (trees, furniture).
We drew and cut ours out of leftover artwork and colored paper but you can use any cardstock or heavy paper. Tape or glue these to your diorama.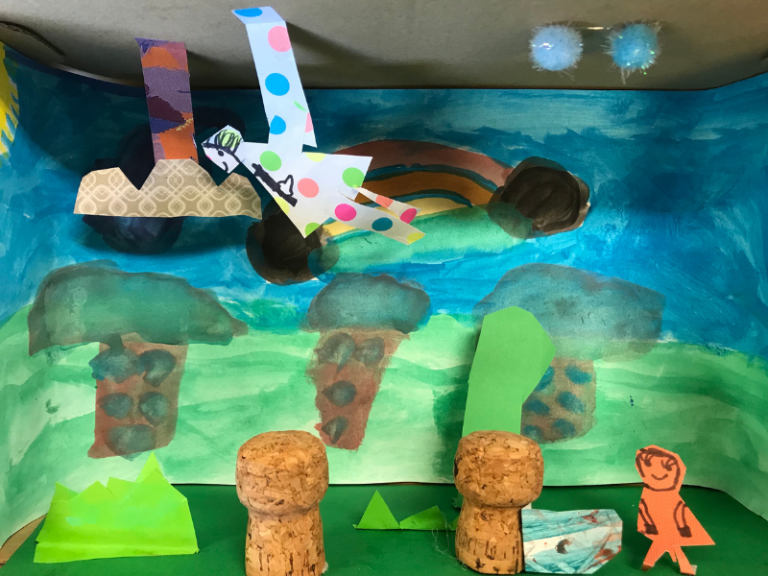
- Finish with other materials and decorations
This is the fun bit! You can use any craft materials you like to finish off your diorama.
Add ribbons or streamers hanging down from the “ceiling” to create pretend seaweed, add natural elements such as shells, stones, leaves, pom poms or other recycled materials.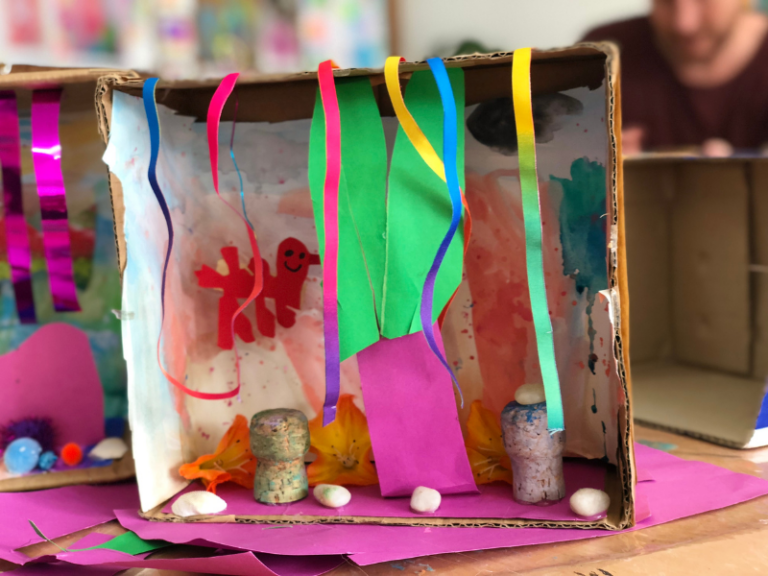
There really is no right or wrong here, but it is a good idea to glue things down and we used a little bit of hot glue for this purpose.
How sweet are these dioramas?? I hope you try these out with your kids!
More Pretend Play Craft Ideas
- How to Make a Cardboard Castle for Pretend Play
- Craft Ideas Perfect for Pretend Play
- How to Make DIY Play Mat for Kids
- Try these Creative Small World Play Ideas for Kids
- How to Set Up a Playdough Play Tray
- Our Favorite Playdough Play Ideas for Kids
Pin It For Later