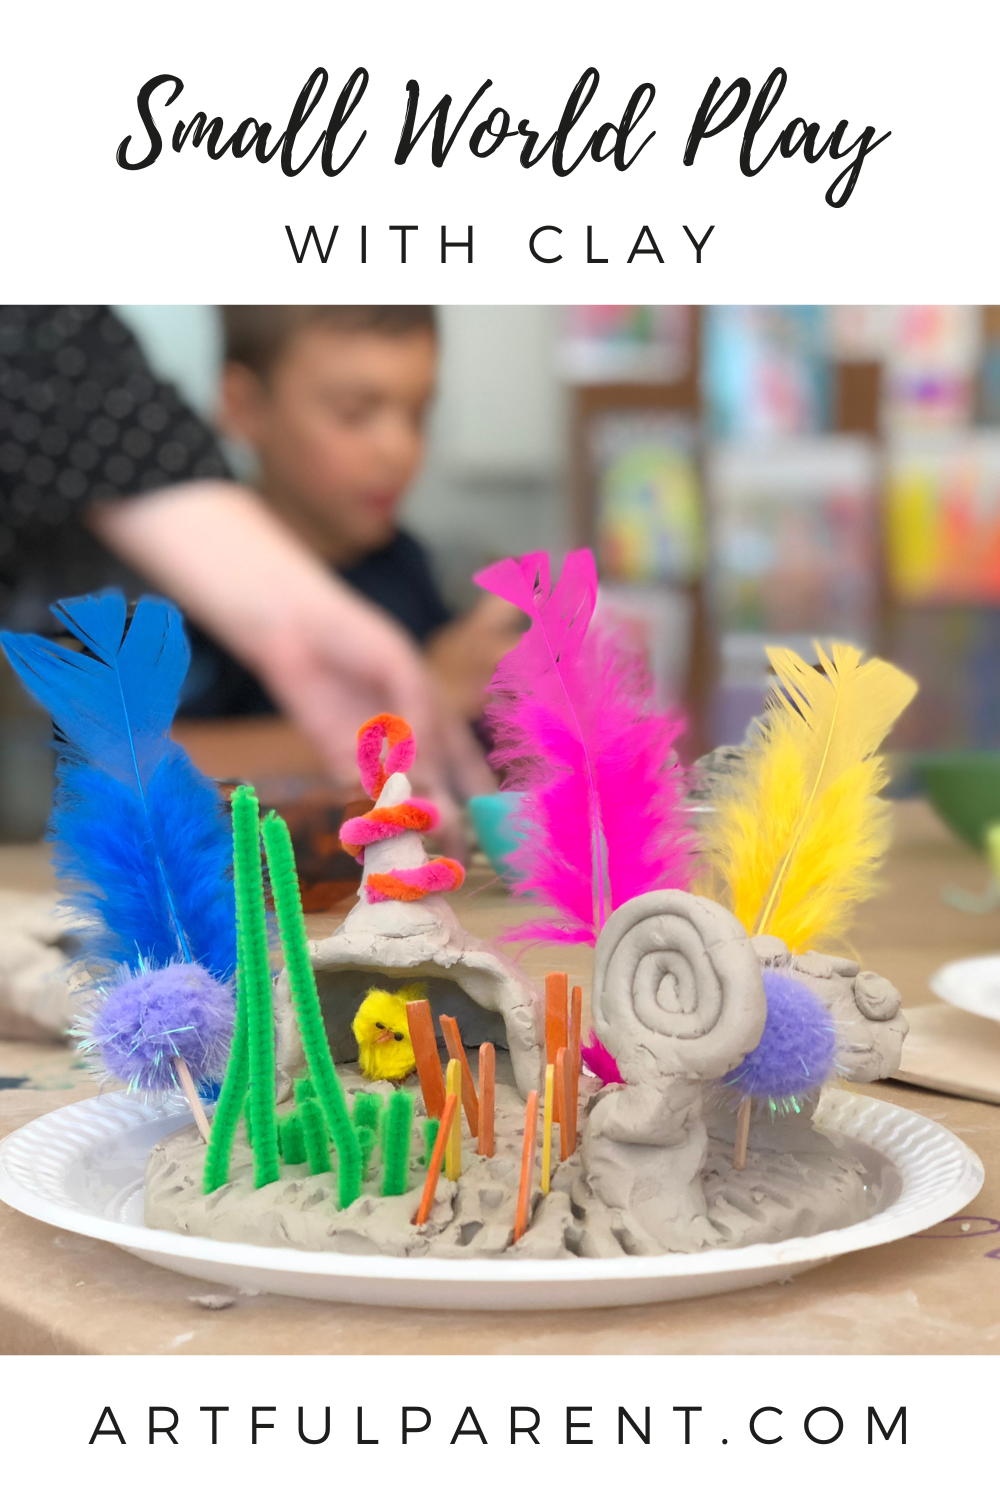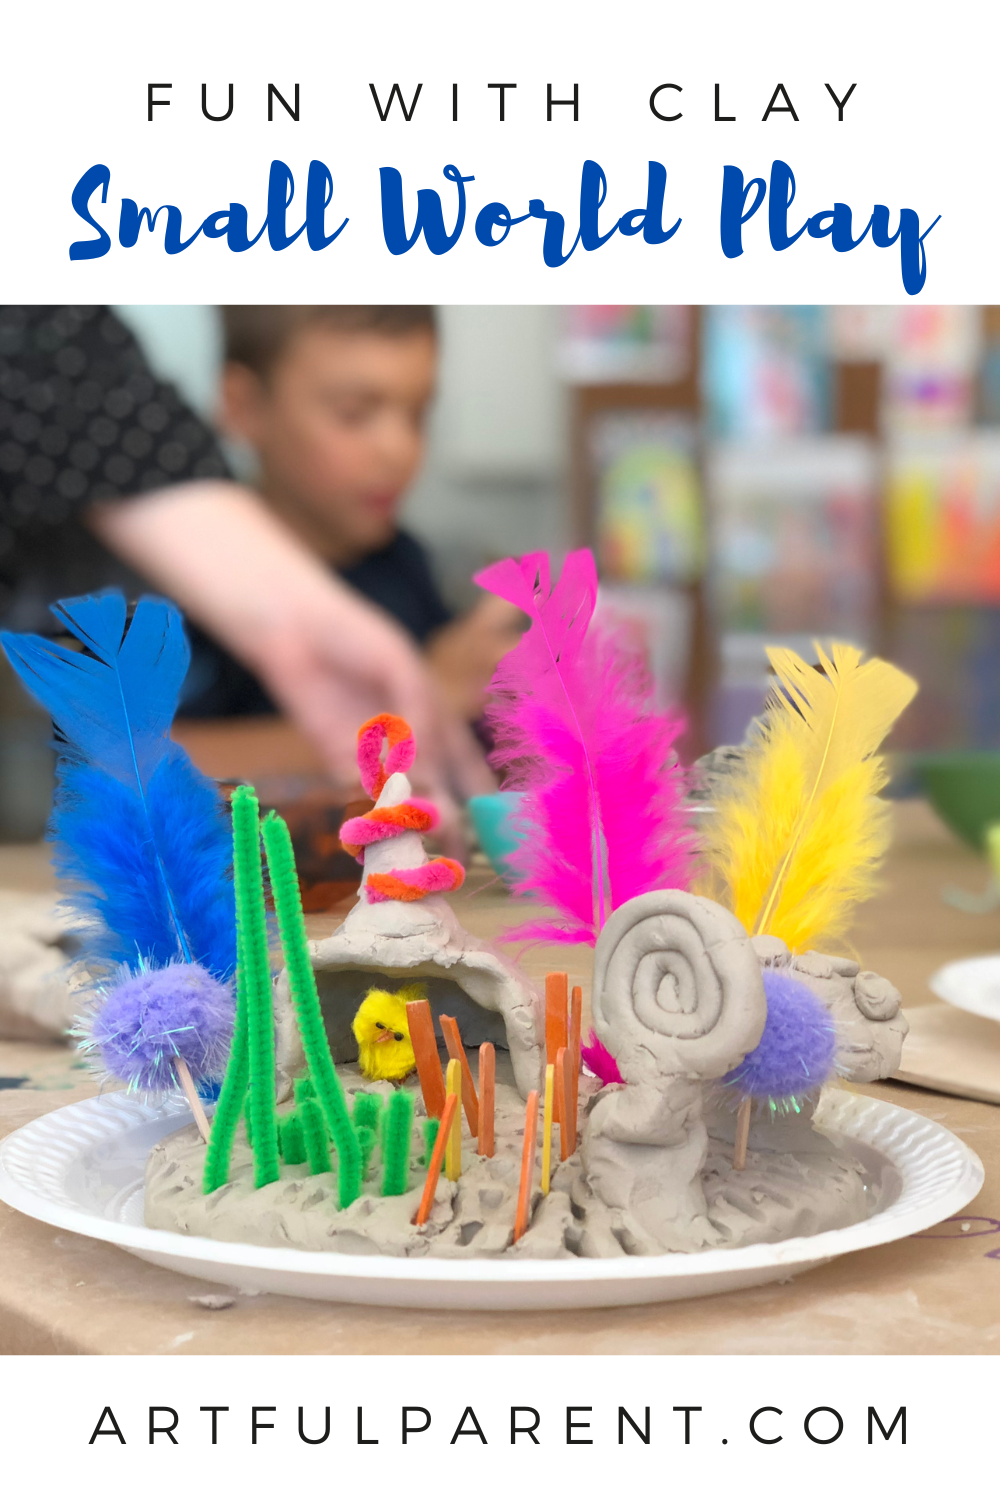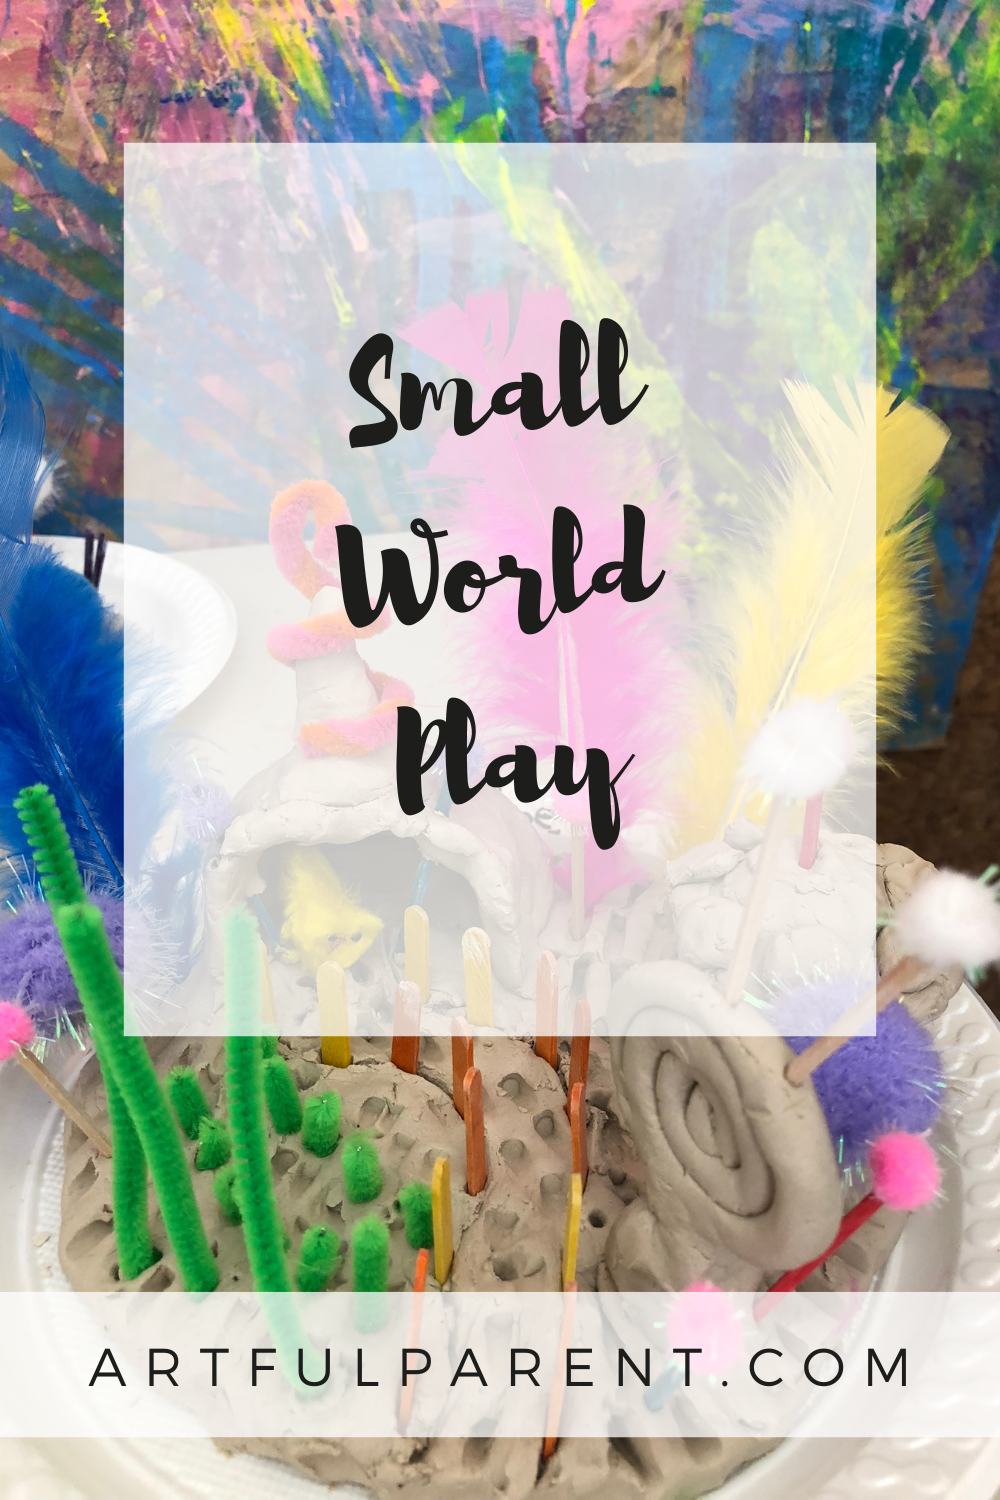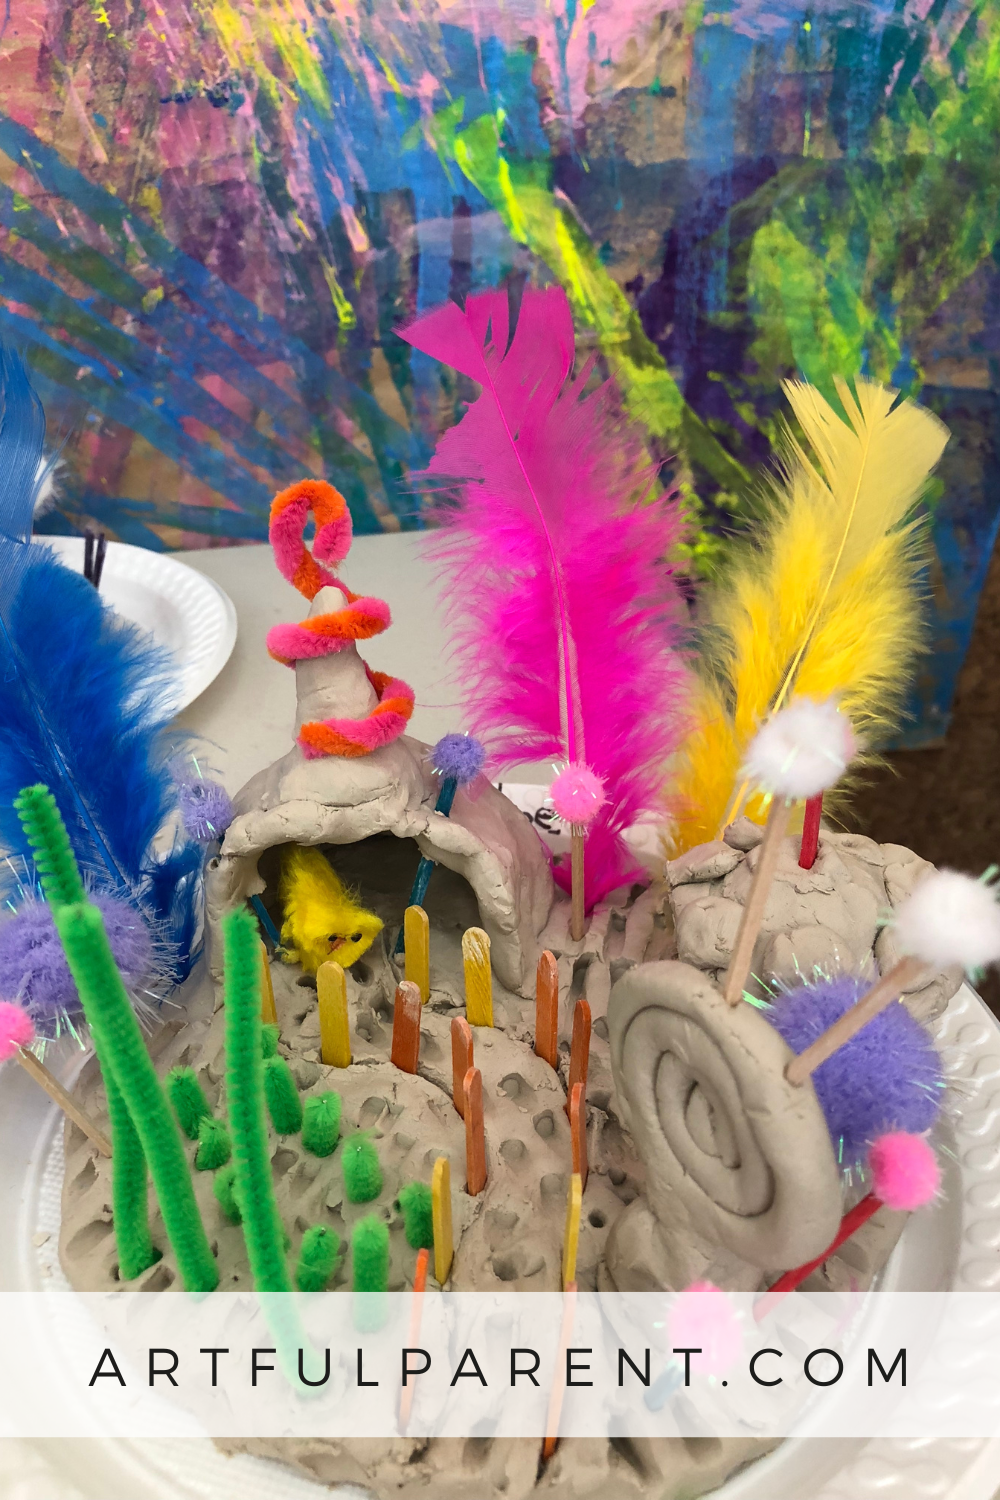
Try some small world play with your kids by adding lots of craft materials to a scene made from clay. This is a fun make and play activity!
Updated March 2025
Kids love to create tiny, little worlds and fill them with all sorts of imaginative details. This activity is an easy to set up with air-dry clay and craft materials and needs very little direction from an adult.
You can also do this small world play idea with playdough! (Here are our favorite cooked playdough and no-cook playdough recipes). If you choose to use playdough your kids could make their small worlds over and over. Store away the craft materials for next time!
These small worlds encourage open-ended creativity and kids are only limited by their imagination!
One of my absolute favorite things as an art teacher is putting out colorful and exciting craft materials to spark children’s imaginations and then stepping back and watching them create.
Creative Small World Play with Clay

MATERIALS
- air-dry clay (or playdough)
- skewer & clay tools if you have them or popsicle sticks
- small bowl of water
- paper plate, plastic plate or plant saucer
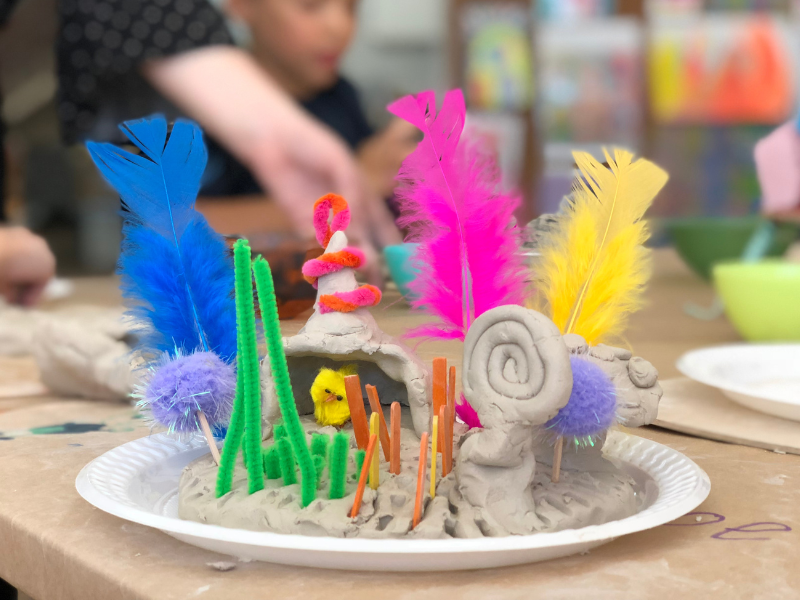
- Decorative elements, like pipe cleaners, pom-poms, colorful pebbles, feathers, small branches, leaves, fake or real flowers, leaves & seedpods, dried beans, shells, mini popsicle sticks, toy figurines
INSTRUCTIONS
- Make the base
Begin by making a “giant cookie” shape in your hands. Squeeze and press the clay into a flat, round shape.
Gently press the circle into your plate and smooth it a bit as you go. Add clay if needed to cover the entire middle circle section of the plate.
At this point kids might want to experiment with pressing different textures into the clay, by using clay tools or a popsicle stick to create marks all over the surface.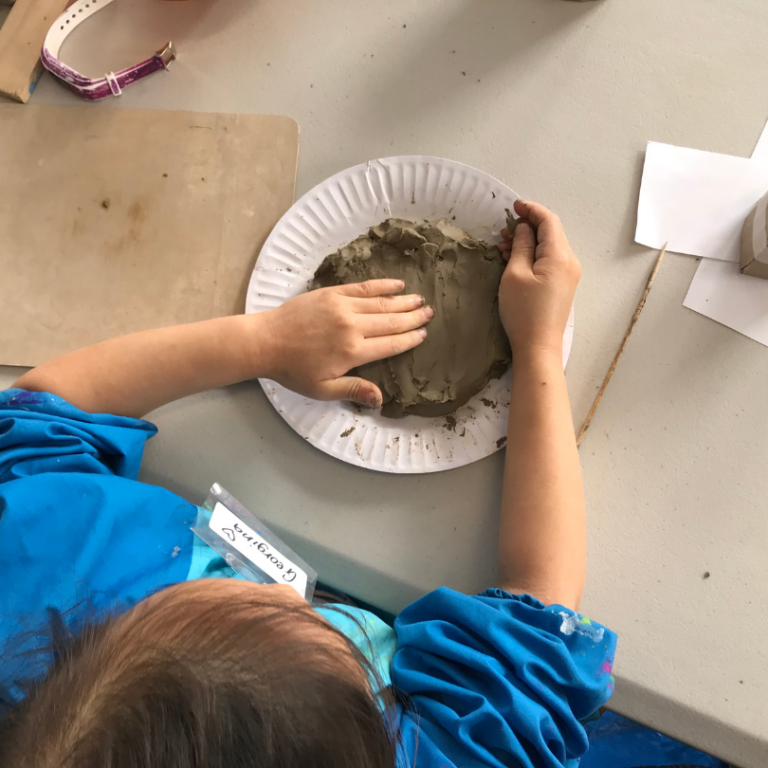
- Choose a theme & add clay sculptures
Now it’s time to choose a theme. Kids love the classics like Fairy Land with mushrooms and little stone paths, Unicorns, or Jurassic World with a little volcano and dinosaurs.
Once they have a theme, it’s time to add clay details:
Mushrooms are easy to make: simply add a flattened pinch pot (a bowl shaped from a ball of clay) to a coil (sausage shape) to create.
Little houses can be modeled by flattening each side of a ball of clay into a cube. Use the flatness of your worktop to help with this.
Pointy trees can be shaped by making coils and then gently pressing one end into a point. Children could also add little figures made from coils to their small worlds.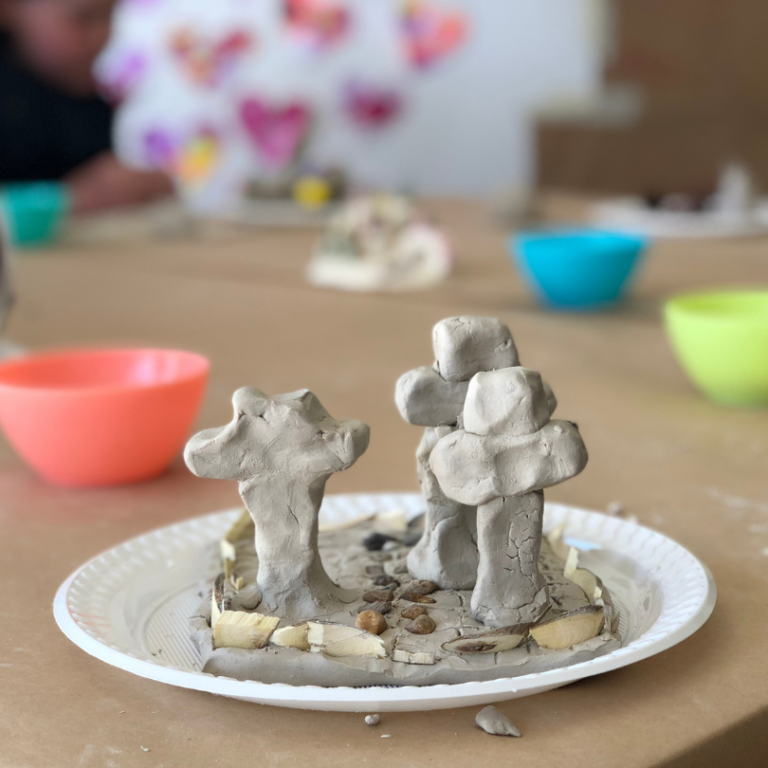
- Attach clay sculptures
When using air-dry clay, the most important step is remembering to gently score both surfaces to be joined (using the skewer). Add water and press the pieces together, then smooth to ensure a good join. Otherwise, any clay additions will promptly fall off when they dry!
Of course, if you’re using playdough this doesn’t matter as your small world is temporary. - Decorate!
Children will have fun decorating their small worlds with a variety of craft materials. There really is no limit to the types of materials to give them.
Brightly colored feathers and pipe cleaners, natural materials like leaves & flowers, sparkly materials like glitter craft foam, sequins and fake jewels are all fun choices.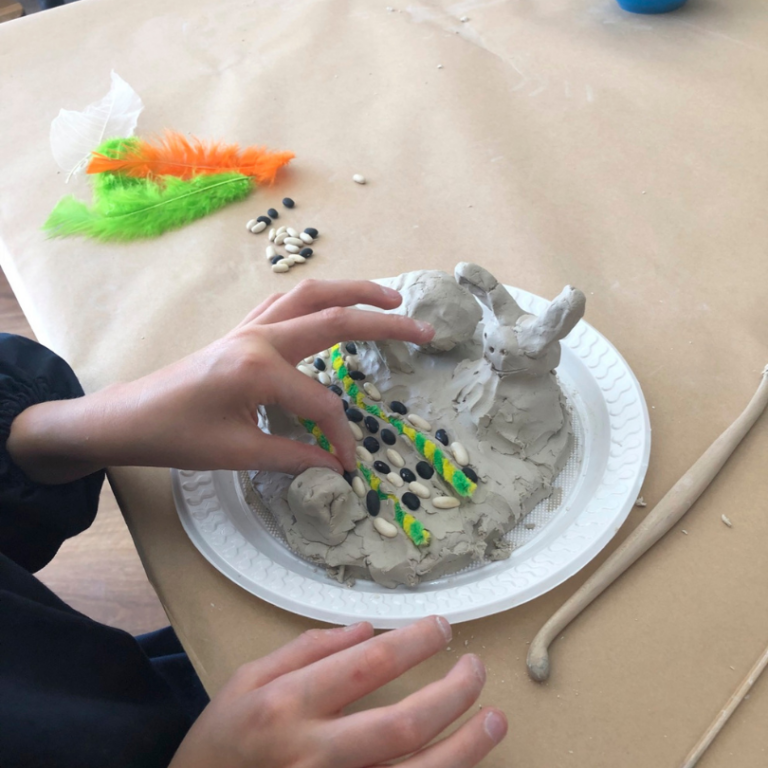
To make a rainbow using pipe cleaners:
- Start with two pipe cleaners of rainbow colors.
- Trim two pipe cleaners so that you now have three of ascending size.
- Gently poke them into the clay to form a rainbow.
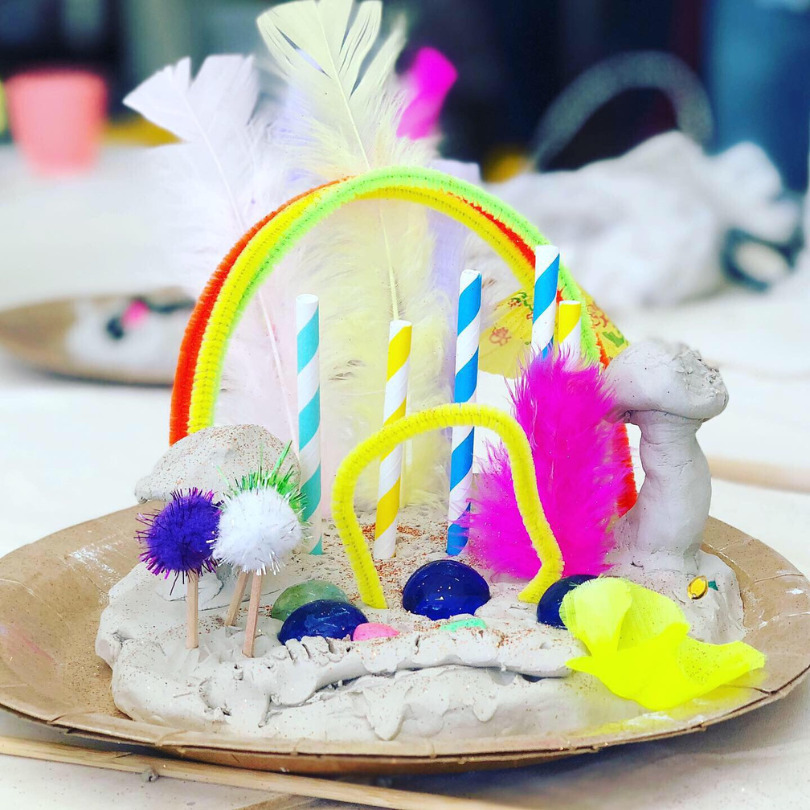
To make fluffy, Dr Seuss-style trees:
- Gently press a matchstick into a pom-pom.
- Insert the matchstick pom-pom tree into the clay.
I guarantee children of all ages will enjoy this activity! And it’s especially great for a rainy day indoor art activity as it needs so little direction from an adult. Have fun!
More Small World Play Ideas for Kids
- How to Make A Fairy House with Clay
- How to Set Up a Dramatic Play Bakery with Playdough
- Create Mini Worlds with Shoebox Dioramas for Kids
- How to Make a Fairy Garden for Kids
- How to Make a Cardboard Castle for Pretend Play
- How to Set Up a Playdough Play Tray
Pin It for Later