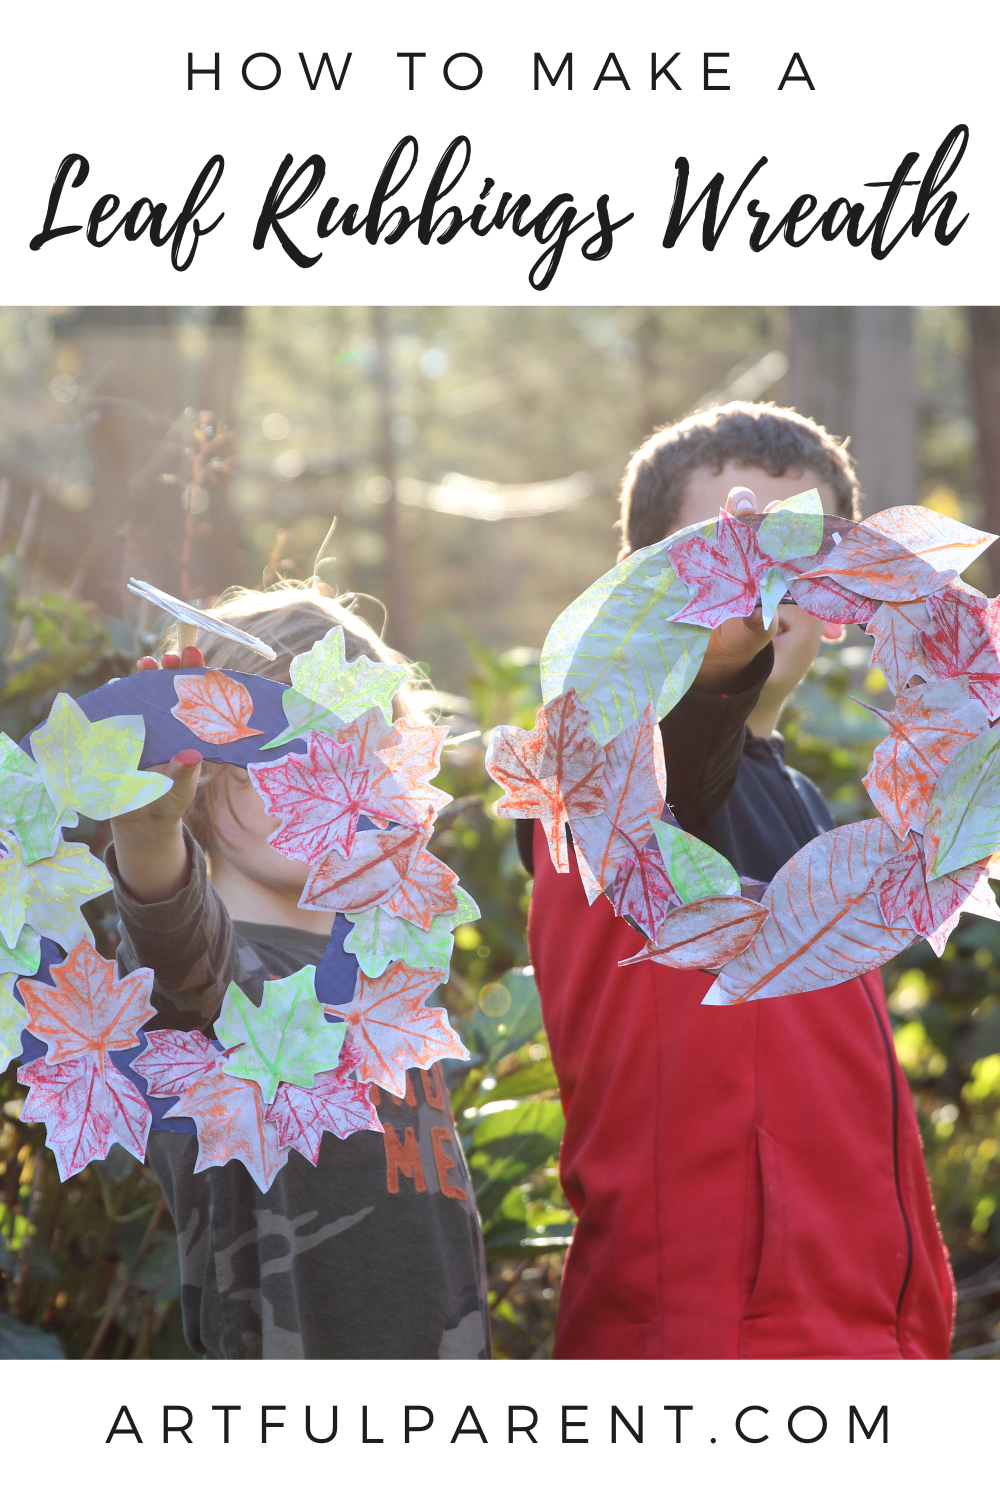
Make leaf rubbings & create a colorful wreath that will last indefinitely in this easy fall project from Joanna of The Blue Barn.
Hi Joanna Walker here from The Blue Barn and today I’m sharing a project that involves one of my favorite simple fall invitations – leaf rubbings.
This activity is not new to many of you I’m sure. But I wanted to take you through the simple invitation I left out for my children after school one day. This activity grew and evolved into so many different projects that are great for all ages–all from a simple leaf.
So to start with, here’s a highlight of the materials we used to create our finished wreaths. However, to begin with a simple leaf rubbing, you will only need a few items from this supply list.
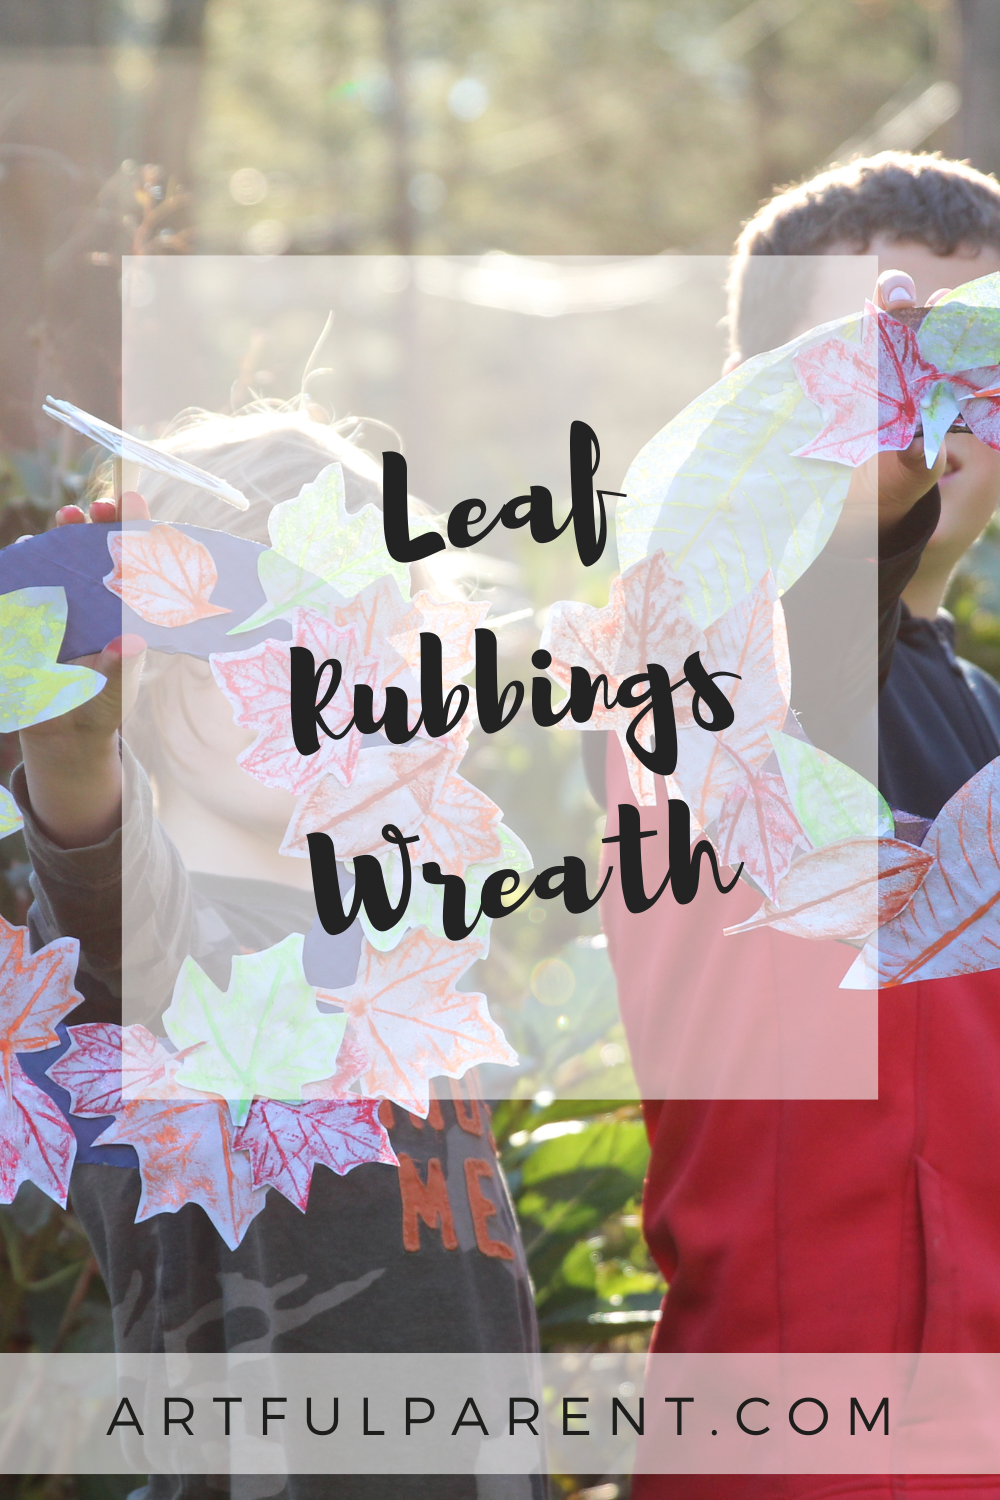
I began by setting this project up on a sunny fall day, you know the perfect day where you need a sweater but the sun is warm and breeze smells good.
The kids were coming off the school bus and I didn’t want them to disappear inside and miss the last of the afternoon sun so I had laid out all that they would need to begin, right next to an afternoon snack. Because lets face it no–kid wants to get creative when they are hungry!
On a tray were a few sheets of the white printer paper, oil pastels in fall colors and a few leaves to get them going.
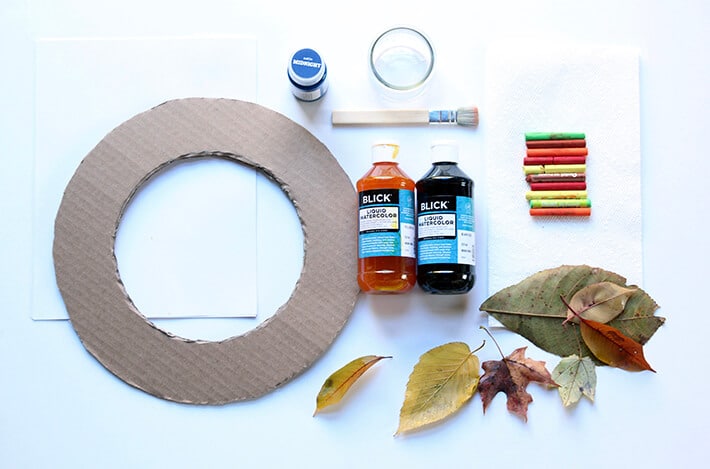
2. Create leaf rubbing
It didn’t take long for them to spot the oil pastels and leaves. I showed them how to take a rubbing from the back side of a leaf and they were off.
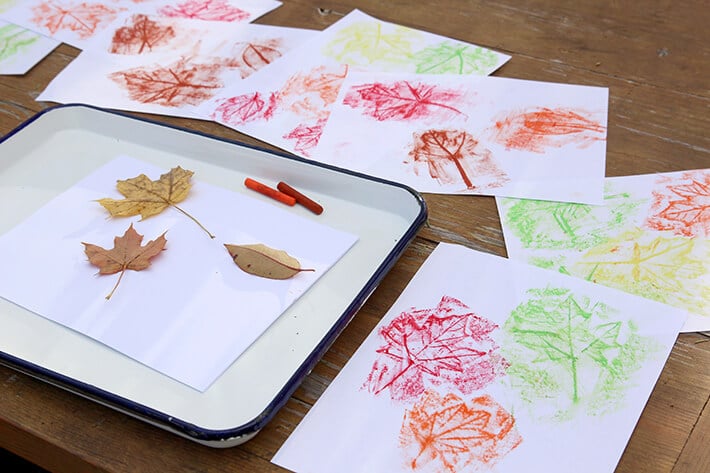
To make a good leaf rubbing, place a leaf bumpy side up under a sheet of paper.
Then, taking an oil pastel, rub the side of the oil pastel over the paper where the leaf is hidden. Note:: It works best to remove the paper from the outside of the pastel first.
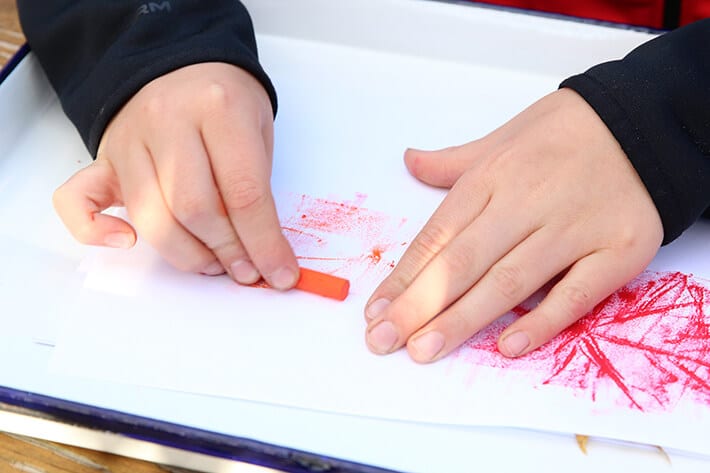
It was interesting to see how my kids all interpreted this simple invitation differently.
My youngest immediately took the tray and all the supplies and went off on a “leaf hunt”. He wanted me to identify all the leaves he’d made rubbings of when he came back.
He would wander around the garden and when he found an extra special leaf he would bend down and take a print of it.
My other son chose to take a few different shaped leaves and lay them under the paper. He then began to play a kind of hide-and-seek guessing game as to which leaf shape he was making a print of.
My daughter, who is slightly older, took a more scientific approach and found great delight in very slowly uncovering all the different veins and lines on the leaf.
We talked about things she had learned in science and I answered questions it then triggered in my son about how plants eat and drink.
After a lot of leaf rubbings and easy chatter we had run out of paper so I collected all the different prints and told the kids we would take them inside and work some magic on them!
3. Paint leaf rubbings
Next, I mixed up a wash of black watercolor paint. You could choose a more fall like color (yellow, red, orange) but I wanted the colors to pop through for the kids so I chose black.
We painted all the sheets of leaves and the kids were delighted to see how the paint ran off the oil pastels with the colors showing through.
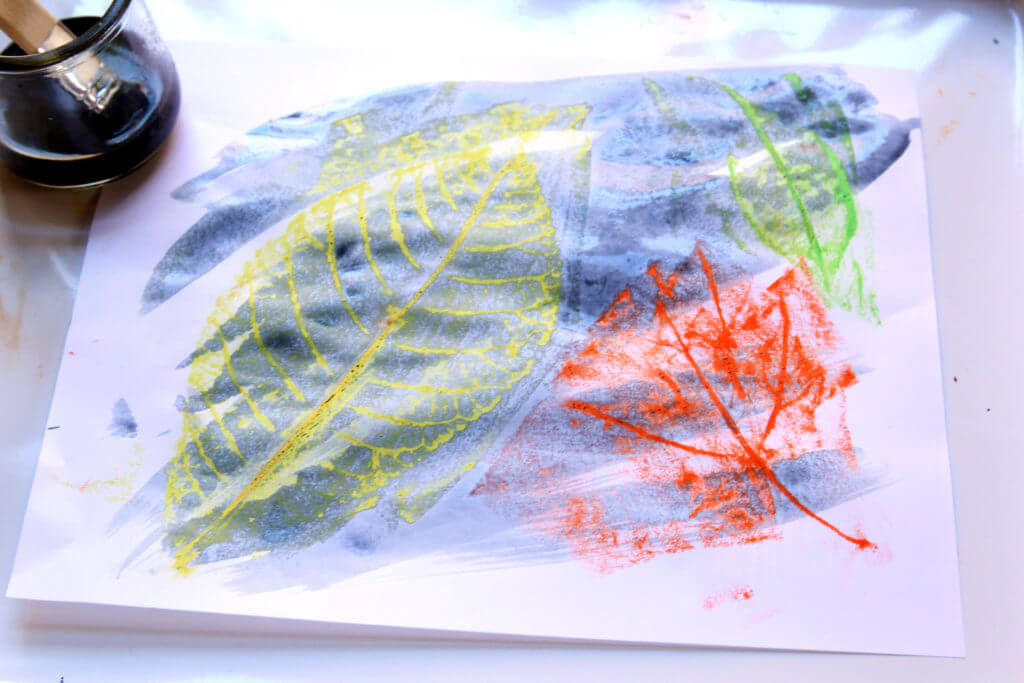
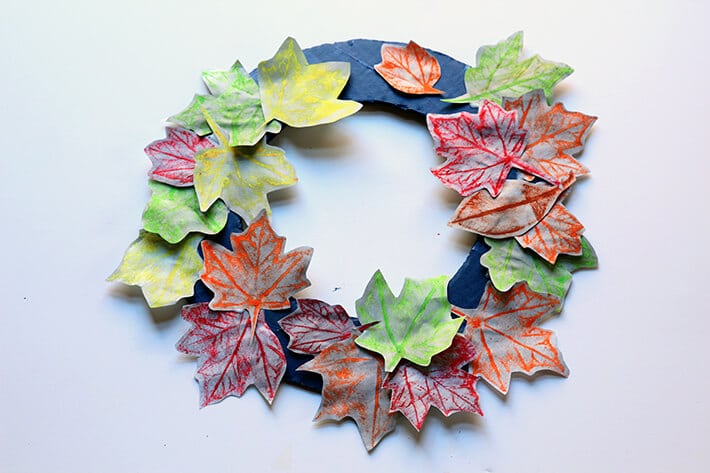
4. Paint cardboard hoop
We couldn’t let all the pretty leaves go to waste, so while the leaves were drying we painted the cardboard hoops with acrylic paint.
5. Cut out leaf rubbings
Once the leaves were dry we began to carefully cut them all out tracing around the outside of each of the leaf prints.
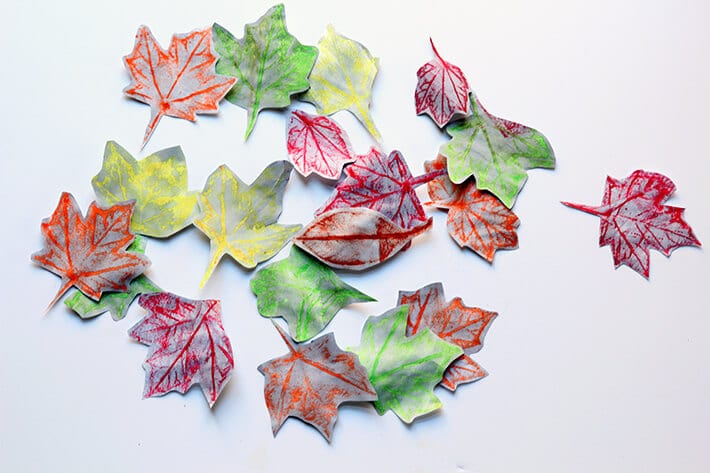
6. Glue leaves to wreath
Just add glue! Have the kids stick the leaves to their painted rings.
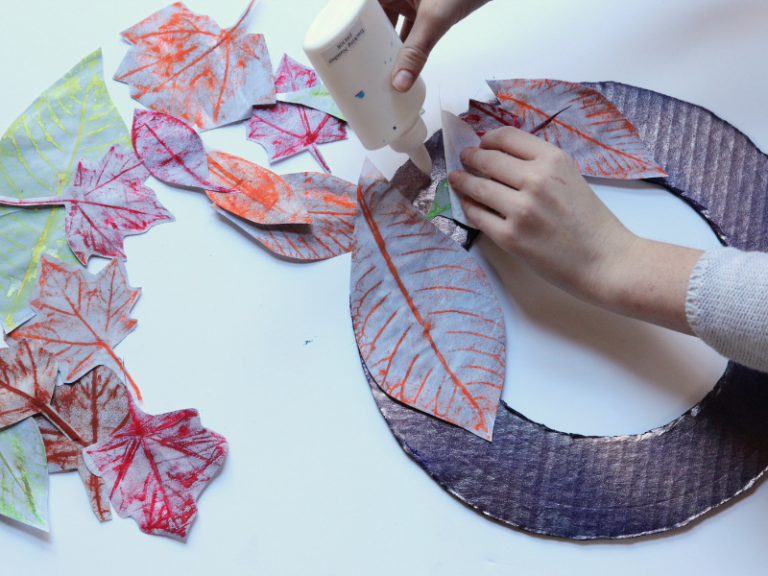
Thank you for joining me, I hope you will go and enjoy some simple leaf art with your children. Let us know where it leads you.
About the Author
Joanna Walker is the creator behind The Blue Barn which offers art experiences for children, and she teaches preschool art classes part-time. She’s a mom to four children ages 13, 11, 9 & 7.
If you’d like to see more ideas from Joanna, you can check out her blog, Blue Barn Living. You can also follow her on Facebook, Instagram, and Pinterest. Her favorite place to hang out online is Instagram for the positive, supportive community of each other’s creativity– and there is SO much inspiration to be found.
It includes supplies for fall arts & crafts (including the best paper leaves for painting!), autumn toys, Halloween ideas, and picture books about autumn.
Plus, we have lists of the best kids art supplies, open-ended toys, children’s games, and more!
This is an online workshop with 10 fun fall arts and crafts activities that your family can enjoy all autumn long. Use coupon code KASHALFOFF for $9.99!
Very creative and beautiful idea for the autumn leaves, definitely put into practice for my little scholars at the school.
With much Love and gratitude
Your Website Is Nice And Informative. Please Keep Continue Such Kind Of Good Effort. If you are not able to transfer Digital currency in Bitstamp account, you can call on Bitstamp Customer support number to find the easiest methods to overcome such complexities.
3 Comments
Tasneem Albert
November 16, 2018 at 11:58 amVery creative and beautiful idea for the autumn leaves, definitely put into practice for my little scholars at the school.
With much Love and gratitude
Meltem Celebi
November 16, 2018 at 6:32 pmLovely way of enjoying nature in a creative way . I will also try this. The project in my head is also make leaf skeletons.
paul warker
November 28, 2018 at 5:14 pmYour Website Is Nice And Informative. Please Keep Continue Such Kind Of Good Effort. If you are not able to transfer Digital currency in Bitstamp account, you can call on Bitstamp Customer support number to find the easiest methods to overcome such complexities.