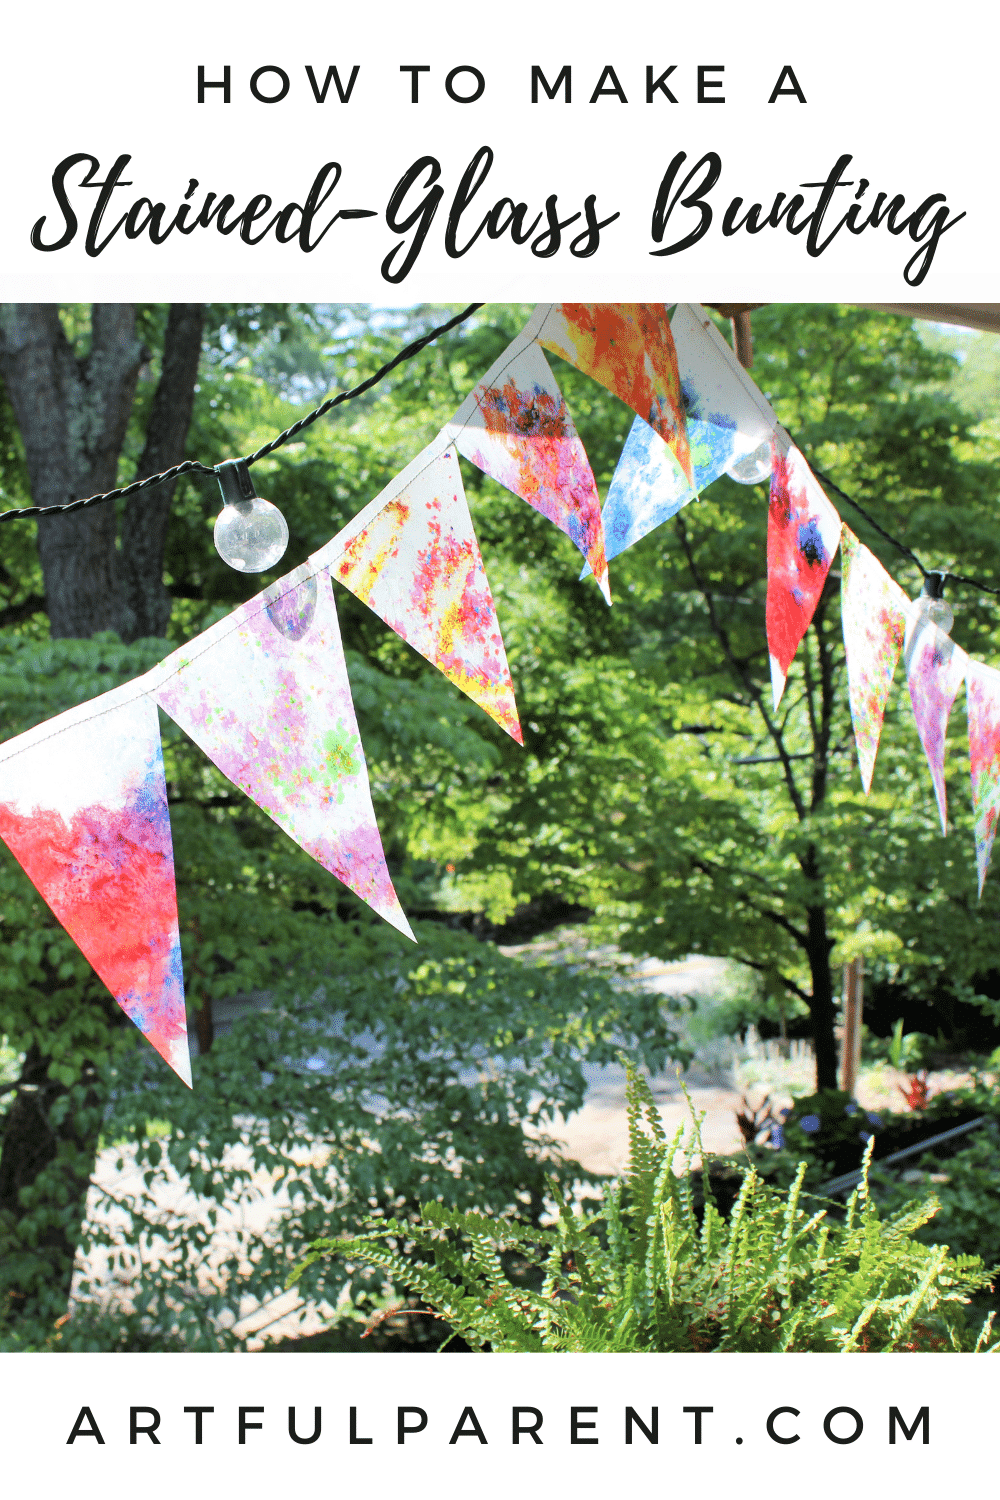
How to make a bunting using melted crayons that results in a stained-glass effect. This bunting is a beautiful addition to any porch or back yard!
Updated May 2022
We’ve made all kinds of buntings, garlands, and banners for parties and just-for-fun decorations all year round. And you know how often we do stained glass and suncatcher art activities.
So, we LOVE the idea of combining the two!
Here’s how we did it.

How to Make a Bunting with Melted Crayons
MATERIALS
INSTRUCTIONS
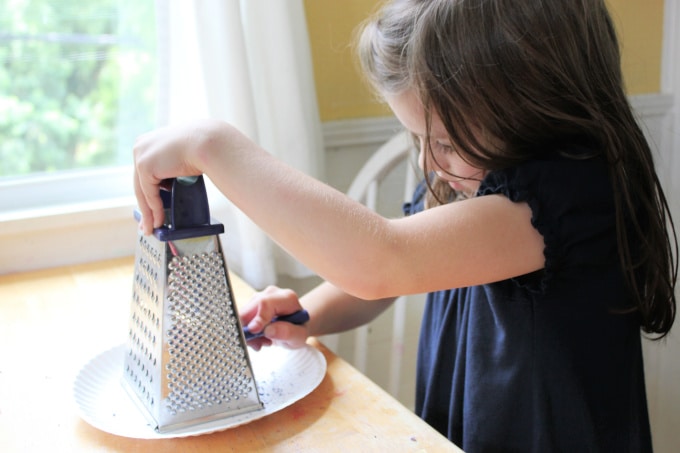
- Grate your crayons
First, grate your crayons on the cheese grater and put the shavings into separate compartments of a divided container or a muffin tin. Small bowls would work just as well.
- Create your crayon shaving sandwich
Arrange your crayon shavings on half of a folded over piece of wax paper.
Then, fold the other half over the shavings, creating a “sandwich”.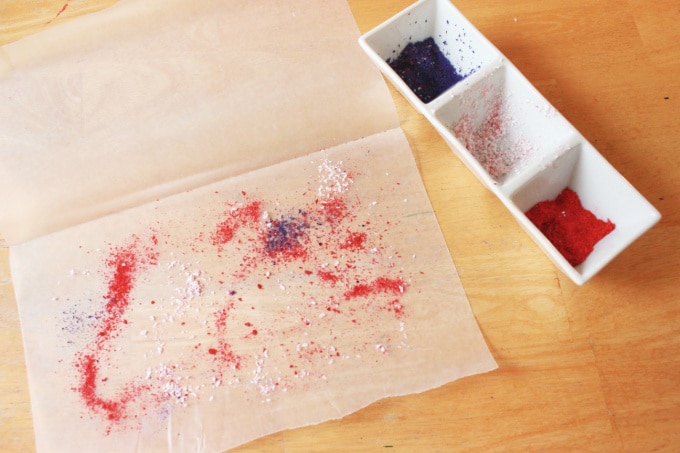
- Iron your shavings
Set the wax paper/crayon shaving sandwich on a piece of newsprint or other paper on your ironing board or surface. Place another piece of paper on top.
Run the iron over the paper/wax paper/crayon shaving sandwich slowly and evenly to melt the crayon. We use low heat, such as the silk setting. - Repeat
Repeat this process as many times as you’d like, until you have enough melted crayon sheets to make your bunting.
- Make your bunting
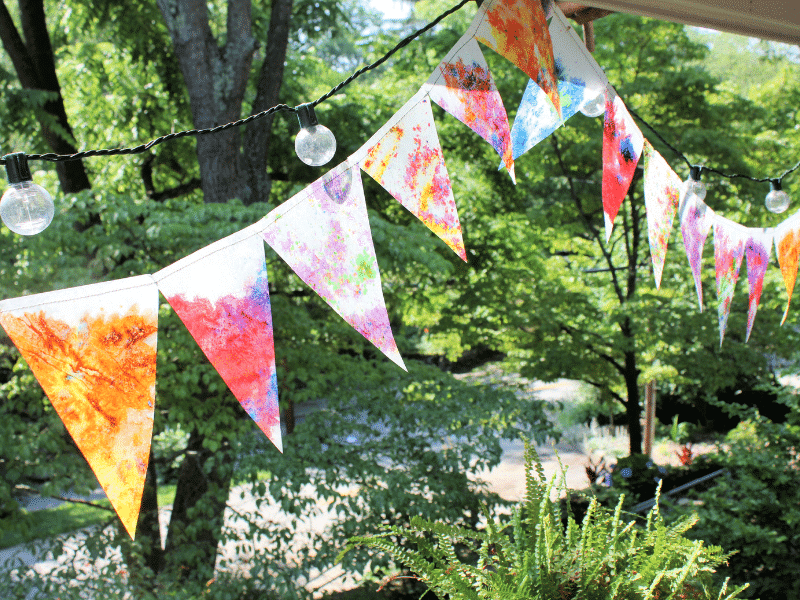
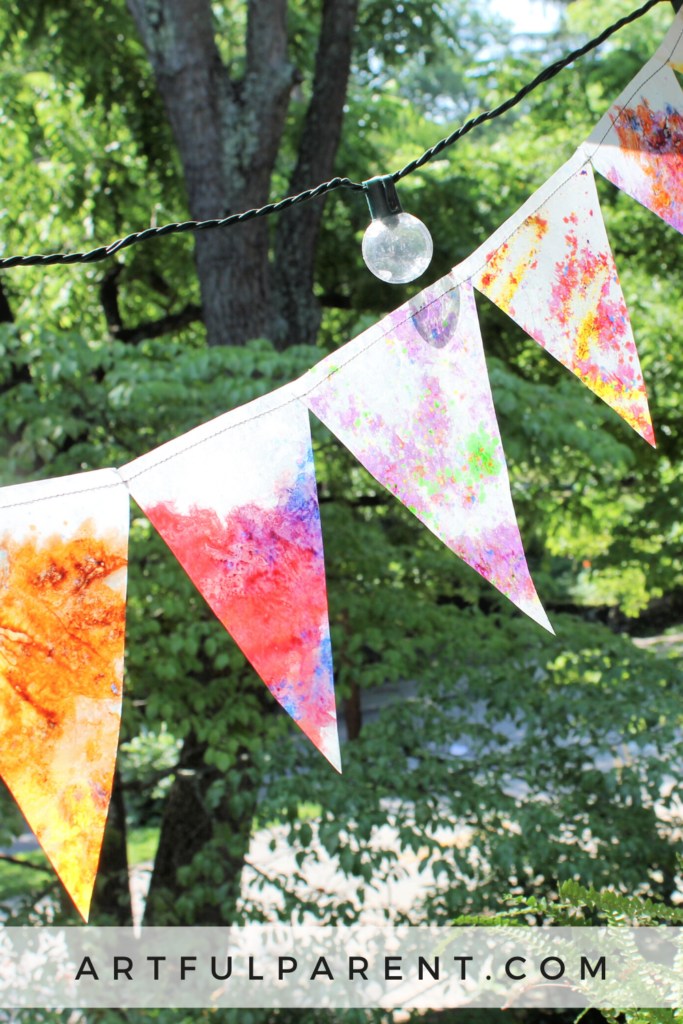
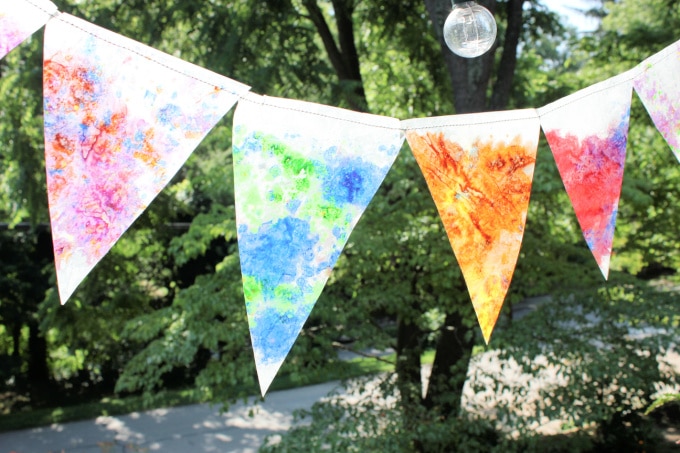
Once the wax melts are cool, cut them into triangles for the stained-glass bunting.
We sewed our triangles together, but if you don’t have a sewing machine, you could either use a hot glue gun and ribbon or you could fold a piece of masking tape along the top to create the bunting.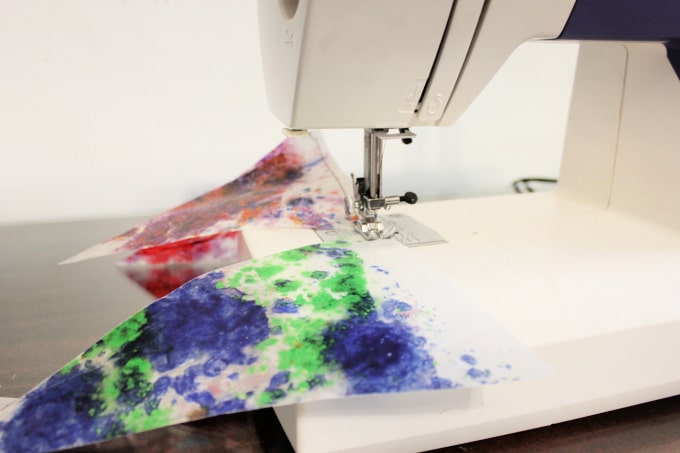
We hung our bunting out on the porch and it’s beautiful even when the sun isn’t hitting it! And we’ve even added some of our melted bead suncatchers out there, too.
Maybe you need one of these on your porch or in your window?
More Suncatcher Crafts for Kids
- Melted Crayon Stained Glass Art for Kids
- How to Make Suncatcher Heartstrings with Melted Crayon Hearts
- How to Make a Suncatcher with Beads
- 7 Ways to Make Melted Plastic Bead Suncatchers
- How to Make Tissue Paper Suncatchers
- How to Make a Flower Suncatcher
Pin It for Later
