

Flower pounding is such a fun process art activity! Turn the flower prints into beautiful flags with this spring craft.
Updated April 2025
My kids love instant crafts—ones that come together quickly and keep their creativity flowing. When a project needs drying time (like glue), their excitement starts to fade.
That’s why flower pounding is a favorite. It’s fun, hands-on, and the results are immediate. They love hammering the flowers and peeling them back to reveal the prints.
Plus, it’s a great excuse for a nature walk to collect leaves and blooms beforehand!
Flower pounding is simple, satisfying, and sparks so much joy every time. And these flags are the perfect addition to your garden!
Flower Pounding for Kids

MATERIALS
- Fresh flowers or leaves
- A piece of calico fabric (we recycled a drawstring bag)
- A piece of thin cardboard
- Tape
- Hammer
- Cord
- Toothpicks
Time needed: 30 minutes
INSTRUCTIONS
- Prep your fabric
If you aren’t using a recycled drawstring bag that’s been cut into flags, you can hand stitch a loop at the top of the material. This allows the flag to hang after threading the cord through.
Alternatively, the flags can also be attached to a piece of hanging cord with clothespins. - Lay out your flower
Choose a flower or leaf you would like to dye into the fabric. Place it on a hard surface, with the side you want on your fabric facing up.
Place a piece of calico fabric over the top of the flower (make sure you have your flower facing up, touching the fabric).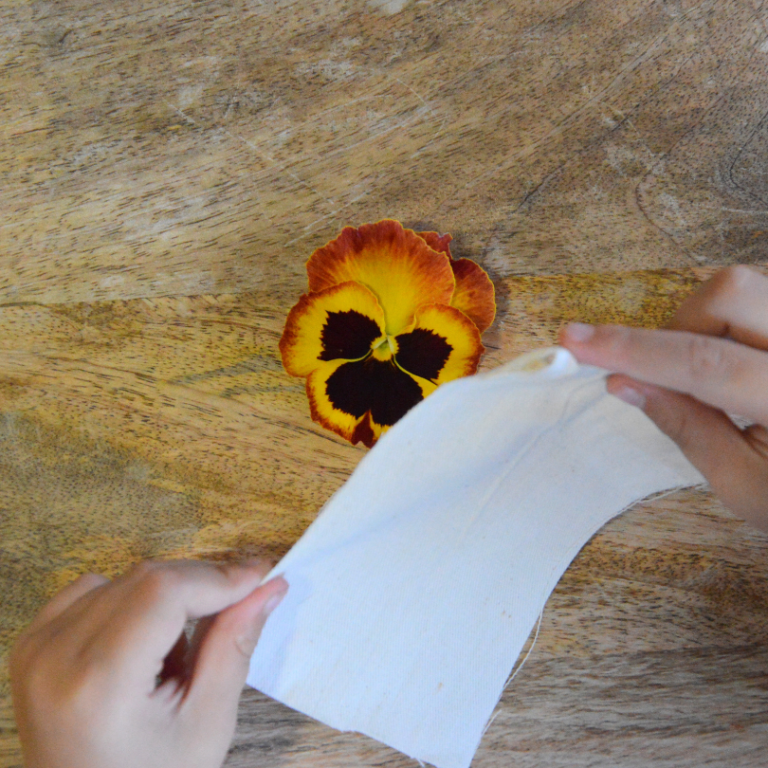
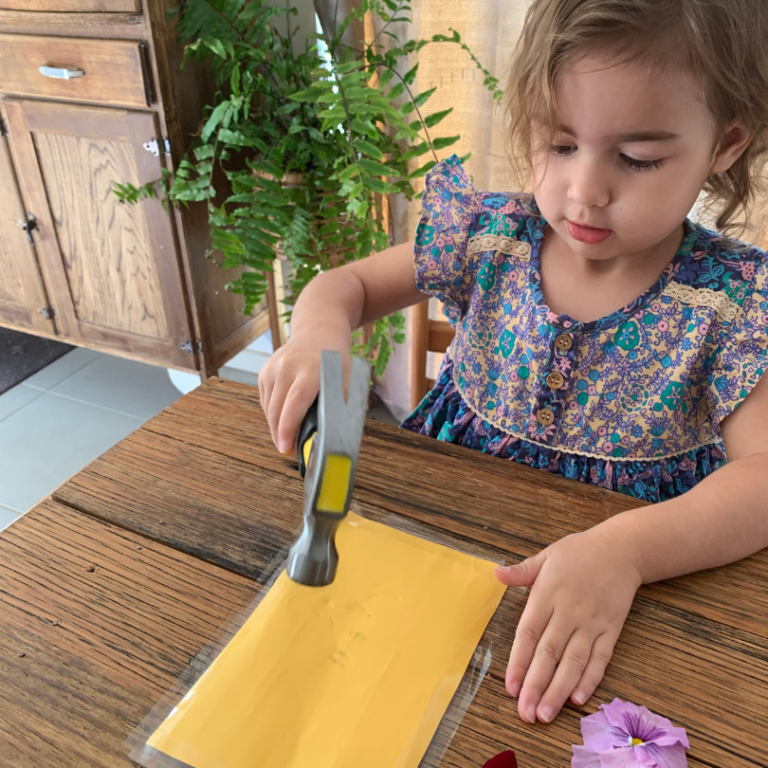
Then place a piece of cardboard over both and tape down the side so it won’t move while hammering it. - Begin flower pounding with hammer
Now comes the best part: hammering the cardboard. Be sure little hands aren’t on the board, and then let them hammer away at the piece of cardboard.
- Check your flower transfer
Gently peel away the tape and lift off your piece of cardboard. Check the back of the fabric for any areas that haven’t been hit yet to expose the full shape. Pound those areas lightly now with the hammer.
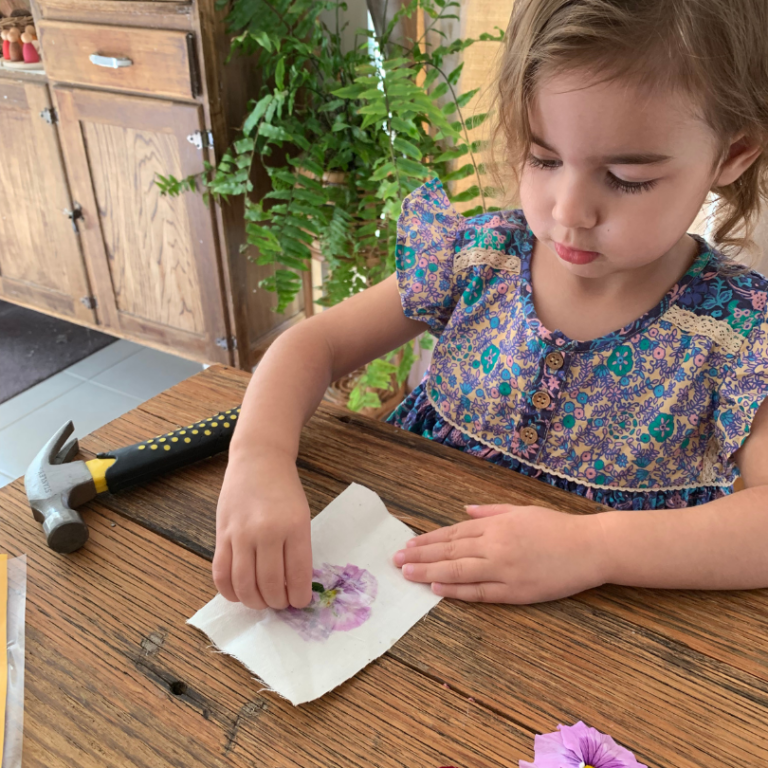
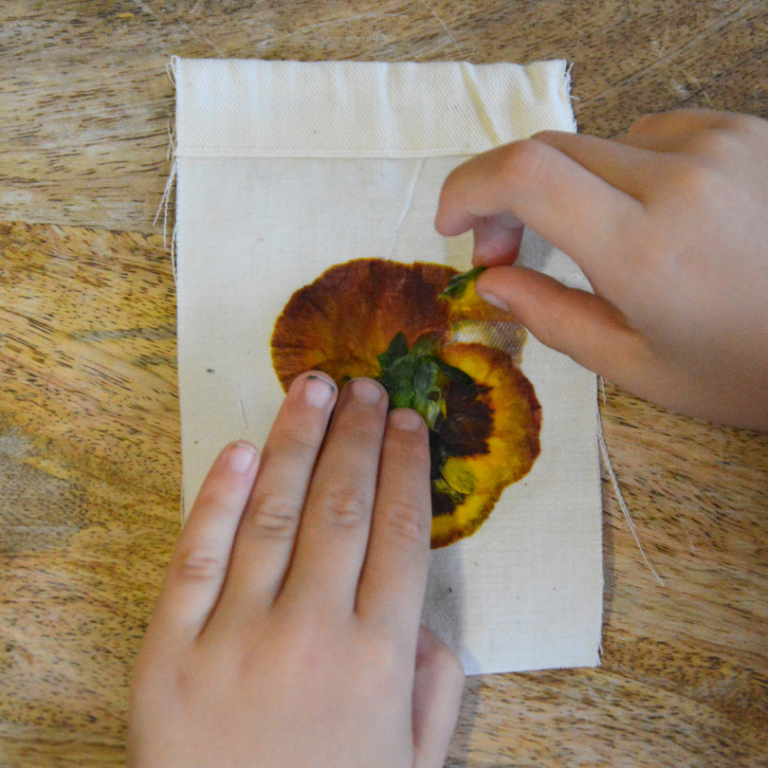
- Peel away the flower
Turn your piece of fabric over and gently peel away the pieces of flower to reveal the beautiful botanical print.
- Cut cord to length
Cut a piece of cord the desired length to use for hanging your botanical print and tape it to a toothpick.
There are also child-friendly threading needles available, but I personally love finding household objects to use instead.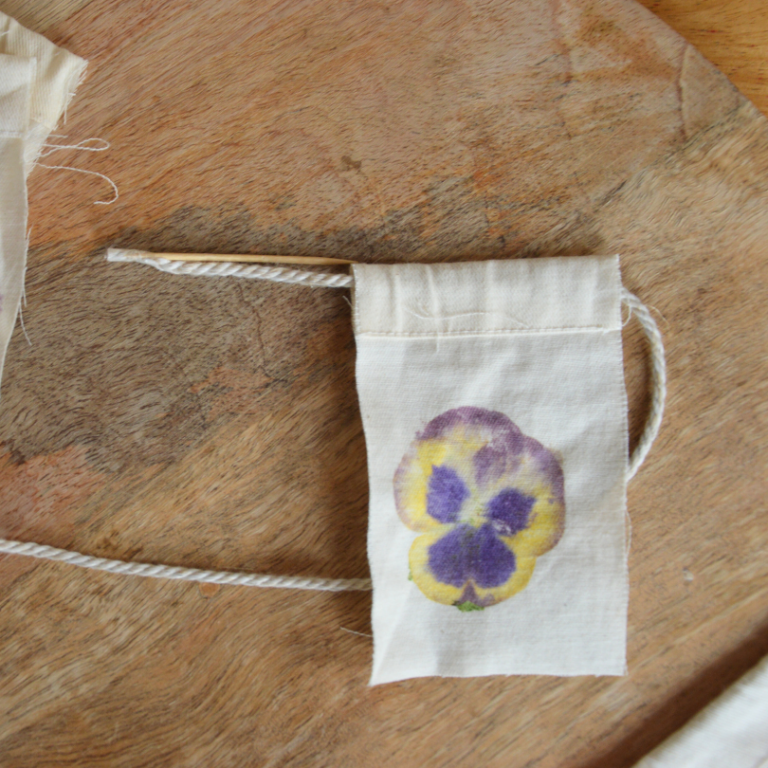
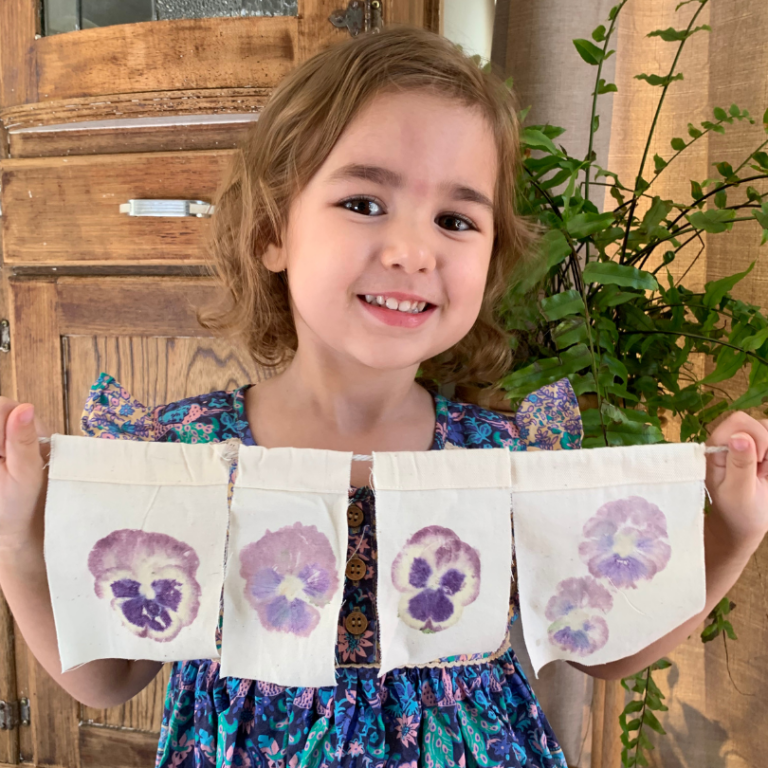
Thread your cord through the looped piece of material and double knot the end. Continue adding and threading additional flower flags or you may choose to leave it as a singular wall hanging. - Hang your flower flags!
Now your botanical print is ready for all to see! Your little one will surely feel so much happiness in creating a print instantly with their own hands.
This is a great activity to do if you have a special flower with a memory attached to it. Then you will be reminded every time you see it.
If your little one is feeling a little more creative, they can also create a larger picture by arranging the leaves and flowers together.
More Flower Crafts for Kids
- 12 Flower Crafts for Kids
- How to Make Garden Wish Flags
- How to Do Flower Printing
- 5 Fun Spring Book Crafts for Kids
- How to Make a Nature Collage for Kids
- 13 Nature Walk Ideas (+ FREE Scavenger Hunt Printable)
Want even more creative ideas?
Check out our Spring Creativity pack!
Let creativity blossom with this fun bundle of art activities perfect for Spring!! This 40-page printable eBook is full of coloring pages, drawing prompts, games, and more!
Pin It For Later
