Learn how to set up an art cart for kids in a few easy steps. A must have for any kids art corner, big or small!
Updated February 2025
I can’t imagine life without our art cart. Seriously.
Its small footprint is conducive to inviting art into the smallest urban space or a nice addition to a larger art space. We recently gave our own little art cart a much needed makeover, and it was such a fun project that totally reinvigorated the space (Check out the transformation HERE!).
I believe having a dedicated place for art supplies storage is key to incorporating art into your home. Ultimately it’s about access for kids.
Art Cart for Kids
Over the years our art cart has evolved. Initially it housed much of my firstborn’s toddler art supplies when our family lived in a 1 bedroom apartment. With the addition of a sibling, our art cart morphed with toddler-accessible supplies on lower shelves and art materials for my oldest moved to the top shelf.
By having supplies out in the open, we encourage autonomy in art making and help to build our kids’ confidence as artists.
Because my kids have access to (pre-approved) art materials, when inspiration strikes, they can go and choose paper & drawing supplies, or get out a container of playdough with tools. I love seeing their confidence with our art supplies and processes grow.

As parents, we can choose what we’re ok having out on the cart. If the idea of glue or paint getting squeezed everywhere makes you cringe, then of course, don’t put that out. There are still many materials that are not accessible to my toddler on our art cart but she doesn’t seem to care!
So I encourage you to take a leap of faith. Your kids will likely thrive under the belief that they are capable and will rise to the occasion.
Set up An Art Cart in 4 Easy Steps!

1. Purchase cart
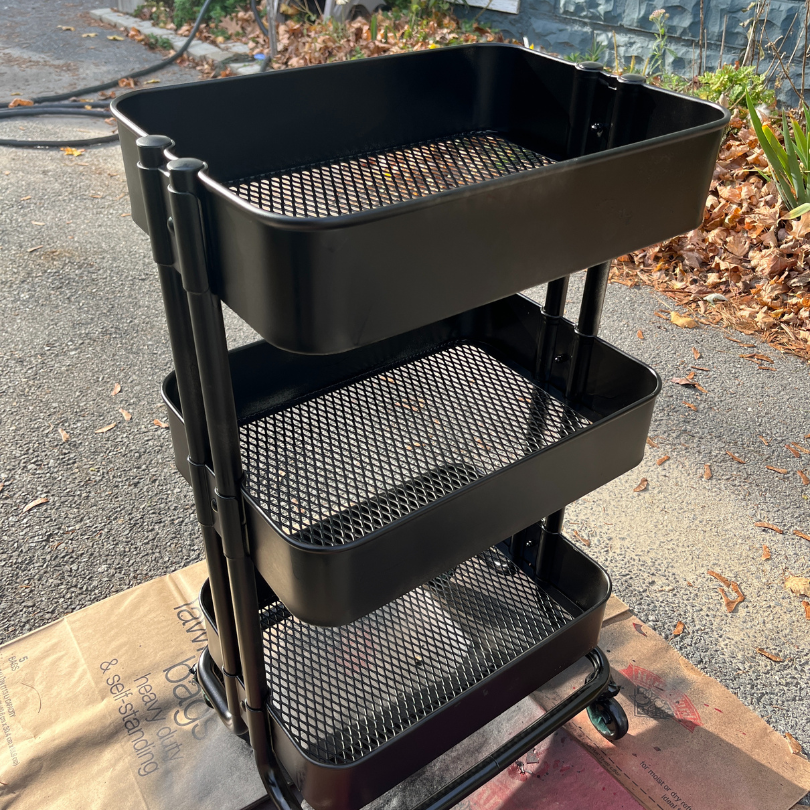
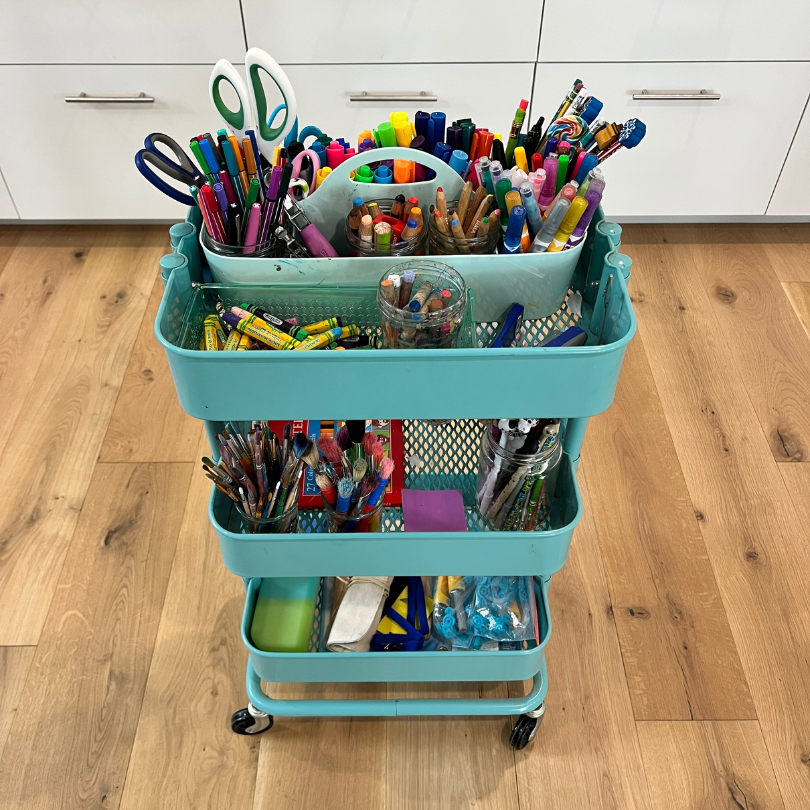
First step is to find a cart. I like our rolling cart, which can be pulled up to the table and then tucked back in the corner when we’re finished. These are becoming more widely available for a very reasonable price (normally $30).
Where to buy a cart
- IKEA (I’ve had mine for years!) They also have a mini version for fitting in extra small spaces.
- Michaels
- Amazon
2. Containers
In my opinion, finding the right containers or baskets for the art cart (or kids art space) is the trickiest part. In general, having matching containers or cup holders creates an overall nice aesthetic.
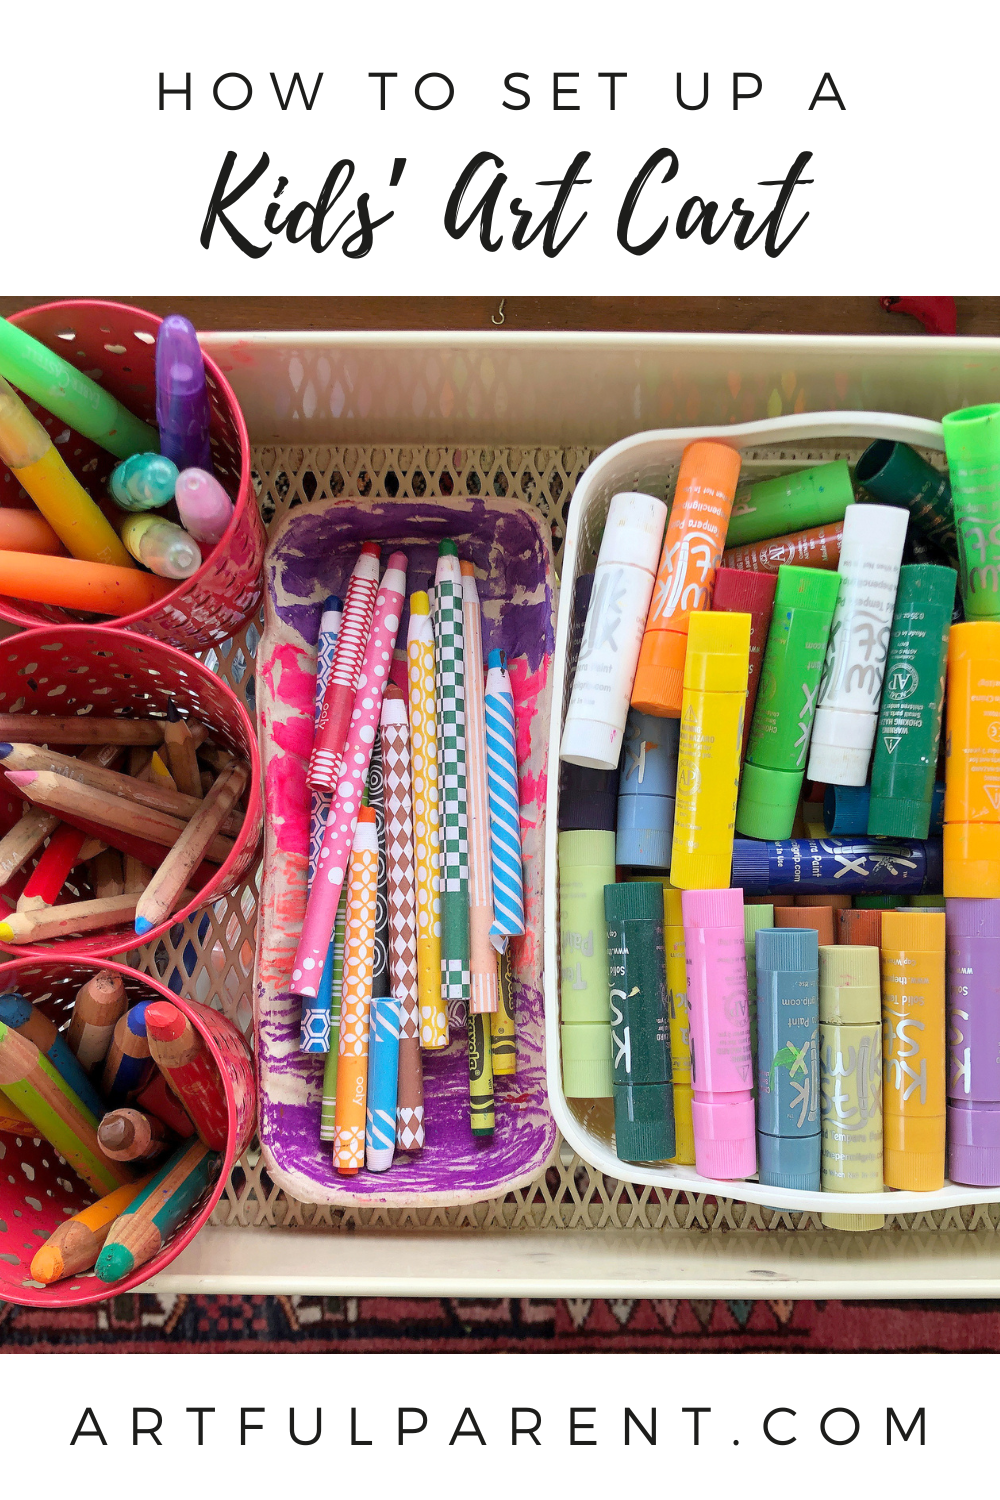
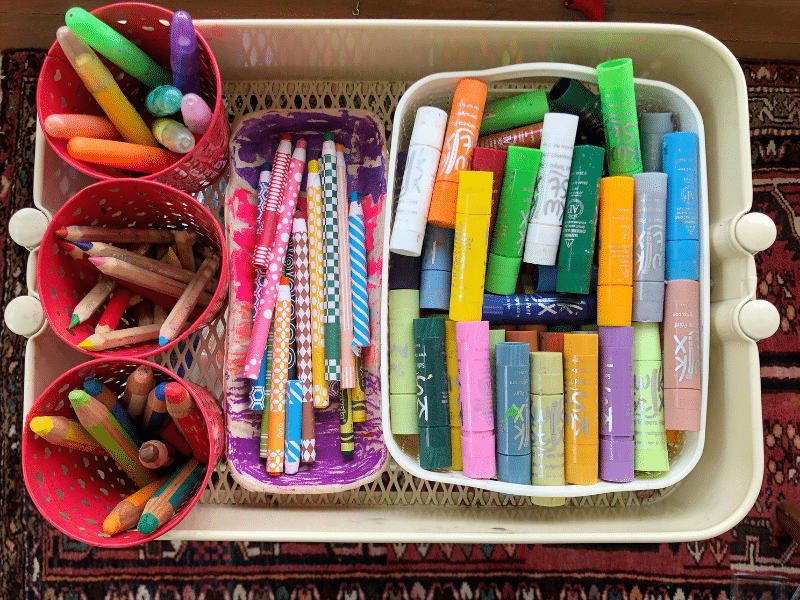
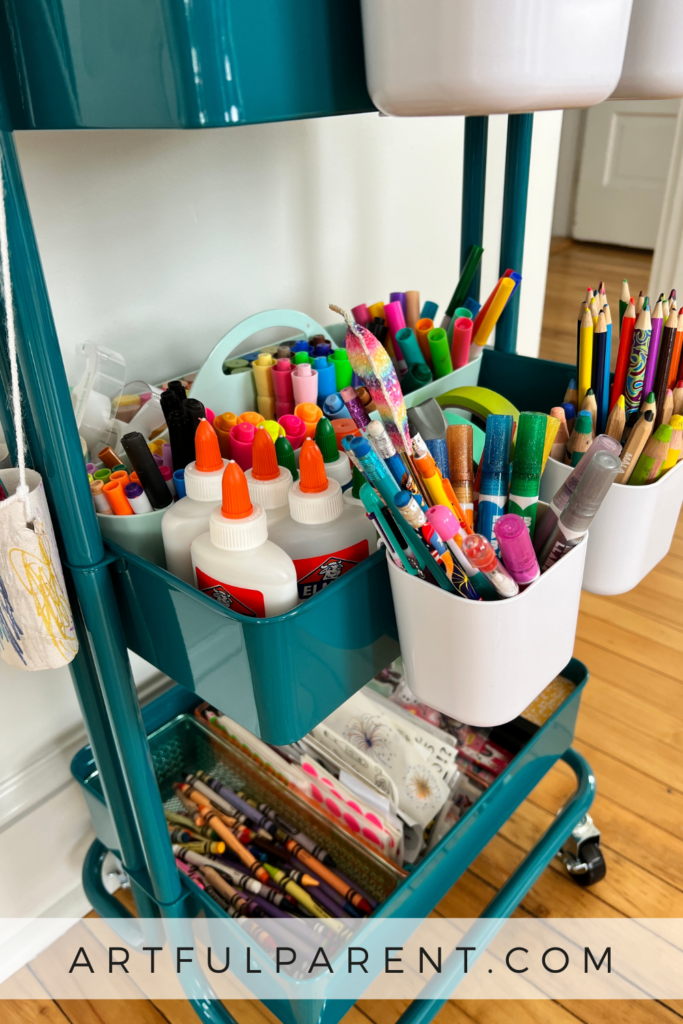
One day I sat down and measured each shelf to figure out what could fit and how to maximize the space. I used these containers which fit three across to micro-organize materials on the shelves.
This is rather tedious but stick with it, because it will feel so great, when you get it just how you like it.
Pro tip: Purchase washable containers such as metal or plastic as art supplies will dirty containers in time.
Where to buy containers
- Amazon (these magnetic containers can give you extra storage on the sides!)
- Target (and sometimes the baskets & cupholders from the $ section!)
- IKEA
- The Container Store
- Michaels
- Recycled cans, jars or trays (you might paint or decoupage them)
3. What’s on our art cart?
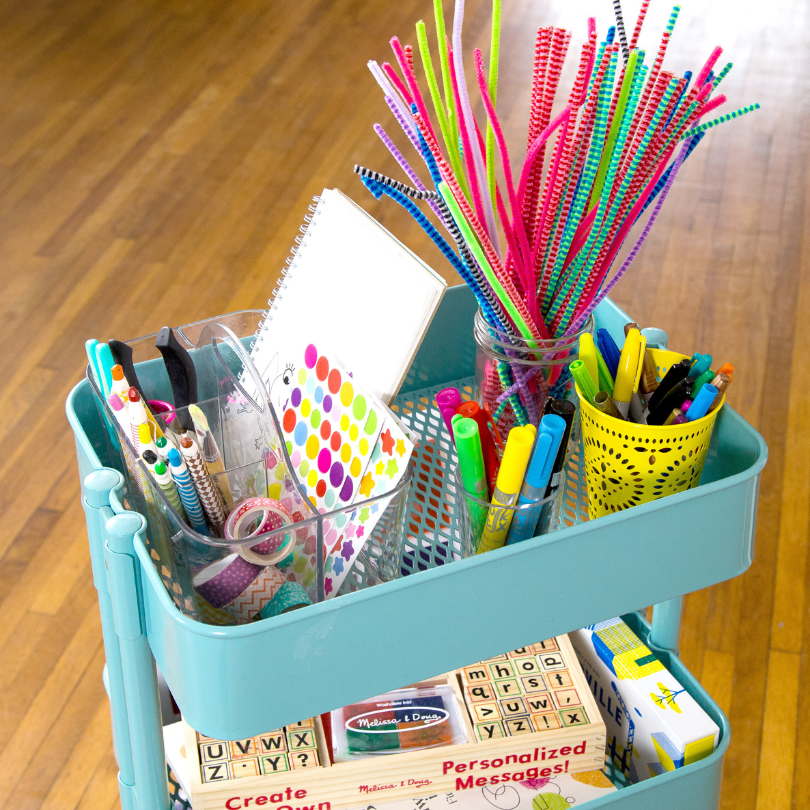
As I mentioned, our cart is currently set up as a toddler art station with supplies I’m okay with my toddler accessing. We have a selection of toddler-safe drawing materials, like tempera paint sticks, Stabilo 3-1s, and oil pastels. I also have a set of tempera watercolor cakes and brushes. I like to have a selection of stickers like labels and dot stickers. If you have the space, you can add some easy and low-mess sensory options like containers of playdough and a set of mini rolling pins, plus a few mini figures.
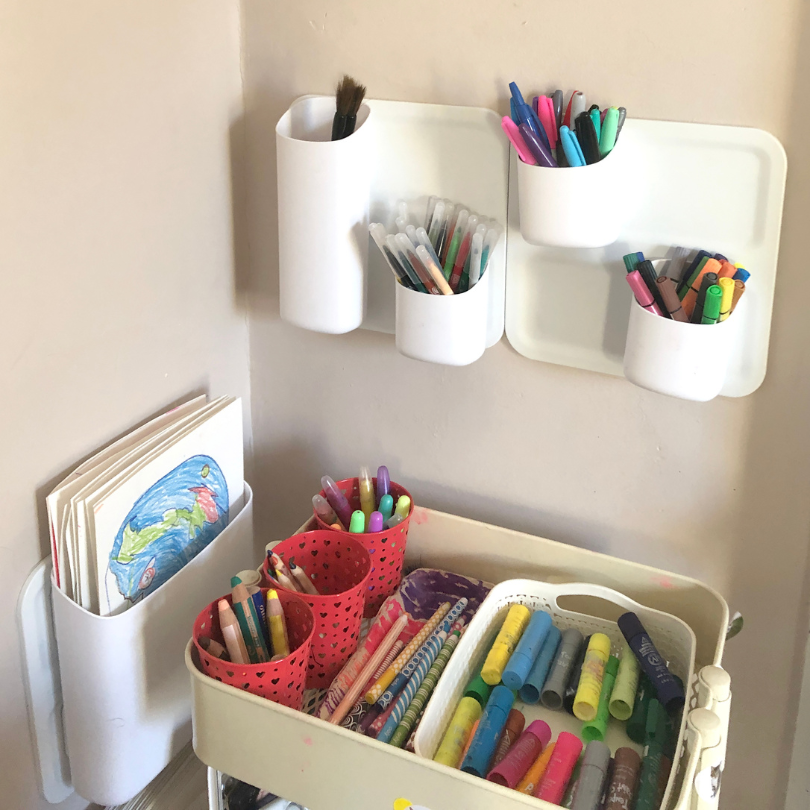
Another great option is to set a removable art caddy on top of your cart.
For small spaces, try mounting this magnetic modular system for holding paper and markers and permanent markers (out of toddler reach).
4. Set up cart
After assembling the cart, it’s time to make those art supplies accessible. I recommend taking everything out of the packaging––trust me on this one. Remember the big goal here is to give easy access to art supplies so that art making flows naturally for your kid(s) throughout the day.
As an example, we have all our drawing supplies up on the top shelf. Paint, stickers and a few extra drawing materials are on the middle shelf. And the bottom shelf is dedicated to playdough, tools and toys.
The great thing is this is totally customizable and in time you might go back and rotate new art materials in. As my kids grow, I’m sure our toddler art station will change as well. I’ll be referencing this article to help us maintain our space as it grows and changes over the years.
So there you have it! We love seeing your photos so be sure to follow us on Instagram and Facebook. Tag us at #theartfulparent
More Kids Art Space Ideas
- 6 Tips and Ideas for a Kids’ Art Room
- Create a Kids’ Craft Room that Gets Used!
- Set Up an Art Room for Kids That Builds Creative Confidence
- 6 Craft Room Ideas for Kids
- Shop Our Favorite Art Supplies
- How to Set Up an Art Caddy
Pin It for Later