An easy tutorial for making a rainbow suncatcher with translucent pony beads. The perfect colorful addition to any window!
Updated February 2024
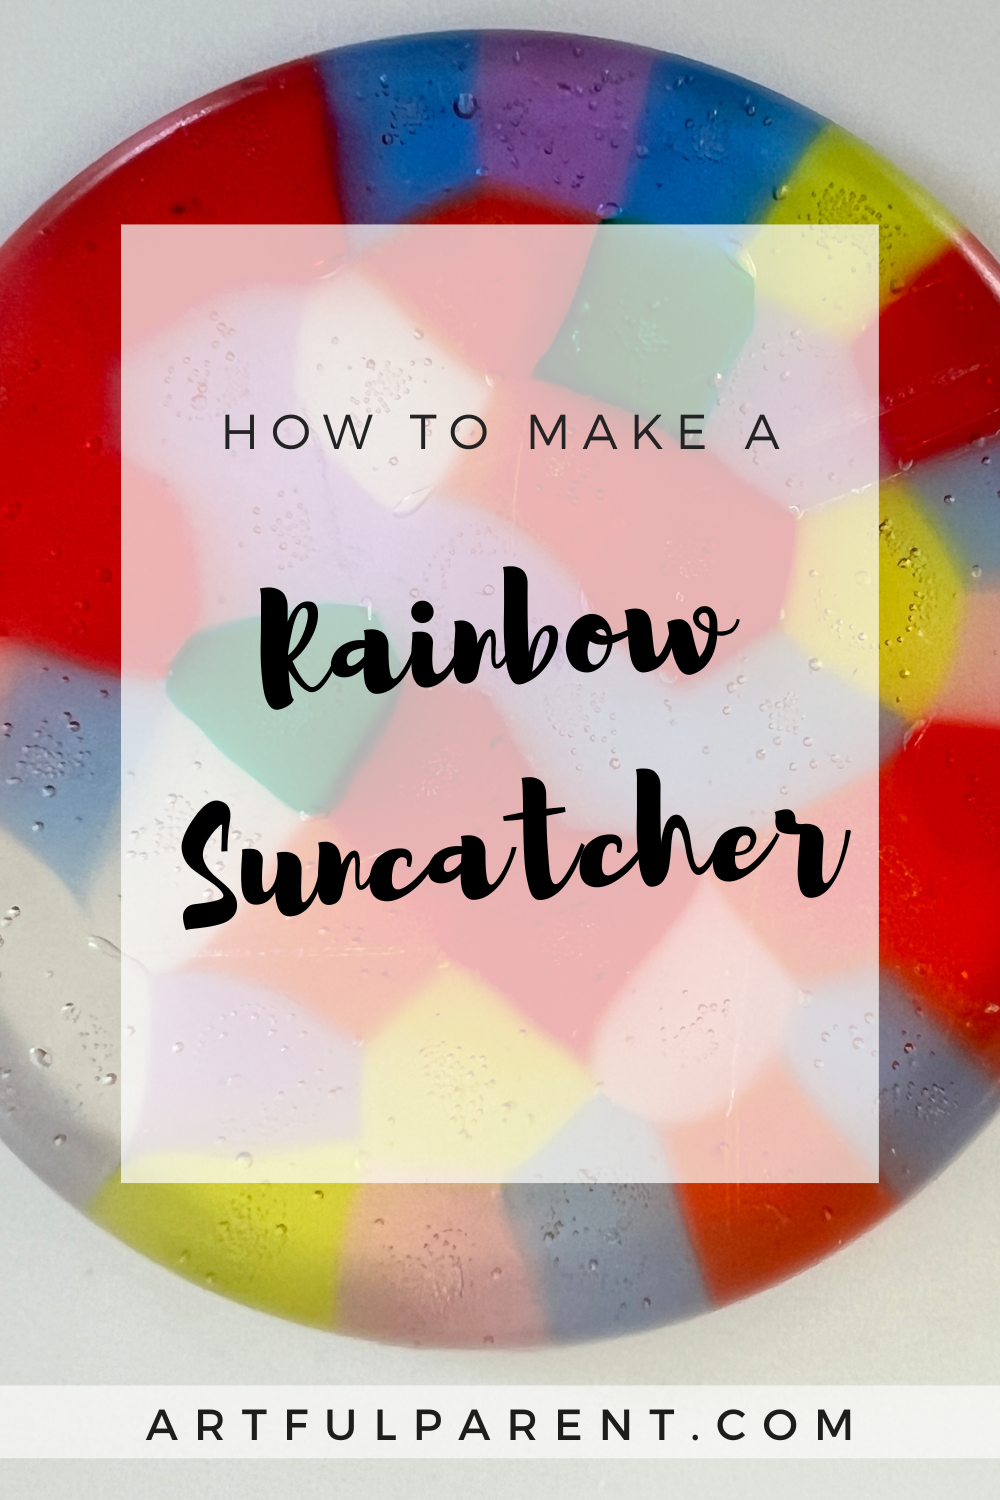
If you’ve been following the Artful Parent for a while, you might know that we have a mild obsession with melted bead suncatchers, making everything from basic suncatchers to melted bead art, garlands, and DIY fairy wands. We’ve tried all kinds of different configurations and ideas for melted pony beads, but we really love these rainbow suncatchers the best!
These are so pretty and make a perfect gift for a summer birthday or an end-of-the-year gift for a teacher!
Important note: melting plastic is toxic, so be sure to follow the directions closely and do this project outside!
Here’s a video of rainbow bead suncatchers in action, and keep scrolling for more details.
Rainbow Suncatcher with Plastic Beads

MATERIALS
- Translucent pony beads in a rainbow of colors
- Small, round metal baking dish*
- Grill
- Drill (optional)
*We suggest lining your pan with foil first if you’re going to use the baking dish for food afterward. Or pick up some metal baking dishes at a thrift store or yard sale and dedicate them to crafting.
INSTRUCTIONS
- Arrange plastic beads in metal dish
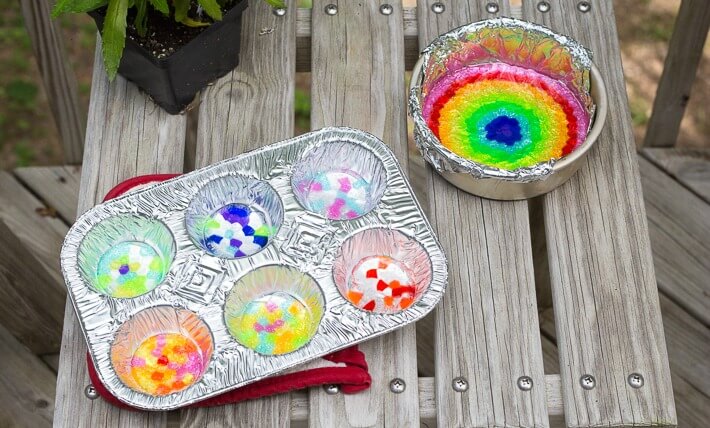
First, lay out your plastic pony beads in the small metal baking dish. You can use a concentric rainbow design as we did here or any design that you like.
Remember you want to use translucent pony beads. They need to be somewhat transparent so they will act like a suncatcher and let the light shine through them.
- Melt beads on grill
Important Note! Melting plastic is not good to breathe, so this step is best done outside.
We make all of our melted bead suncatchers on the gas grill outside so that we don’t get any toxic chemicals inside. The grill works great and only takes about 10 minutes! You could also use a toaster oven outside. Whichever way you melt the beads, be sure to do so outside!
Start checking the melting beads after about 5 minutes. You want the beads to be fully melted (not bumpy or pebbly) but be careful that you don’t heat the plastic beads for too long so they bubble and burn. - Let cool
Once the suncatchers are cool, invert the pans and they’ll pop right out!
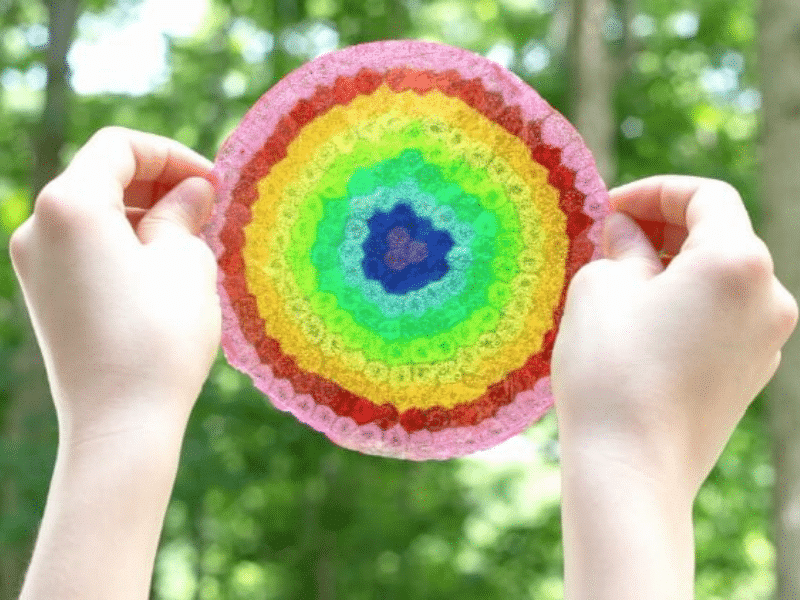
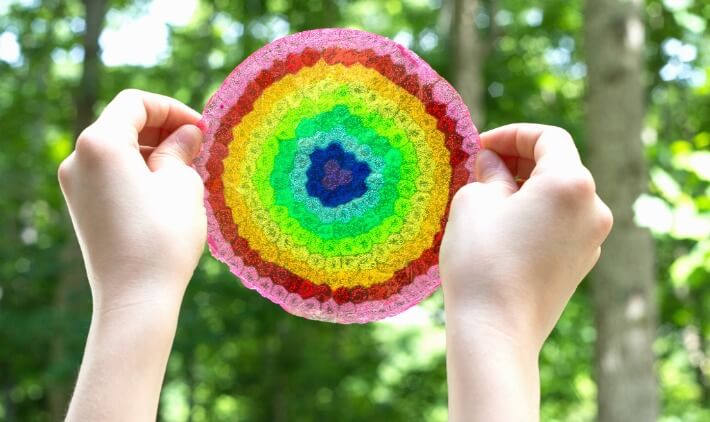
- Let the sun shine through!
Hold your new plastic bead suncatcher up to the light and admire!
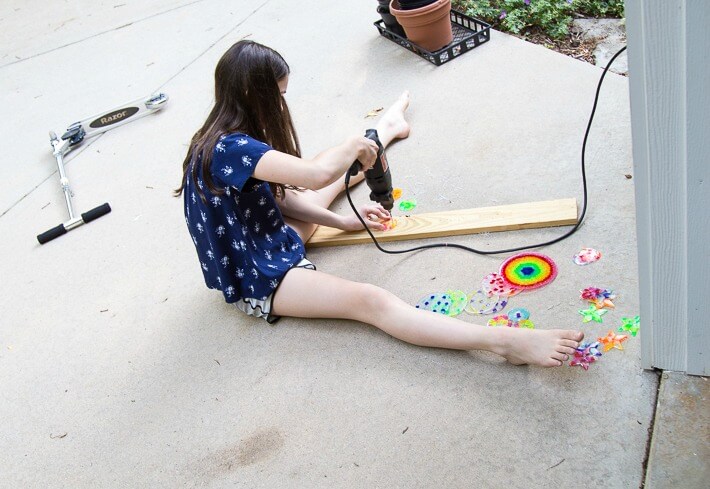
- Drill a hole to hang your suncatcher (optional)
You can use an electric hand drill to drill a small hole at the top of your suncatcher to add a hanging loop. You could also use a hot glue gun to glue a hanging ribbon to the top.
Have you tried making plastic bead suncatchers yet? They are such a fun summer craft, plus they make great gifts!
More Suncatcher Ideas for Kids
- How to Make Melted Bead Suncatchers
- 7 Ways to Make Melted Pony Bead Suncatchers
- Tissue Paper Suncatchers for Kids
- How to Make a Flower Suncatcher
- A Nature Suncatcher Craft for Kids
- Stained Glass & Suncatchers from the Artful Parent
Pin It for Later
