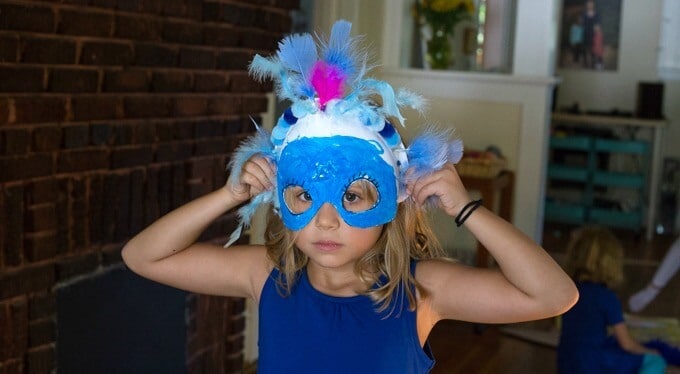
How to make paper plate masks, cardboard wings, simple vests, and more for kids’ costumes. Great for Halloween, a costume making party, or pretend play!
Last week, I told you about our costume making party and how Maia and Daphne and their friends created costumes using Primary clothes as the base.
They made masks, wings, and tails (with some help from their parents).
Today, I’m going to share more detail about how to make paper plate masks, cardboard wings, funky chicken tails, and comet tails.
In other words, all the accessories from the kids’ costumes you saw in the photos from our costume making party!
Note :: I’ll include a free printable PDF of some paper plate mask ideas at the end of this post.
Here’s a video showing Paper Plate Masks in action! And don’t forget to scroll down to get the step-by-step instructions.
How to Make Paper Plate Masks
MATERIALS
- paper plates*
- Marker
- Scissors or utility knife
- Hole punch
- Thin elastic
- Paint or paint sticks
- Tacky glue
- (Optional) Embellishments such as feathers, pompoms, sequins, yarn, or pipe cleaners
*You can use the sturdy paper plates made by Chinet (or similar) as some of the kids did, or the more flexible and inexpensive paper plates as Lucia, the red fox, did. Both work.
INSTRUCTIONS
- Draw eye and nose holes
Start by estimating your eye holes and nose areas and drawing them on the paper plate.
We chose to remove the bottom halves of the paper plates to leave noses and mouths more free, but you can keep the paper plate a whole circle if you prefer.
To help the plate fit your child’s face better, consider cutting a notch in the top of the forehead area of the paper plate and bringing the two ends together with tape, a glue gun, or staples.
Note :: If you have more than one child making paper plate masks, it might be easier to get the eyes and nose correct on one plate, then trace them onto a second paper plate.
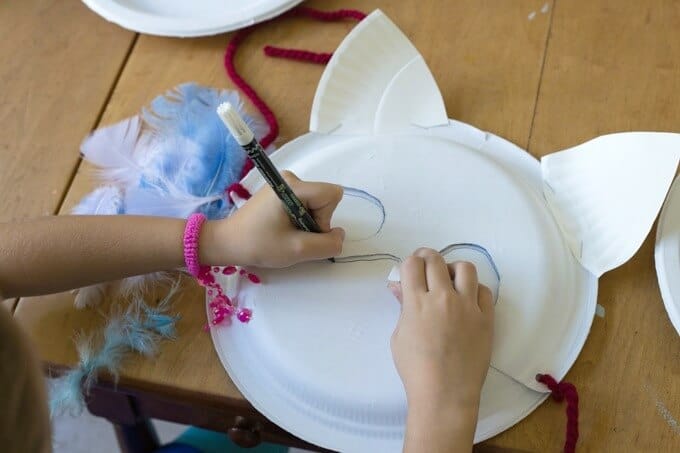
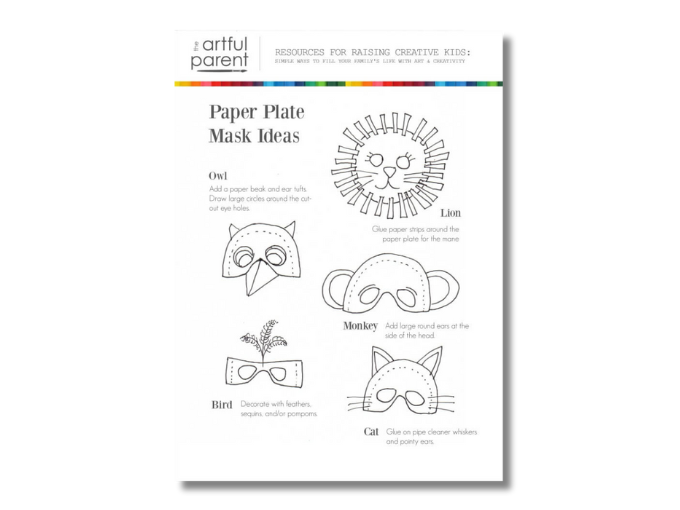
Here are some possible shapes for your paper plate masks. - 
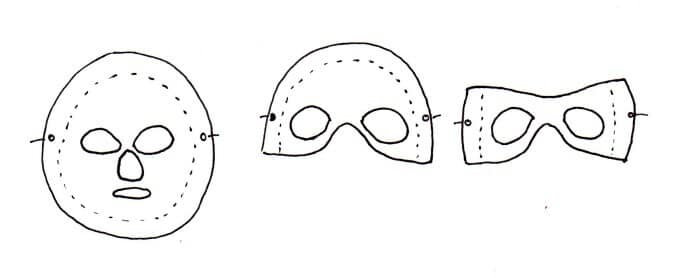
Add additional features
If your costume requires ears, you can cut them out of a paper plate and attach them with staples or a glue gun. Same goes for a beak.
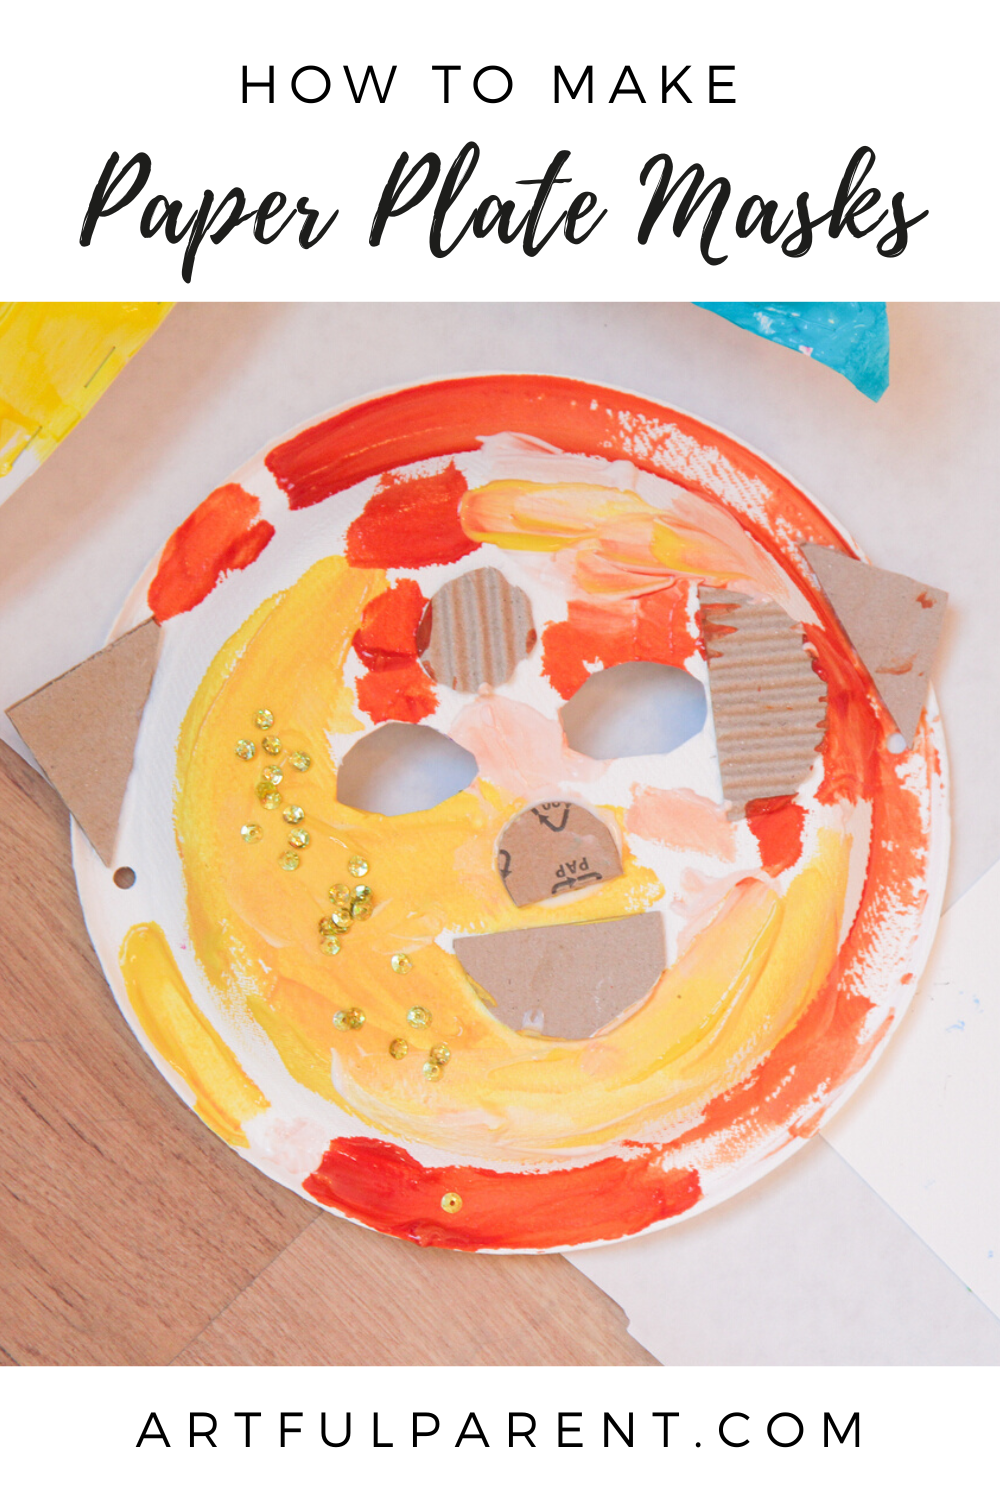
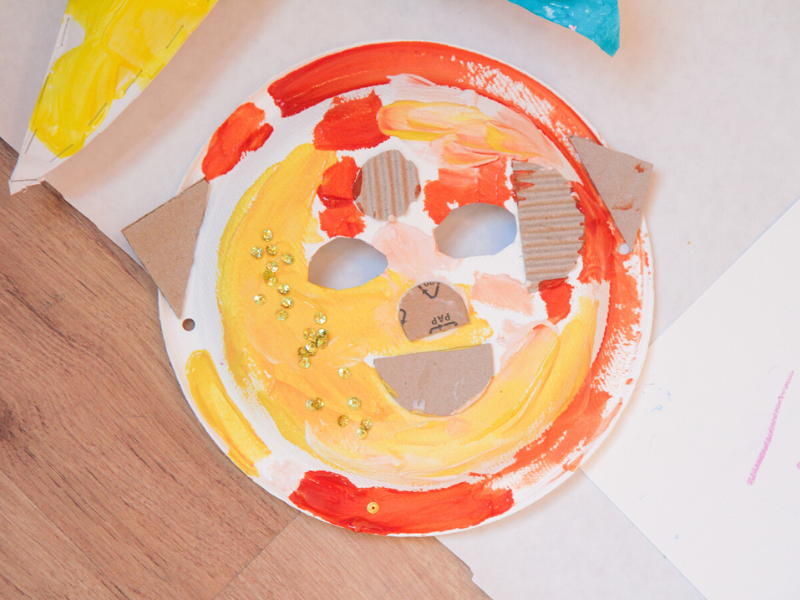
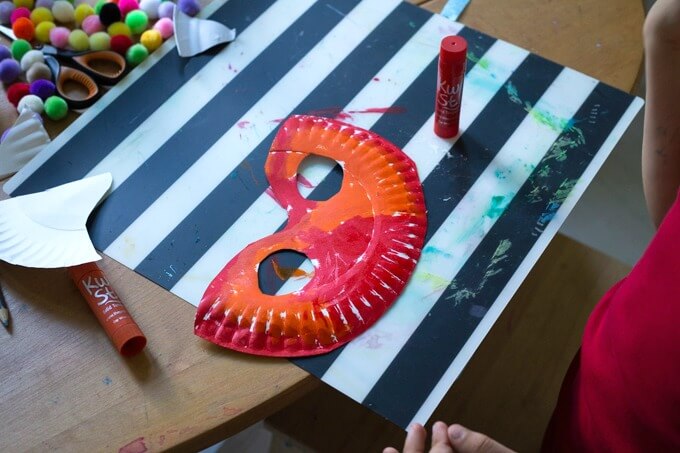
- Paint and decorate your mask!
You can use any paint (tempera, BioColor, acrylic, watercolors, etc) but we used tempera Kwik Stix paint sticks for the costume party because they are mess free and fast drying (90 seconds).
After you paint the mask, embellish the mask with feathers, pompoms, sequins, glitter, yarn, pipe cleaners, paper, cotton balls, etc.
Tacky glue works well for this (sticky and relatively fast drying) as does a glue gun.**
**A note about hot glue gun safety**
– Make sure your kids understand that the tip is hot and could burn them if they aren’t careful.
– Burns do happen sometimes; keep a bowl of ice cubes and water nearby just in case.
– Rest the glue gun on a special tray or dish (such as a disposable pie plate) when it’s not being used so everyone knows where it is.
– Keep extra glue sticks handy.
– I suggest buying a mini size hot glue gun to use with little kids (easier to squeeze) and a regular size glue gun for older kids.
– If you’re unsure about letting a child use a hot glue gun, read this post on glue guns versus white glue by Teacher Tom, my interview with him, or page 181 of my book (more tips from Teacher Tom on kids using glue guns). - 
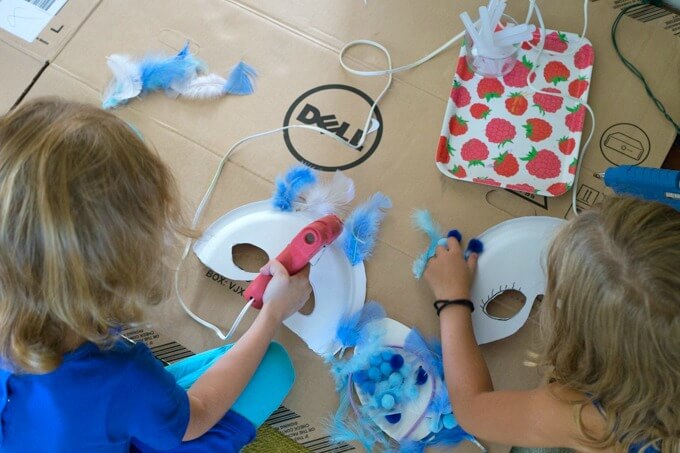
Fit Mask and Add Elastic String
Once the mask is finished, tie the elastic string through one hole, fit the mask to the head, and tie it off on the other, trimming off the excess.
Here are the four finished masks, clockwise from top left…
- Ezra’s chicken mask :: he eventually covered the entire paper plate with colorful pompoms.
- Emily’s blue jay mask :: she embellished it with blue and white feathers, pompoms, and paint stick paint.
- Daphne’s blue jay mask :: she decorated it with marker eyelashes, a blue paint stick, blue pompoms, and lots of feathers.
- Lucia’s red fox mask :: made with a paper plate, red and orange paint sticks, and lots of red and orange pompoms attached with tacky glue. She later attached a paper fox nose and pipe cleaner whiskers.
Base Clothes for Kids Costumes
Now, what do you need to complete the costume?
I assume you have a base outfit that matches your costume idea. We used colorful Primary clothes and pjs as the bases for our costumes, and really like them. You can also use clothes you already have or pick up something at the thrift store.
How to Make Cardboard Wings and Tails for Bird Costumes
If you need wings or a bird tail, this next section will help you.
MATERIALS
- Cardboard
- Markers
- Sturdy utility knife
- Tempera paint
- Tacky glue
- (Optional) feathers
- Elastic string
- Mini size hot glue gun or a regular size glue gun
INSTRUCTIONS
1. Trace outline
Begin by tracing the child’s outline with arms spread out on a large piece of cardboard. Use a marker to draw the wingspan, with the base of the wings going down to the waist.
After the child stands up, add a fanning bird tail to the bottom of the tracing.
2. Cut out shape
Next, use a utility knife or strong scissors to cut out the wings (an adult job).
If desired, cut feathers along the wings and tail. This is easier to do after the initial wing shape is cut out.
3. Paint wings
Then, paint your wings. Regular tempera paint or BioColor works well for this. (The paint sticks we used on the masks are better for smaller areas and details.) Let dry.
Turn the wings over and paint the other side. Again, let dry.
4. Add feathers
Now, it’s time to add feathers. Squeeze a line of tacky glue, then arrange feathers along it. Repeat as desired.
5. Attach shoulder and wrist loops
Finally, use a hot glue gun to attach a loop of elastic string where the wrists touch the wings and also at the shoulder area.
To wear the wings, slip arms through the shoulder loops and wrist loops.
Make a Funky Chicken Tail
For the chicken tail (as seen on Ezra above), we cut a fan-shaped tail out of cardboard. Then Ezra decorated it with the paint sticks and colorful feathers.
This can be attached around the waist with elastic or ribbon.
How To Sew A Fox Costume
Fox Tail
- Lucia’s red fox tail :: made with red cotton poplin fabric with a white terry cloth tip. Then stuffed with crumpled paper. It attaches to her costume with an elastic string around the waist.
- Maia’s arctic fox tail :: sewn from fake white fur that I picked up at the fabric store and stuffed with polyfill. It attaches to the seat of her leggings with a large safety pin.
Fox Fur Vest
I made Maia a simple white vest for her arctic fox costume with the same fake white fur I used for the tail.
- To begin, I used one of her T-shirts as a sizing guide. I laid it on top of a doubled piece of fur fabric with the fold along the top.
- Then I cut out a neck hole, trimmed the corners where the shoulders went, and added a slit up the front.
- Finally, I sewed the two sides closed, with the right sides of the fur/fabric facing each other. After sewing, I turned the whole vest right side out.
If you don’t sew, you could probably attach the sides with a series of safety pins. And if you want the front of the vest to close, you could add snaps or ribbon ties. Easy peasy.
How To Make A $3 Comet Costume
Emerson’s comet costume :: made with a splatter painted cardboard pizza circle taped to his chest.
To make the comet tail, he and his mom sandwiched the ends of yellow and red crepe paper streamers between two lengths of metallic duct tape from the dollar store. This cape of streamers was then attached at the shoulder and wrist with more tape.
What do your kids want to be for Halloween? Would they like to make their own masks or costumes? Or could you make one together?
If you want to try your hand at making a mask, here is the free printable for How to Make Paper Plate Masks that I promised you. Click the link or image to download the PDF or print.
Autumn Arts & Crafts Ideas & Supplies
See our FALL family fun list on my Amazon storefront!
It includes supplies for fall arts & crafts (including the best paper leaves for painting!), autumn toys, Halloween ideas, and picture books about autumn.
Plus, we have lists of the best kids art supplies, open-ended toys, children’s games, and more!
Get our new Halloween Arts & Crafts for Kids workshop!
This is an online workshop with 10 fun Halloween arts and crafts activities that your family can enjoy all October long. Use coupon code KASHALFOFF for $9.99!
Plus a bonus of 10 Halloween-themed drawing prompts!
Download our FREE printable idea list of 31 Halloween activities for kids & families!
Or just check out the blog post with the links… So many fun ideas for Halloween!
Pin It for Later
Related Posts
-
How to Make Homemade Valentines for Kids
With kids' homemade valentines, it's important to consider the process as much as the finished…
-
2 FREE Paper Dolls Printable for Kids
A free paper dolls printable for kids to color, personalize, and dress up. Each printable…
-
How to Make a Dried Orange Garland
Create a beautiful dried orange garland in a few easy steps. Young kids can help…