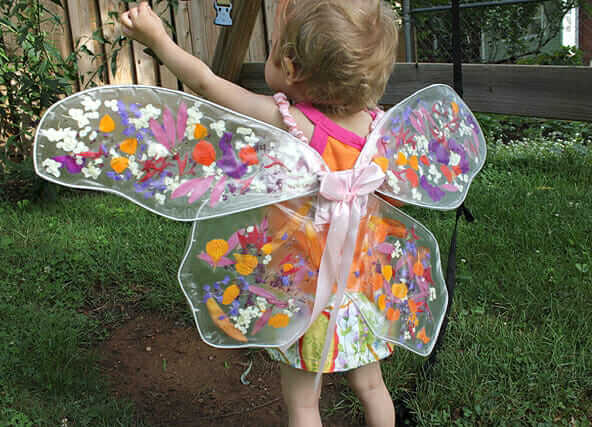
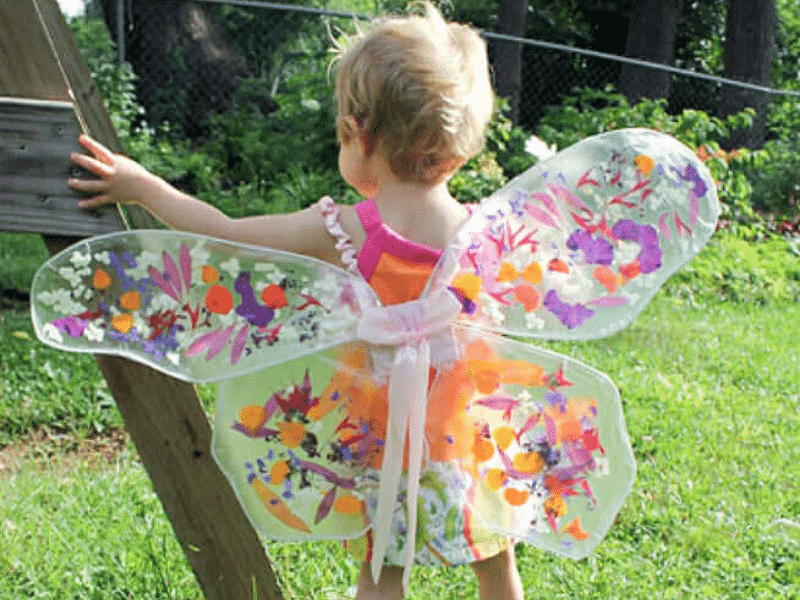
Here’s my little flower fairy in the backyard wearing the magical childrens fairy wings that Maia and I made for her. We used contact paper and flower petals to upcycle a pair of torn fairy wings. Aren’t they beautiful?
Do you have an old set of fairy wings laying around the house? Chances are you have a set or two if you have a little girl in the house. And chances are they’re torn, as the nylon stocking material rips so easily.
You can repurpose your wings in just a few easy steps!
HOW TO UPCYCLE CHILDRENS FAIRY WINGS
MATERIALS
- 1 old set of torn fairy wings (or a strong but bendable wire)
- Transparent contact paper
- Gathered flower petals
- Scissors
INSTRUCTIONS
Step 1 :: First remove the fabric and leave only the wire frame and arm bands.
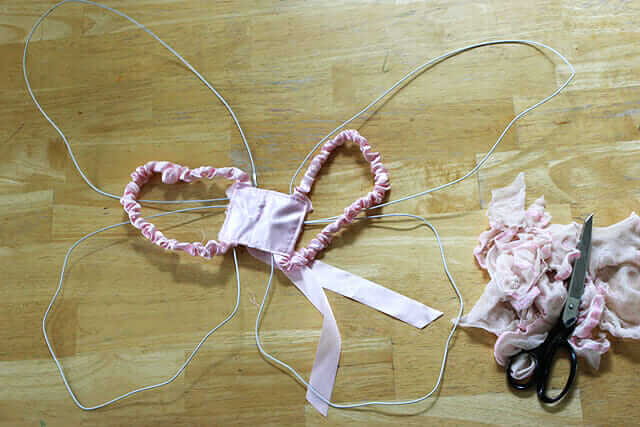
Step 2 :: Then trim a piece of contact paper to fit each wing segment. Peel off the paper backing and lay the wire frame on top of it. Cut around the edges and leave approximately an extra ½ inch border.
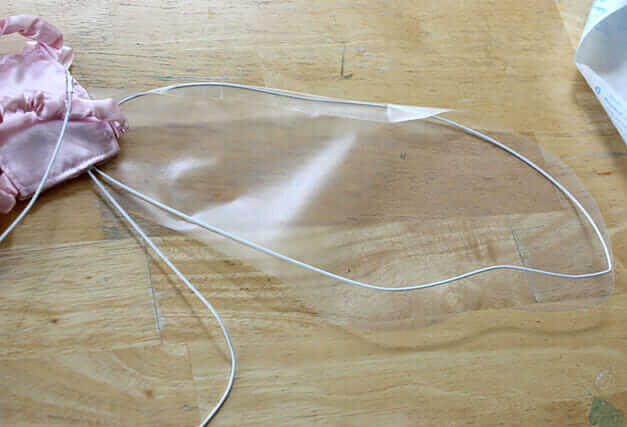
Step 3 :: Now fold the extra border over the wire frame and repeat this step until each wing segment is covered with contact paper.
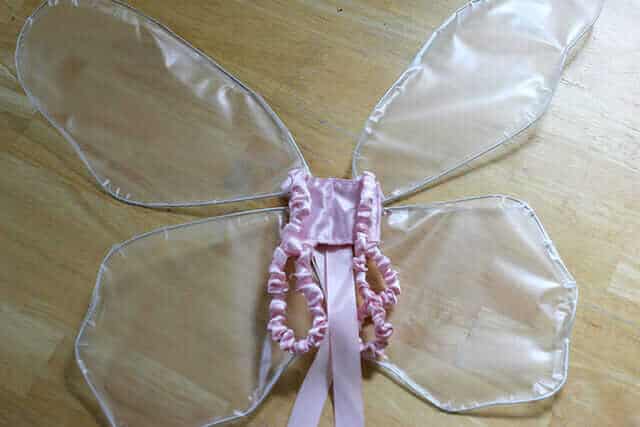
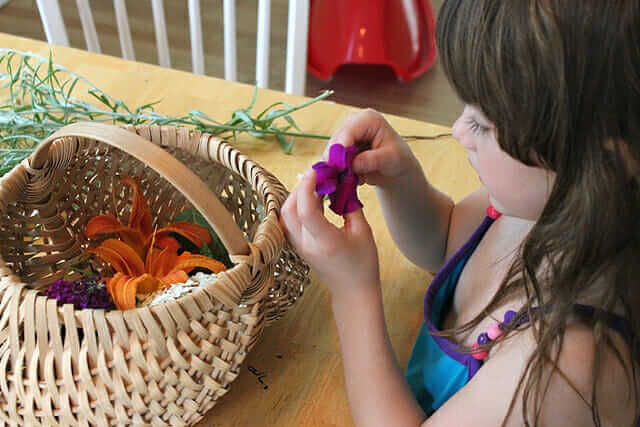
Step 4 :: After this, collect flowers from your yard, park or store-bought bouquet. Leaves and transparent tissue paper bits are great options too!
Step 5 :: Next, begin to arrange the flower blossoms on the contact paper (sticky side up).
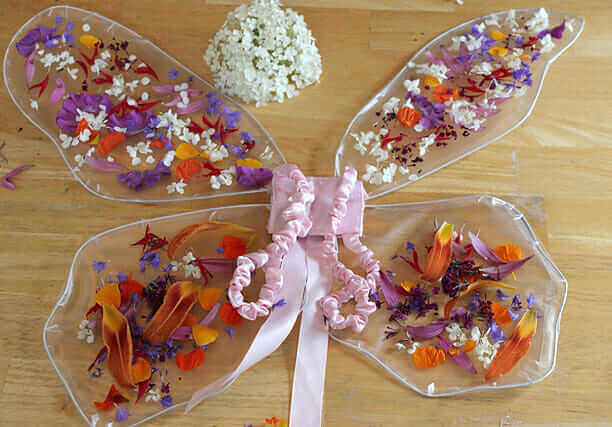
Step 6 :: Then, cover the fairy wings with flower petals until you like how they look!
Step 7 :: Afterwards, lay a section of contact paper over the flowers (sticky side down). Use your hands to press and smooth the contact paper to the edges. Trim the paper so it is flush with the edges.
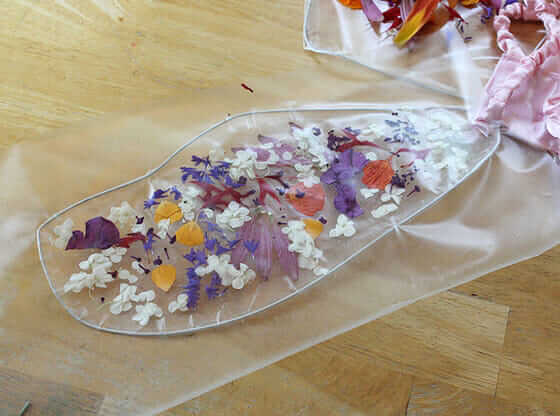
Step 8 :: Finally, repeat Step 7 with each of the remaining wing segments.
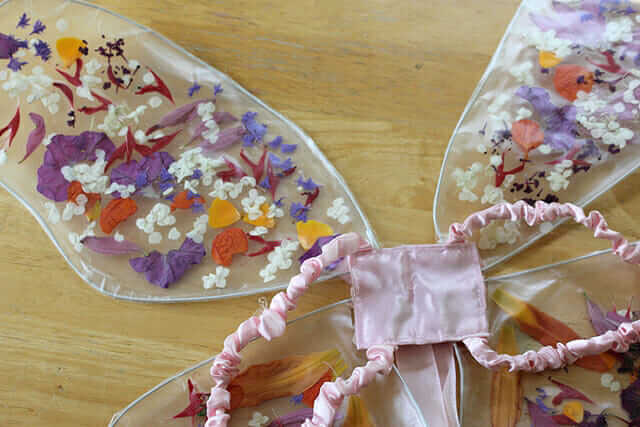
Step 9 :: At last let your little flower fairy try the wings on! (Note: Daphne wore these for all of 10 minutes then Maia wore them for the rest of the morning.)
PIN IT FOR LATER
33 Comments
carol
June 23, 2011 at 8:37 amgorgeous! love the revamped wings better than the original. what would you suggest if you wanted to make wings from scratch? old wire hanger? thanks!
Jena
June 23, 2011 at 9:18 amOh My Goodness, so pretty.
angie hart
June 23, 2011 at 9:20 amwe have several worn out…thanks so much for this beautiful idea!
Paula
June 23, 2011 at 9:38 amgreat and simple idea, thanks for sharing :)
Sandra
June 23, 2011 at 10:27 amOh, thank you so much!!!!!
Barbara Zaborowski
June 23, 2011 at 10:45 amLovely, Jean, just lovely. You see, what they steal in memory, they make up for in extra creativity.
MaryAnn Kohl, art book auhor
June 23, 2011 at 11:05 amShe honestly looks like a true flower fairy… not just sort of looks like one, I mean, she could be a real one. If I saw her in my garden, I would not question the concept of flower fairies.
Sara
June 23, 2011 at 12:13 pmBeautiful! I am curious about how they will wear over time. Will the flower petals fade or turn brown inside the contact paper?
Jess
June 23, 2011 at 12:47 pmYes Sara, we made stained gladd windows with some flower petals and they only lasted 3 or 4 days before they turned a funny brown inside and even gave off some liquid that leaked inside the ‘window’.
We very much enjoyed our 4 days though :)
Anna
June 23, 2011 at 1:56 pmThese are lovely! Jean, I saw a tutorial or something the other day where someone took an old or cheap pair of white stockings and put them over a frame just like this and then watered down fabric dye and put it in a spray bottle to tint the stockings, once they were dry they used glitter puff paint to draw on sparkly accents :D Maybe an idea for winter when the flowers aren’t so abundant?
[email protected]
June 23, 2011 at 4:03 pmHow lovely! We recently pressed some wild flowers – just dandelions, buttercups and daisies and grasses – and then used your idea of sticky-back plastic (as we call it here!) to seal and suspend the arrangement. Looks so cool. Thanks for the inspiration. Your flower fairy is the sweetest thing I’ve seen today!
The Artful Parent
June 23, 2011 at 4:55 pmThanks! And yes, I think an old wire hanger would work. You can also buy wire at home supply stores that might be a little more flexible and easier to work with.
The Artful Parent
June 23, 2011 at 4:56 pmAw, thanks! I like that idea. I’ll have to remember that!
The Artful Parent
June 23, 2011 at 4:56 pm:)
The Artful Parent
June 23, 2011 at 4:58 pmYes, the flowers will fade over time. I suppose you could reuse the wire wing frame over and over if you wanted and just do a fresh batch of flowers every once in a while.
The Artful Parent
June 23, 2011 at 4:58 pmHow fun! Maybe we’ll try that next time!
The Artful Parent
June 23, 2011 at 4:59 pmGlad you tried it! And thanks!
kathy
June 23, 2011 at 6:45 pmThat is very pretty! My girls were sad when their window things turned brown after a few days so I won’t try this myself. But it does look pretty!
I might try this with tissue paper bits instead of flowers. Or maybe construction paper bits would work?
Lou
June 23, 2011 at 6:55 pmSuch a lovely idea!
Makes me wish I had a wee girl. :-)
Christy
June 23, 2011 at 7:21 pmThese are so cute. And of course we have a pair of wings (that aren’t broken yet) so I will keep this tucked away till then.
Thank you!
The Artful Parent
June 23, 2011 at 7:46 pmTissue paper bits would be perfect! I’d use tissue paper rather than construction paper as part of the beauty is the transparency when the light shines through them.
The Artful Parent
June 23, 2011 at 7:46 pmYou’re welcome!
The Artful Parent
June 23, 2011 at 7:47 pmPerhaps a set for yourself? :)
The Artful Parent
June 23, 2011 at 7:47 pmBy the way, you don’t have the link for that other tutorial, do you? I’d love to see it.
Paige Johnson
June 23, 2011 at 8:01 pmLove, love, love this!
@pril
June 26, 2011 at 5:15 pmThis is a great project. I love following your blog as you have such great ideas!. Thanks for sharing. I featured this on my blog: https://koolbeenz-blog.blogspot.com/2011/06/gallery-of-featured-crafters-5-with.html
Feel free to grab my Featured Button if you like, if you don’t already have it.
@pril
Elizabeth B
June 27, 2011 at 12:58 amThese wings are exquisite! I so appreciate that you post projects that are EASY, for those of us who didn’t grow up sewing and crafting often.
Cheers from Sydney,
Elizabeth
Heather
June 28, 2011 at 1:26 pmThis is one of the best tutorials I have seen all summer. What a sweet way to celebrate the season.
maggy, red ted art
July 1, 2011 at 2:35 pmOh my word, this is simply adorable. You do come up with the most amazingly beautiful ideas!!
Have finally added you to my blog roll :-)
Maggy
Wani
July 6, 2011 at 9:13 amSo cute!!
Emily Maruna
July 19, 2011 at 2:43 pmThese are great! I couldn’t find my daughter’s wrecked pair so ended up just making two-winged sets out of old wire hangers (yes. every time I say “wire hangers” I think of the movie, Mommy Dearest. Ack!) for my daughter’s third birthday. They are so pretty. Thanks for the idea! https://emilyflippinmaruna.wordpress.com/2011/07/17/fairy-princess-party-or-quinbys-birthday-party-2/
Emily
Jennifer
May 22, 2012 at 7:04 amooooor just use something not biodegradale! fake flowers perhaps…cut outs…glitter project maybe?
Ann
May 23, 2012 at 7:38 amWe used to make ‘stained glass windows’ with the contact paper and different colors of tissue paper cut or torn into small pieces. Think the tissue paper would work with this as well….young toddlers could tear the pieces to put on the contact paper while older children could cut flower shapes. Then you wouldn’t have to worry about the flower petals turning brown & mushy….