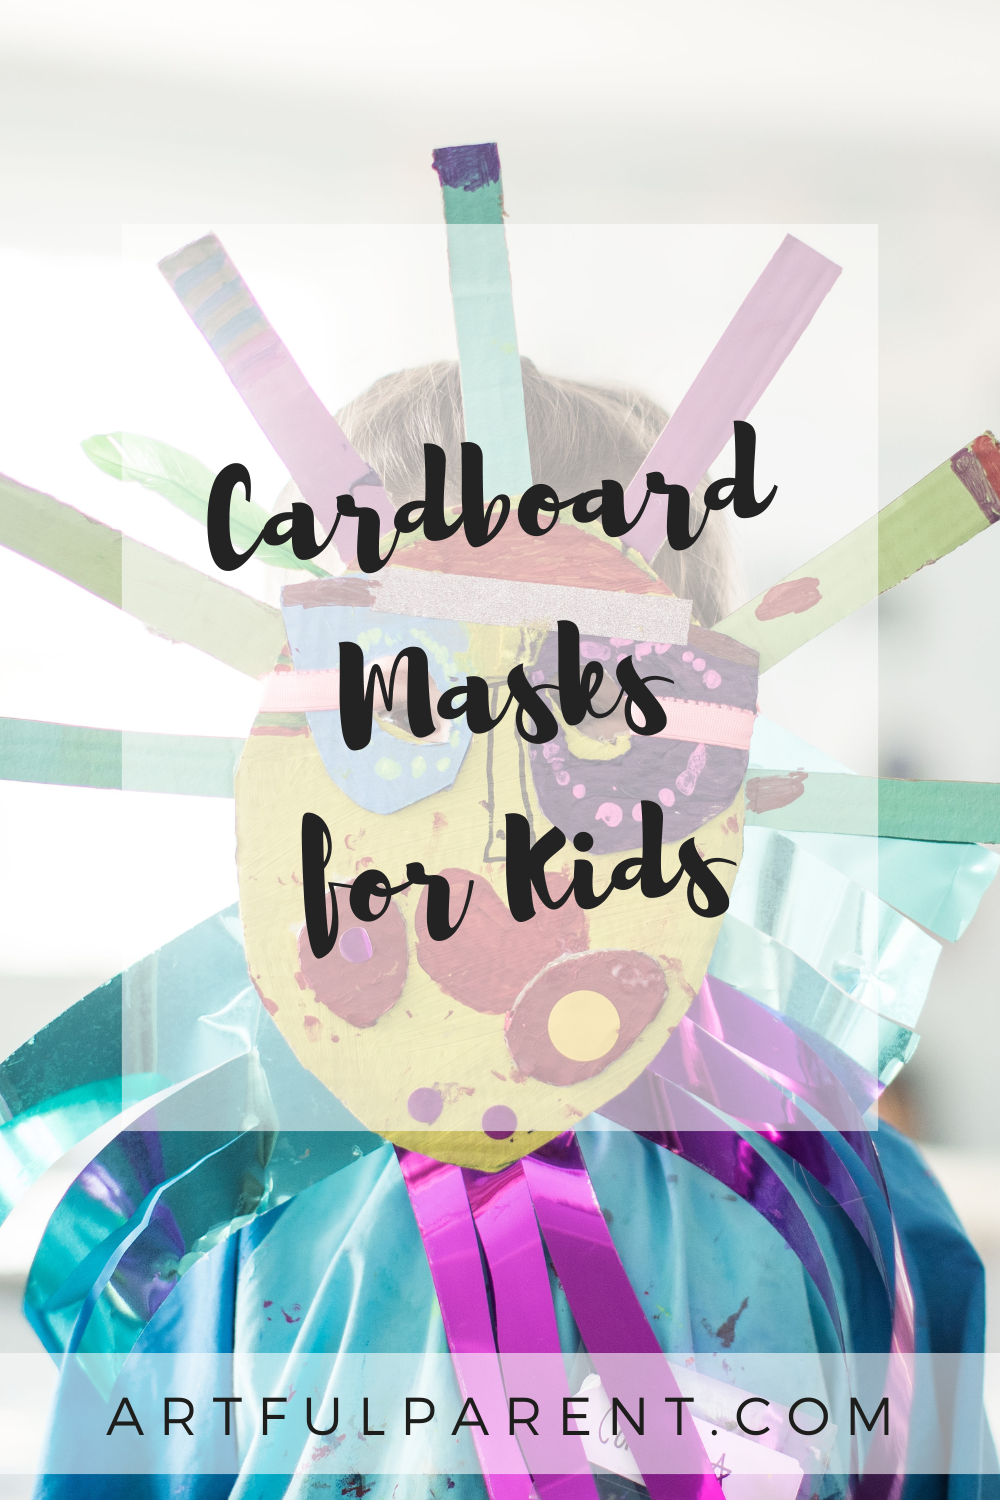
How to make cardboard masks with kids using simple materials. This creative project can be done for anytime fun, Halloween, or pretend play.
Updated February 2025
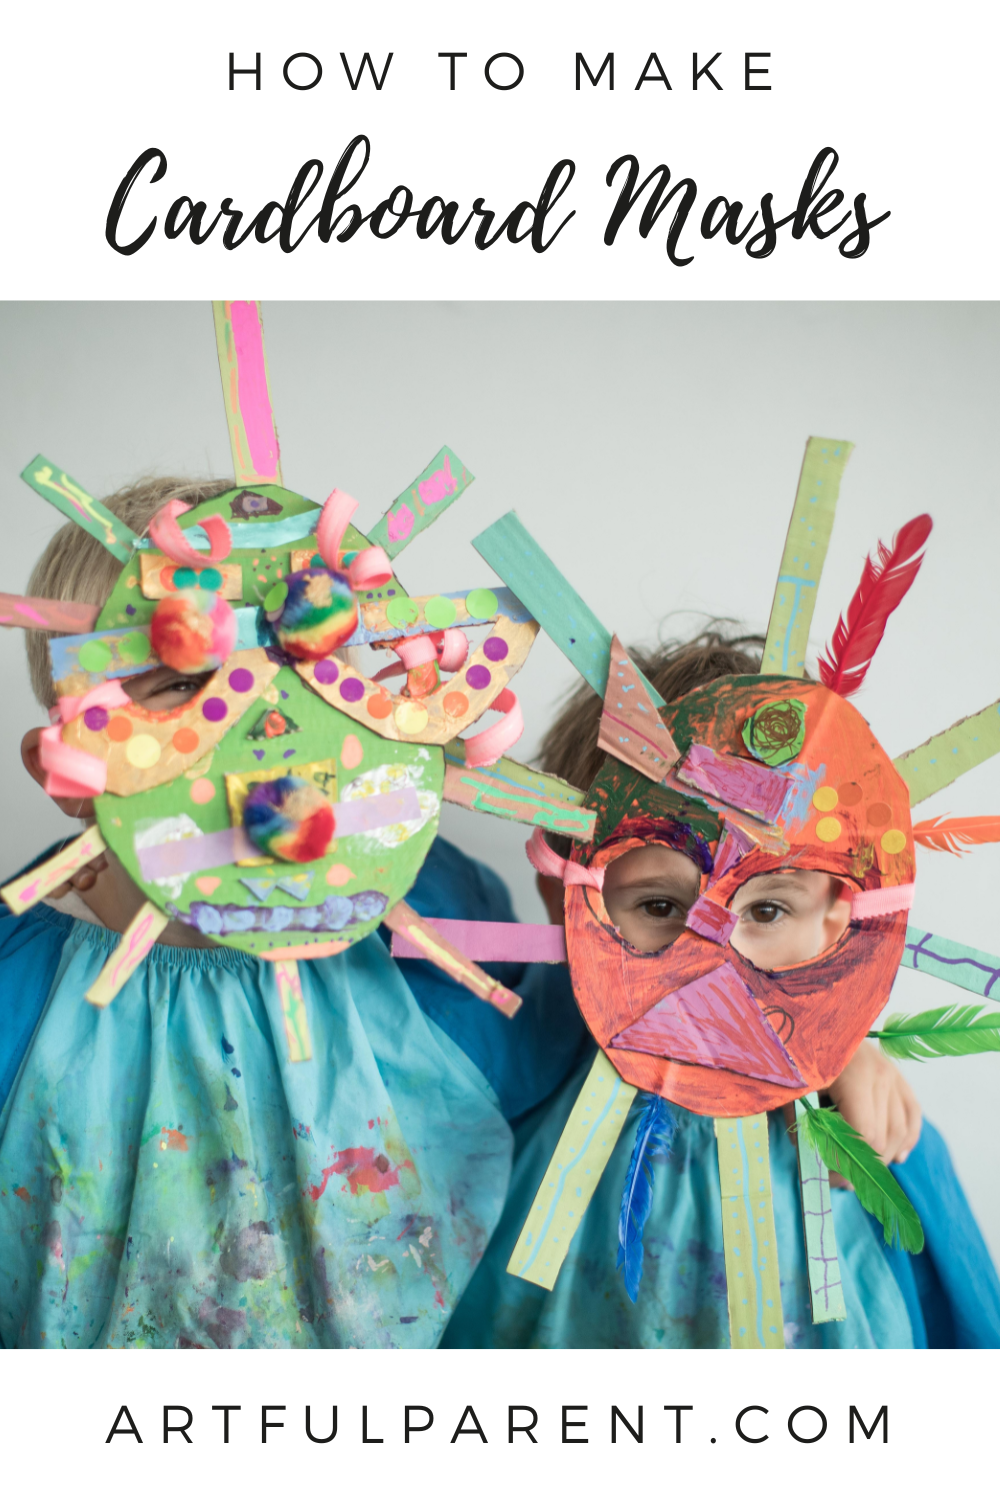
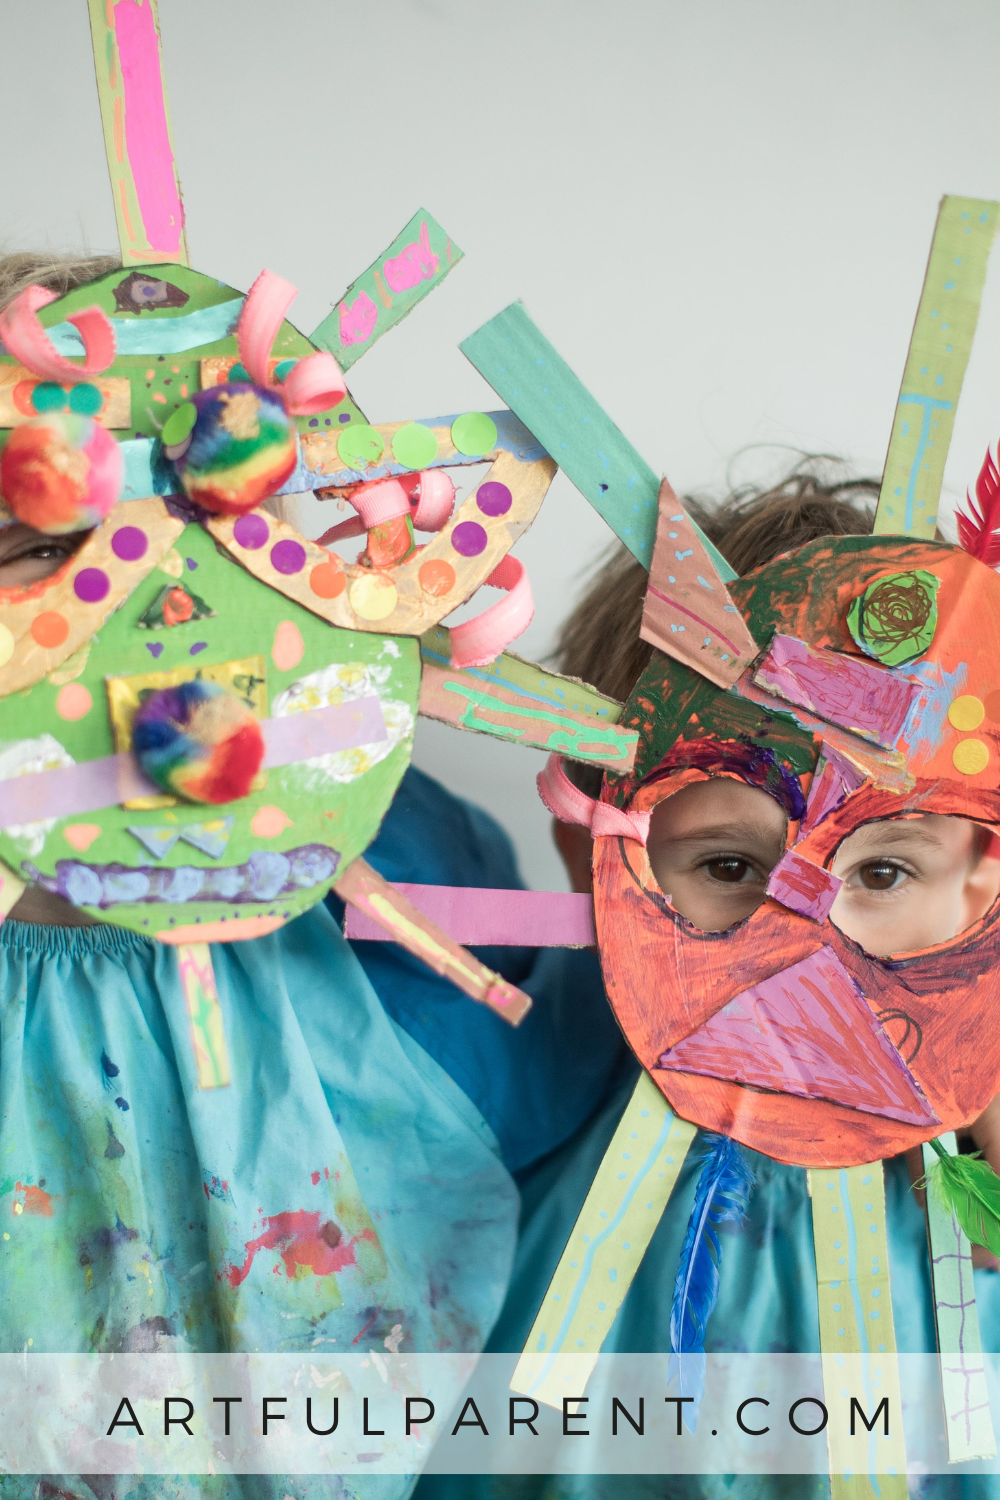
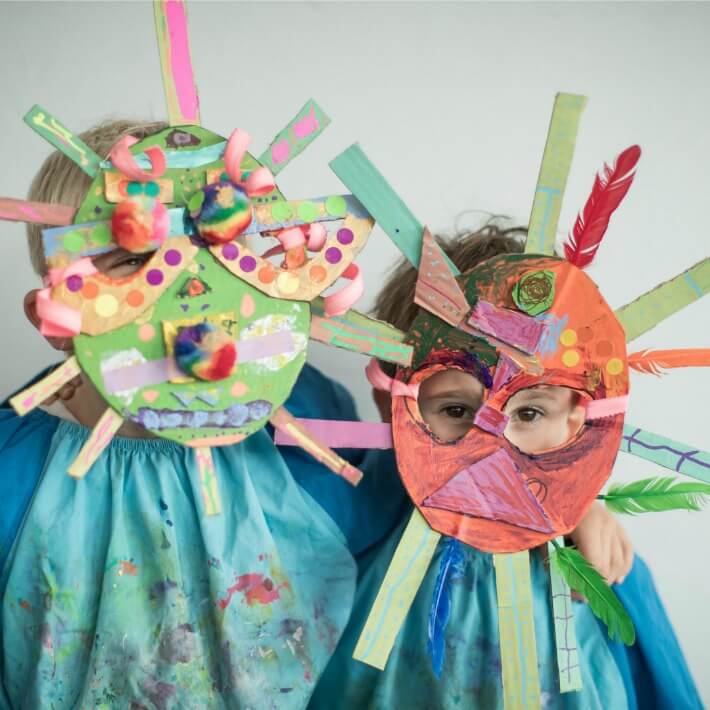
Mask-making is a project I’ve done many times with children. I love watching students individualize their designs. The masks created in our recent workshop are examples of the sort of over-the-top aesthetic only kids can come up with! This activity is suitable for most ages over 4, although younger children may need some assistance.
Using cardboard to make masks is a classic activity and for good reason – it’s cheap, easy and effective! It’s also a great way to use up leftover cardboard boxes. And kids can decorate their masks using whatever art supplies you happen to have.
The design I’m going to share is a full face mask but you could easily create templates for a simple eye mask. We used a medium weight cardboard that you’d typically get from a delivery box. Too thick and it’s too difficult to cut, too thin and it won’t hold up.

Making Cardboard Masks with Kids
MATERIALS

- Painted & pre-cut cardboard face shapes
- Pre-cut cardboard glasses
- Painted & pre-cut strips of cardboard
- Acrylic paints in bright colors
- Paint brushes and water containers
- Paint palettes
- Scissors & a box cutter (for teacher)
- White glue in small dishes
- Chalk markers
- Colored Sharpies
- Craft pom-poms, feathers, washi tape, sparkly streamers & dot stickers (or any other art supplies!)
- Stretchy elastic to make a headband
- Hot glue gun
INSTRUCTIONS
- Prep the cardboard
We painted and pre-cut a lot of our cardboard to save time and because we were working with mostly younger children (4-6 year olds) who would have struggled with the cutting. I let students paint their own spectacles or any extra cardboard details they wanted.
- Create the eye holes
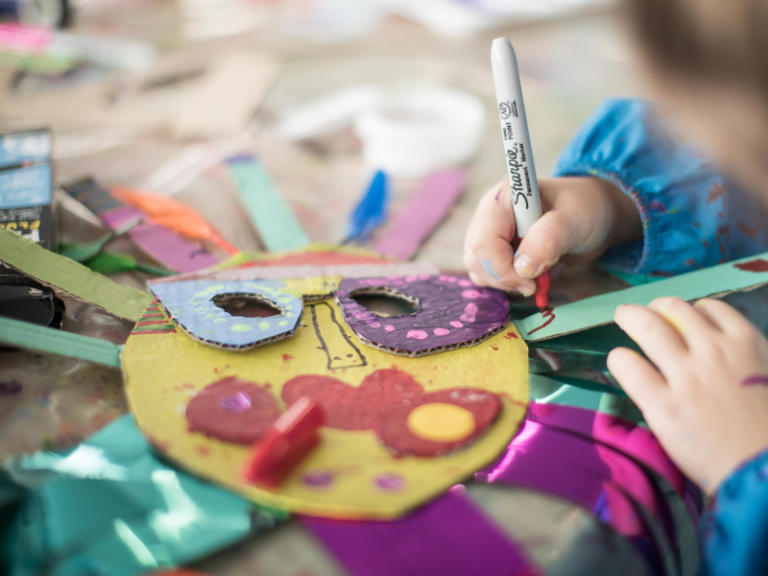
Let children choose a colored face shape and draw on two eyes with a sharpie (on the back), paying careful attention to placement so that their eyes line up with the holes. (Little kids might need help with this part). The teacher then cuts the eyes out with a box cutter.
- Add glasses and other facial features
Next kids can choose a cardboard set of glasses to paint or color with sharpies & chalk markers. Then glue it on using white glue. (You may need to enlarge the eye-holes a little so the holes line up).
Some children may choose not to add the glasses to their cardboard masks, while others like to add cardboard lips, noses, ears and cheeks. Let creativity rule the process!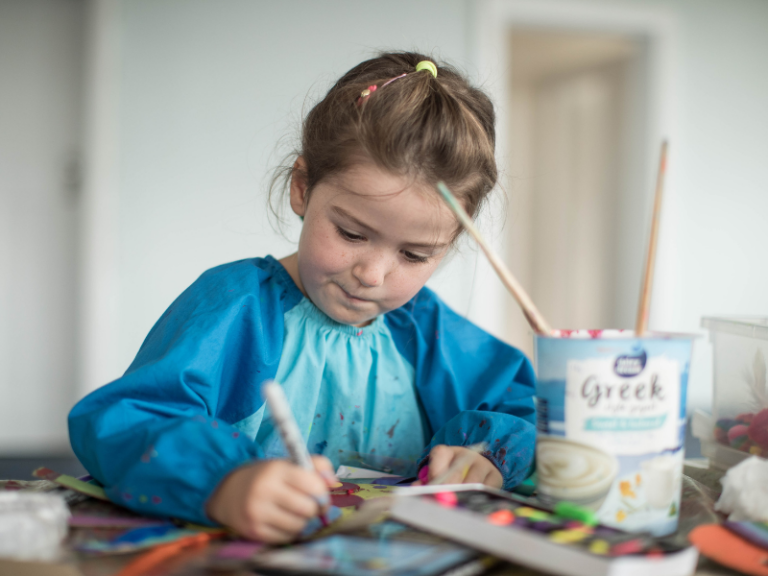
- Decorate!
Here’s the fun part: let children decorate their masks using paint, sharpies, dot stickers, pastels, paint sticks, chalk markers, glitter, craft pompoms, foil, washi tape, patterned paper or crepe paper. Basically whatever you have lying around.
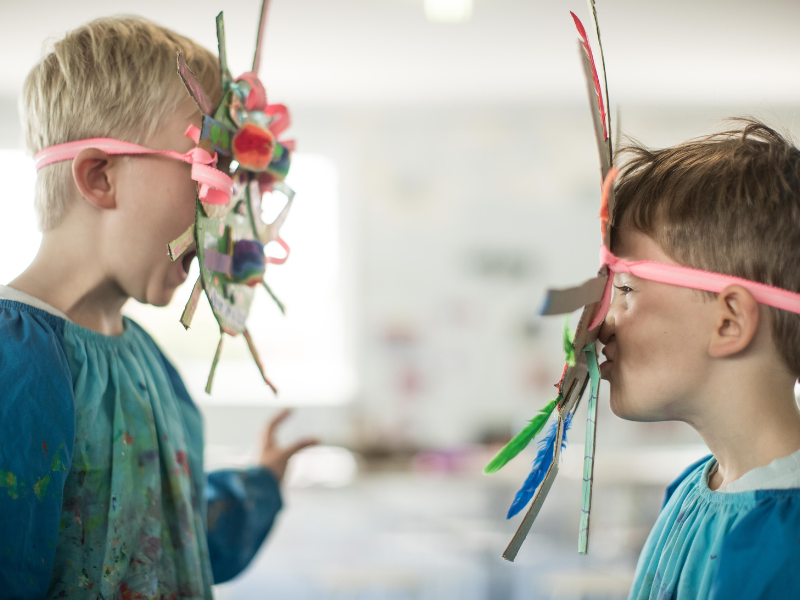
Adding a ‘starburst’ of cardboard strips around the mask really ups the wow-factor! Encourage students to create a symmetrical pattern and hot glue each strip neatly onto the back.
Students can then decorate with sharpies, dot stickers and pompoms. We discovered that feathers are easily pushed into the cut edge of cardboard and look awesome!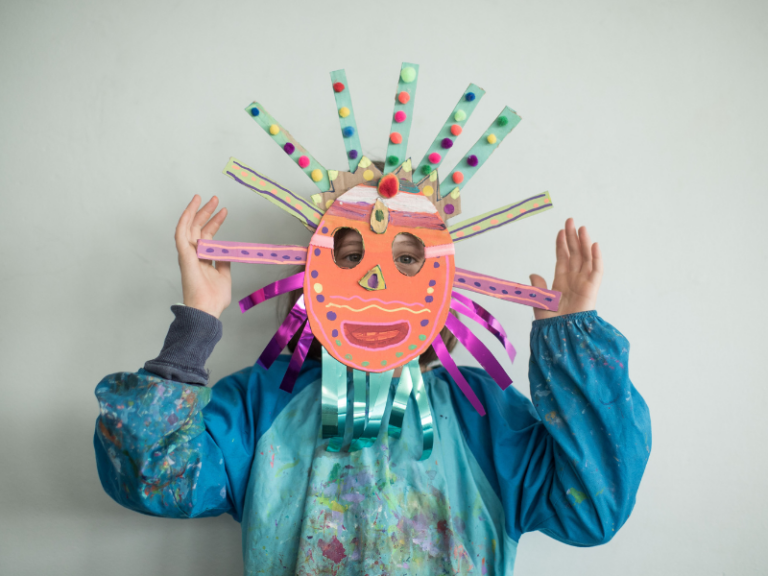
- Finish off with a headband
Finally add some thick elastic to create a snug, durable headband. We simply knotted some through the eye-holes for ease.

As soon as my students finished their colorful masks they were off having fun: looking at themselves in the mirror, play acting in pairs and dancing around. Masks really do encourage imaginative play. Enjoy!
More Costume Making Ideas for Kids
- How to Host a Costume Making Party for Kids
- How to Make DIY Kids Costume from Recycled Materials
- How to Make Party Crowns for Kids
- How to Make Magic Animal Masks for Kids
- How to Make DIY Paper Wings for Kids
- How to Make Paper Plate Masks for Kids
Pin It for Later